Accelero Integration
In the elevator button panel control application, the Cobalt module is controlled by the Accelero software, from which it receives the information about authorized users and the floor permissions. This page describes the complete configuration and operation flow in Accelero — from registering the floors to releasing access by person and by visitor.
In this flow, Gateway is the name of the registration entity inside Accelero (the New Gateway / Elevator Integration screen) to which the Cobalt module is linked — it is not a characteristic of the hardware, which is an I/O module.
The Cobalt integration requires the Accelero platform version 2.16.9-HF3 or higher.
Configuring the Cobalt module on the Accelero platform is done in three stages: registering the floors, configuring the Gateway, and configuring the Controller. Registering the floors is a procedure shared with other devices in the system, while configuring the Gateway and the Controller is specific to the Cobalt module.
Complete the physical installation and the local configuration of the module (network, MQTT, and relay floors) before starting the integration in Accelero. See the Installation Manual and the Operation Manual.
1. Registering Floors
Navigation path: Settings > Elevator – Floors
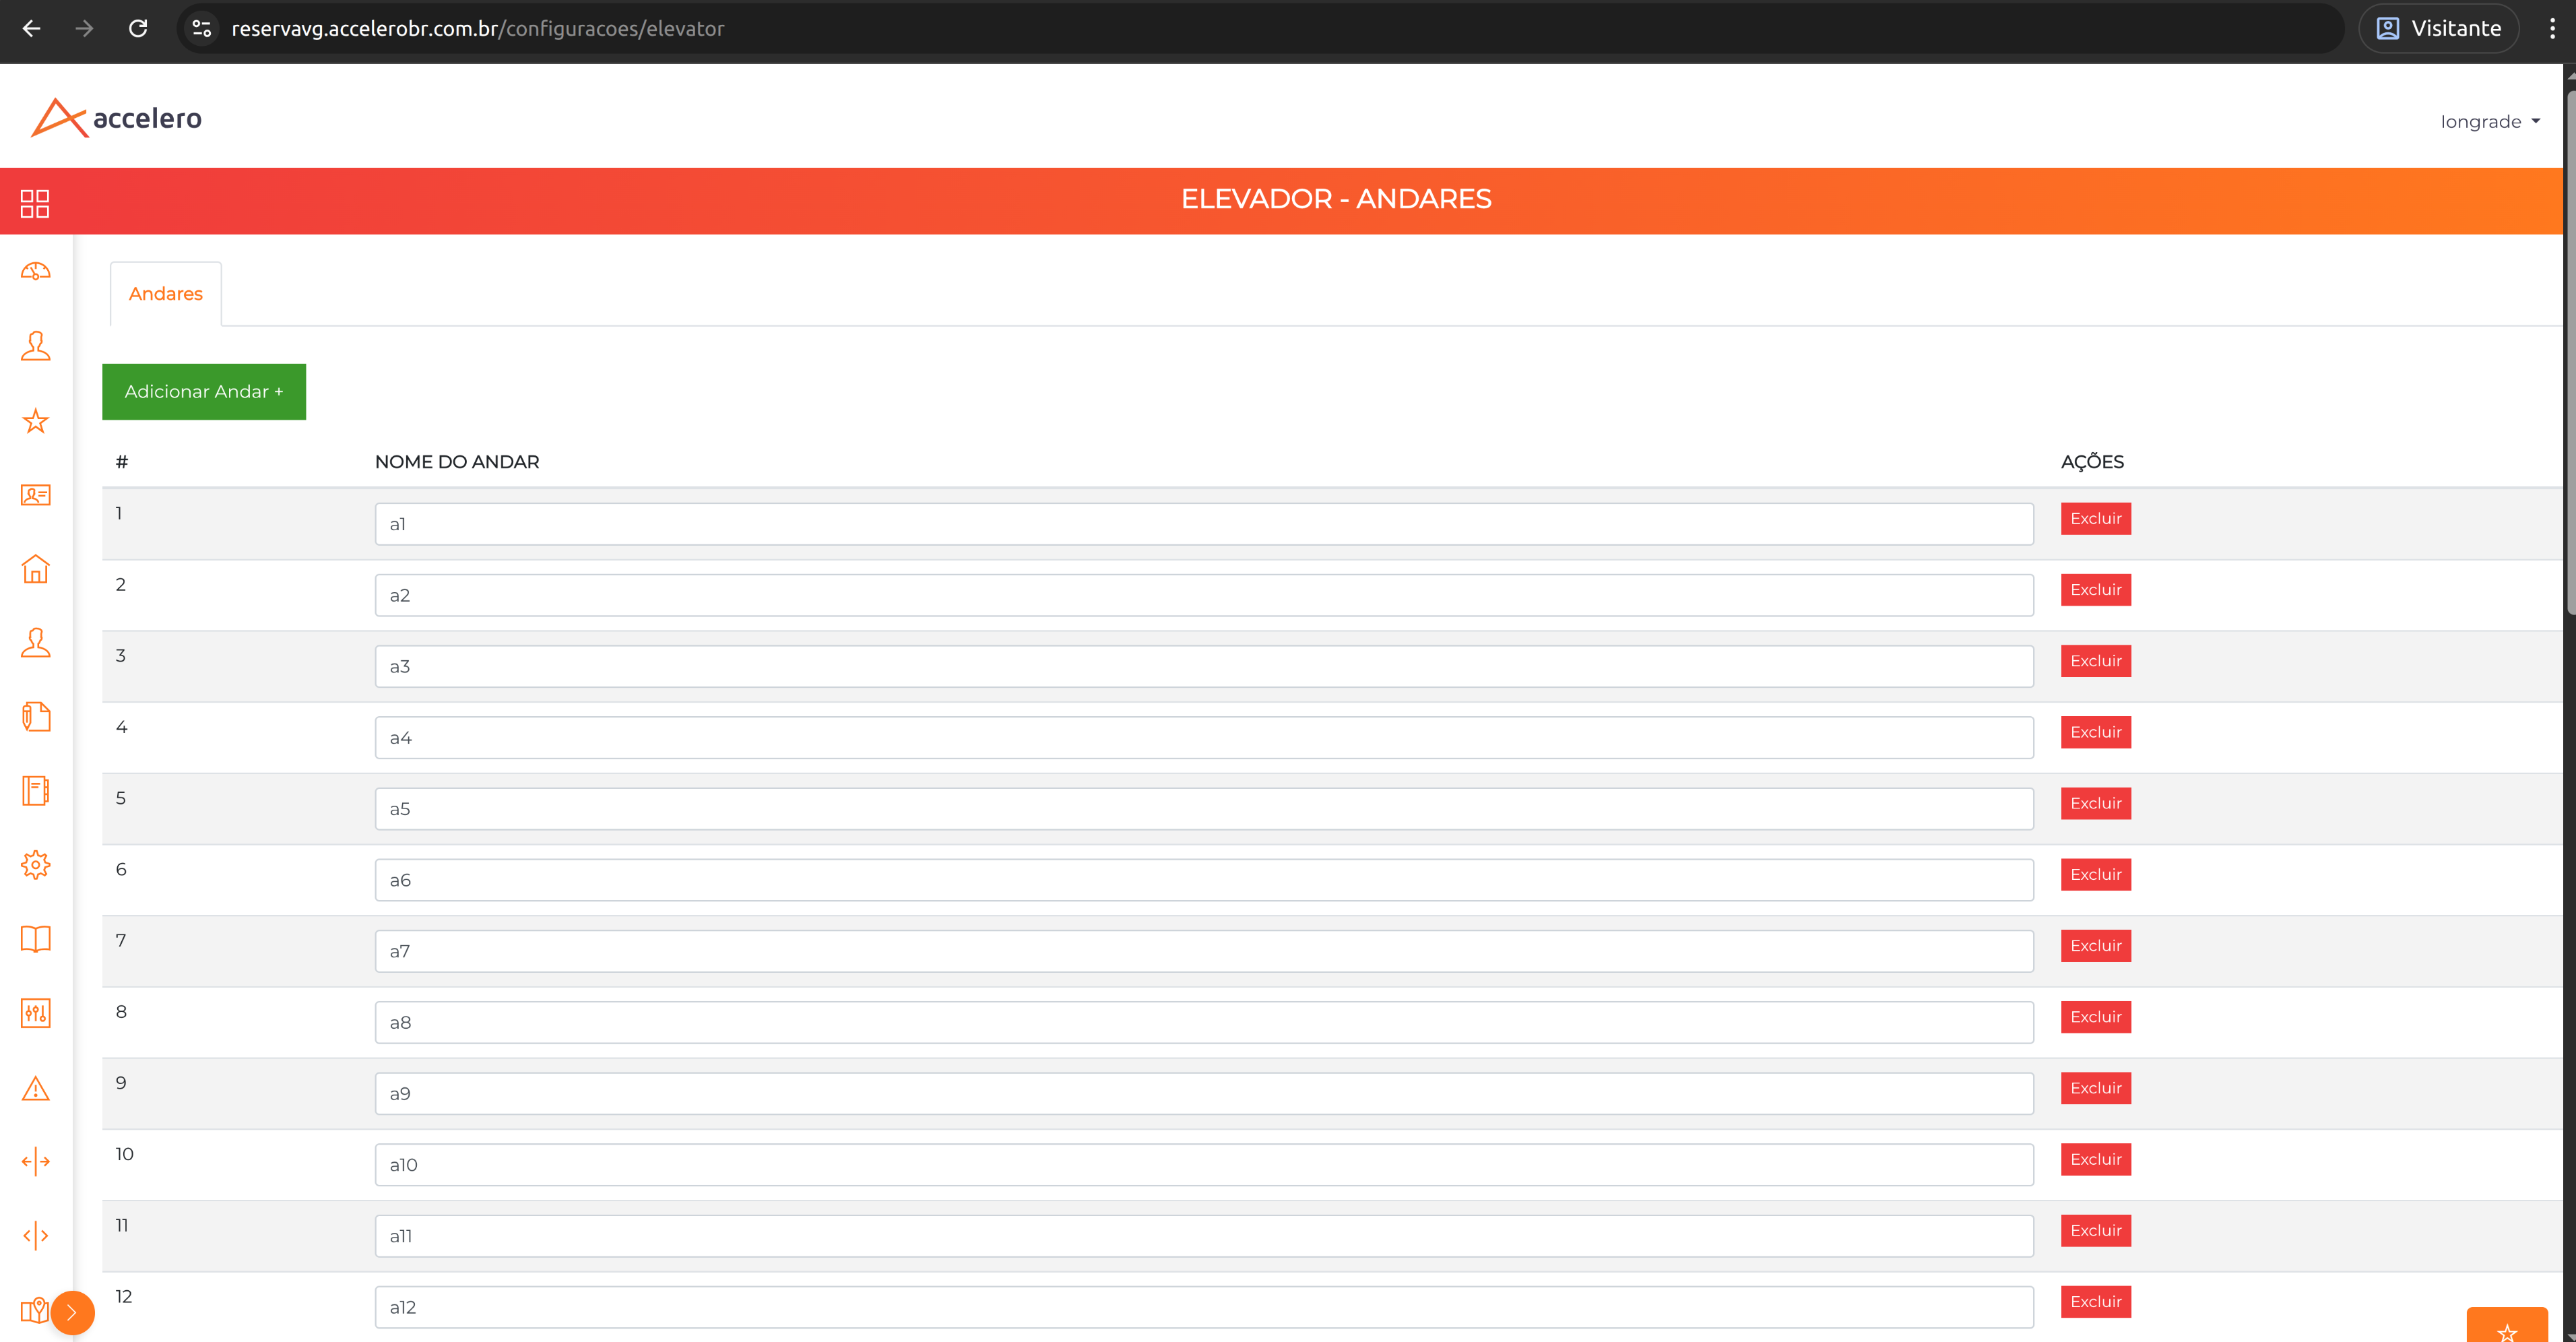
This is the first step of the integration. The floors registered here are the ones that can later be released by person or visitor.
- Go to
Settings > Elevator – Floors. - Click Add Floor to include a new floor.
- Repeat the registration floor by floor and tower by tower.
This step can be done all at once, registering all the floors of every tower/block of the property — not necessarily only the floors the module will serve.
Use short, objective names. For a building with 5 floors and 2 blocks, for example, register the floors as a1, a2, a3, a4, a5, b1, b2, b3, b4, and b5. Describing towers and floors this way is considered a best practice.
2. Gateway Configuration
Navigation path: Advanced > System > Integration – Elevators
In this stage the Cobalt module is registered as an elevator Gateway.
Only the Main board must be registered in Accelero. The Subordinate boards (expansion modules connected over RS485) never need to be registered on this screen.
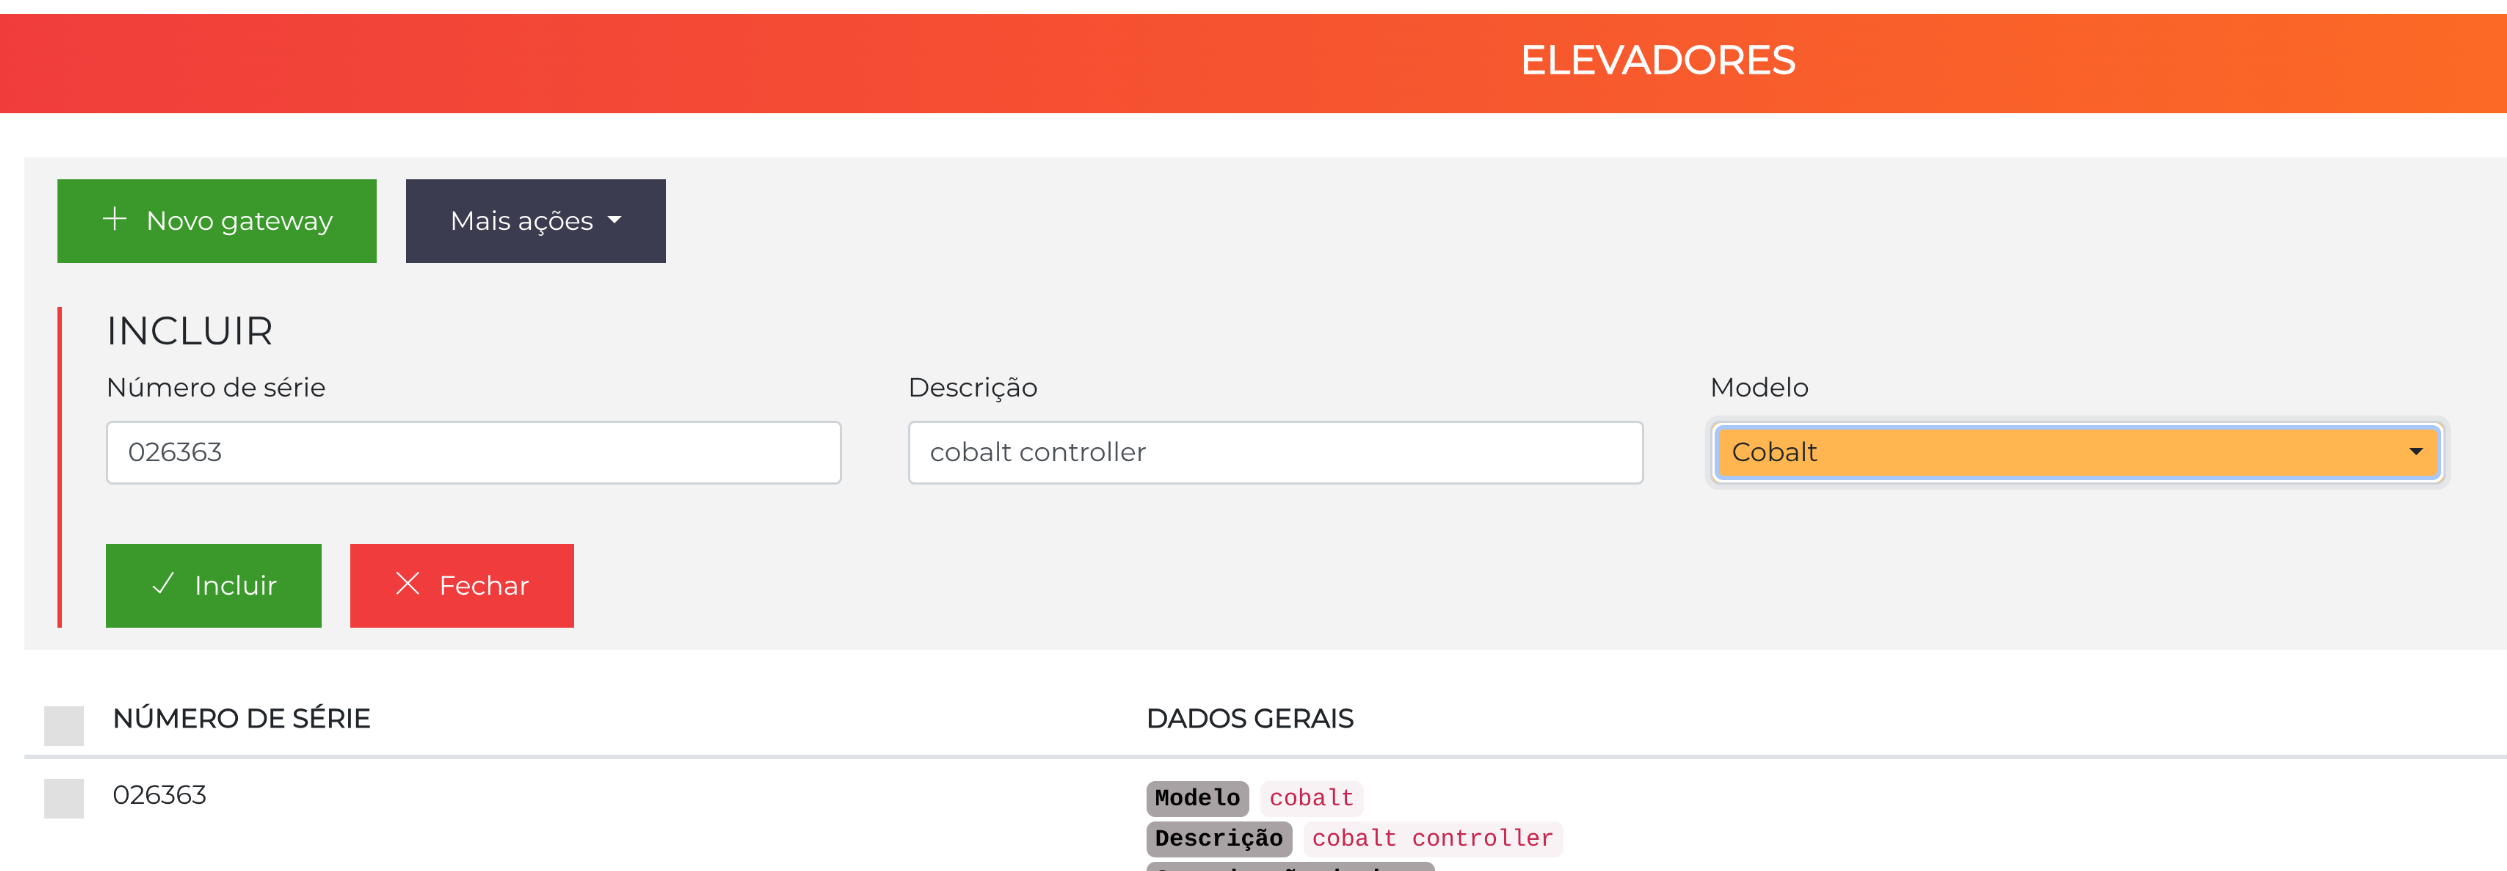
- Go to
Advanced > System > Integration – Elevators. - Click New Gateway. The registration form is displayed.
- Fill in the fields as described in the table below.
- Click Add to confirm the registration.
| Field | Description |
|---|---|
| Serial number | Enter only the digits of the module's serial number (e.g., 026363). |
| Description | Enter an identification for the gateway. |
| Model | Select Cobalt. |
3. Controller Configuration
Navigation path: Settings > Controllers
In this stage the module is registered as a Controller, receives a Channel, and has Elevator Integration enabled and linked to the Gateway created in the previous step.
3.1 New Controller
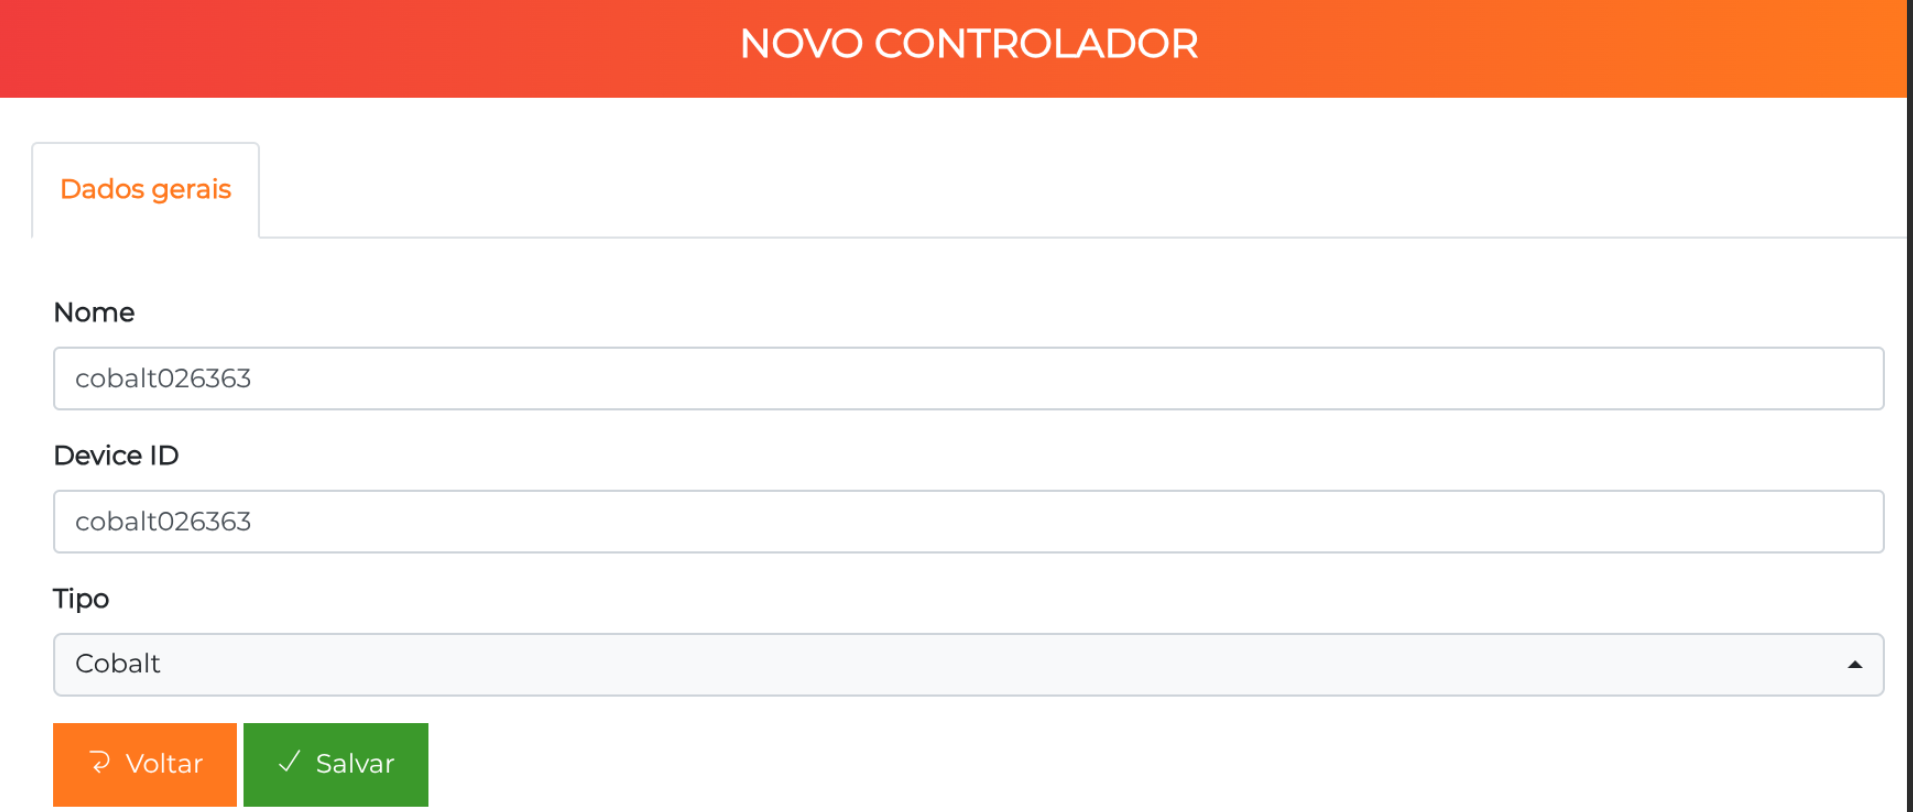
- Go to
Settings > Controllersand click New Controller. - Fill in the fields as described in the table below.
- Click Save to confirm the registration.
| Field | Description |
|---|---|
| Name | Enter the controller name followed by the module's serial number (e.g., cobalt026363). |
| Device ID | The same value defined in the Name field (e.g., cobalt026363). |
| Type | Select Cobalt. |
3.2 Editing the Controller
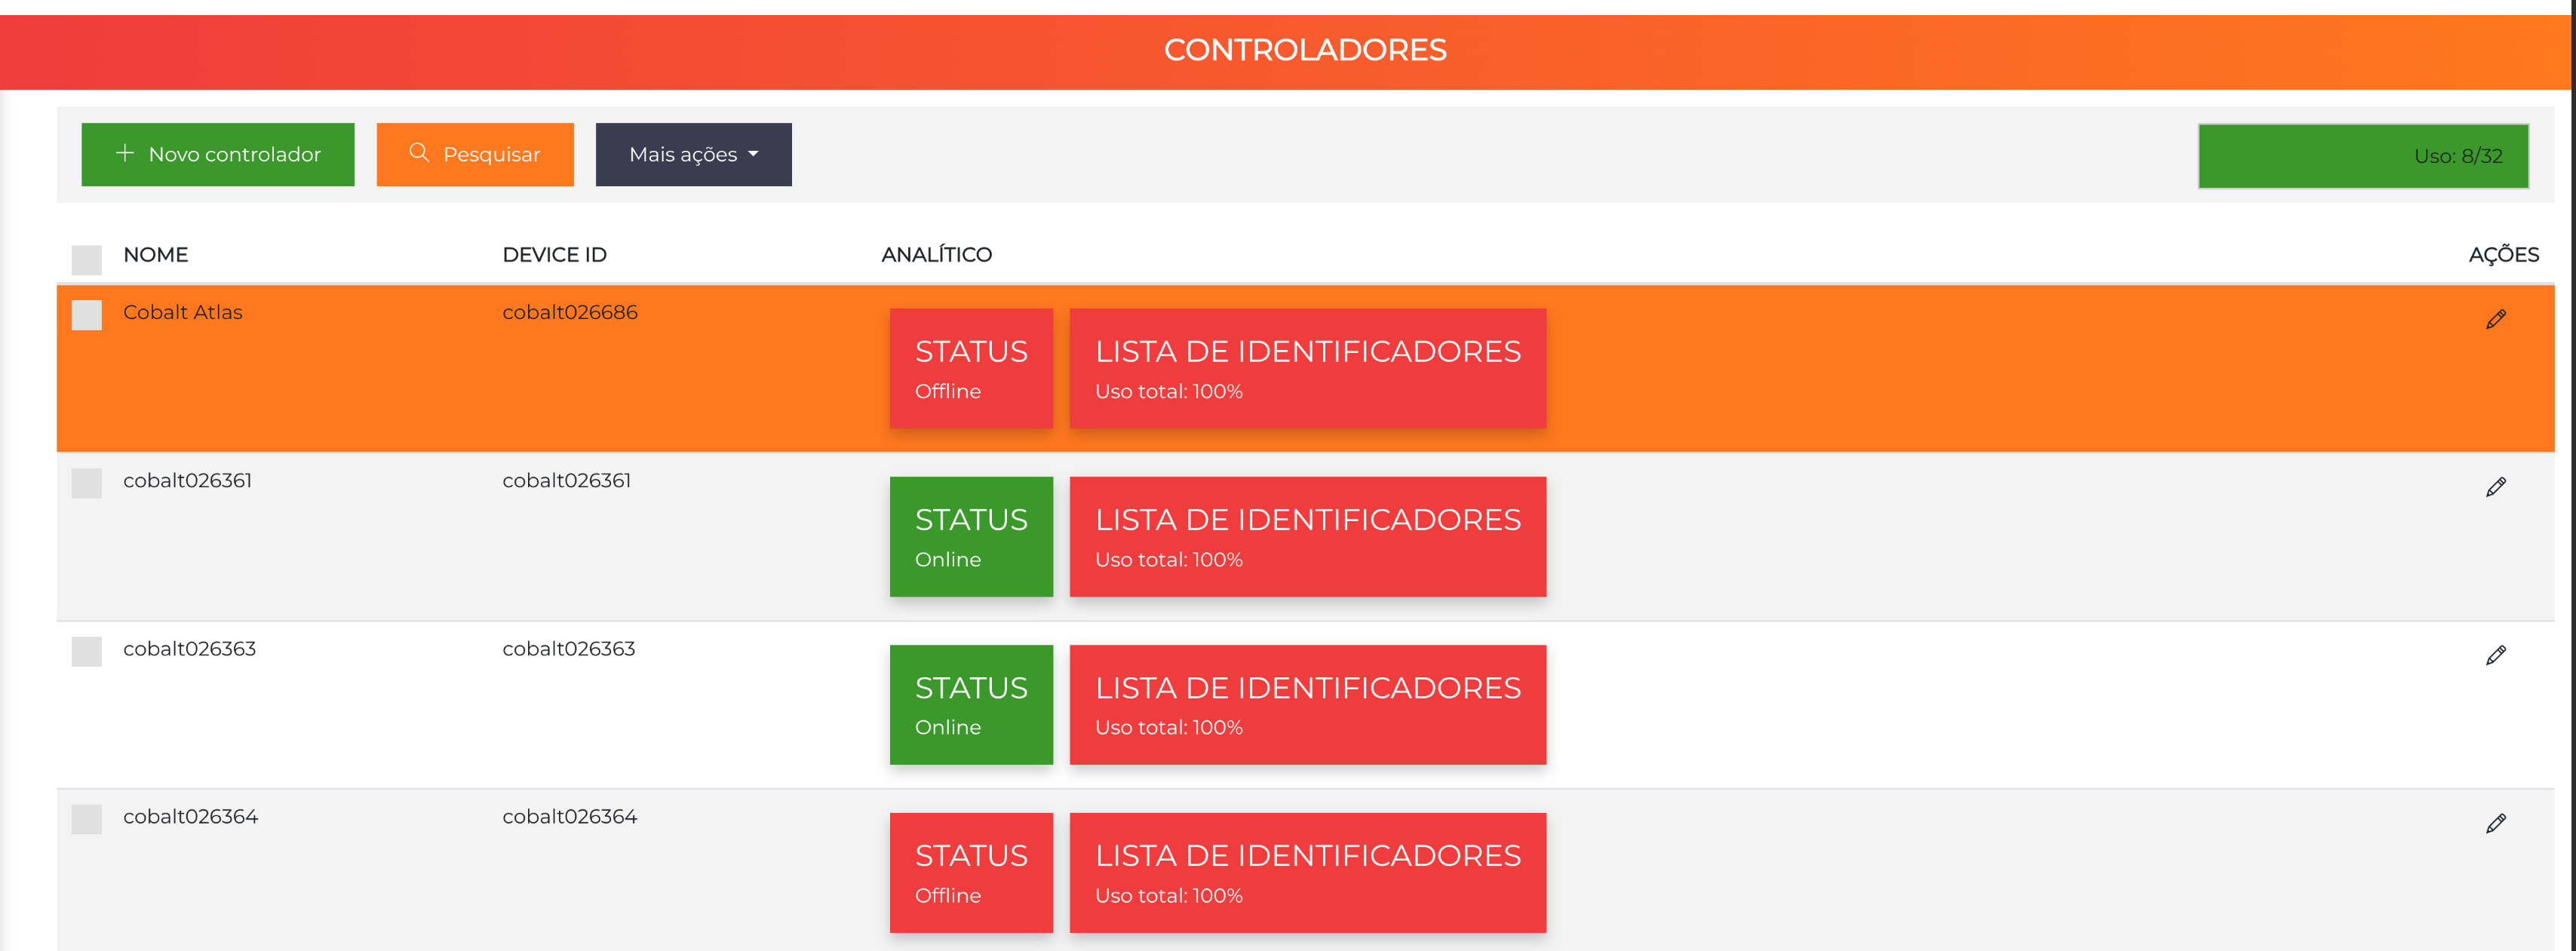
After saving, find the controller in the list and click the pencil (edit) icon to open its settings.
3.3 Adding the Channel
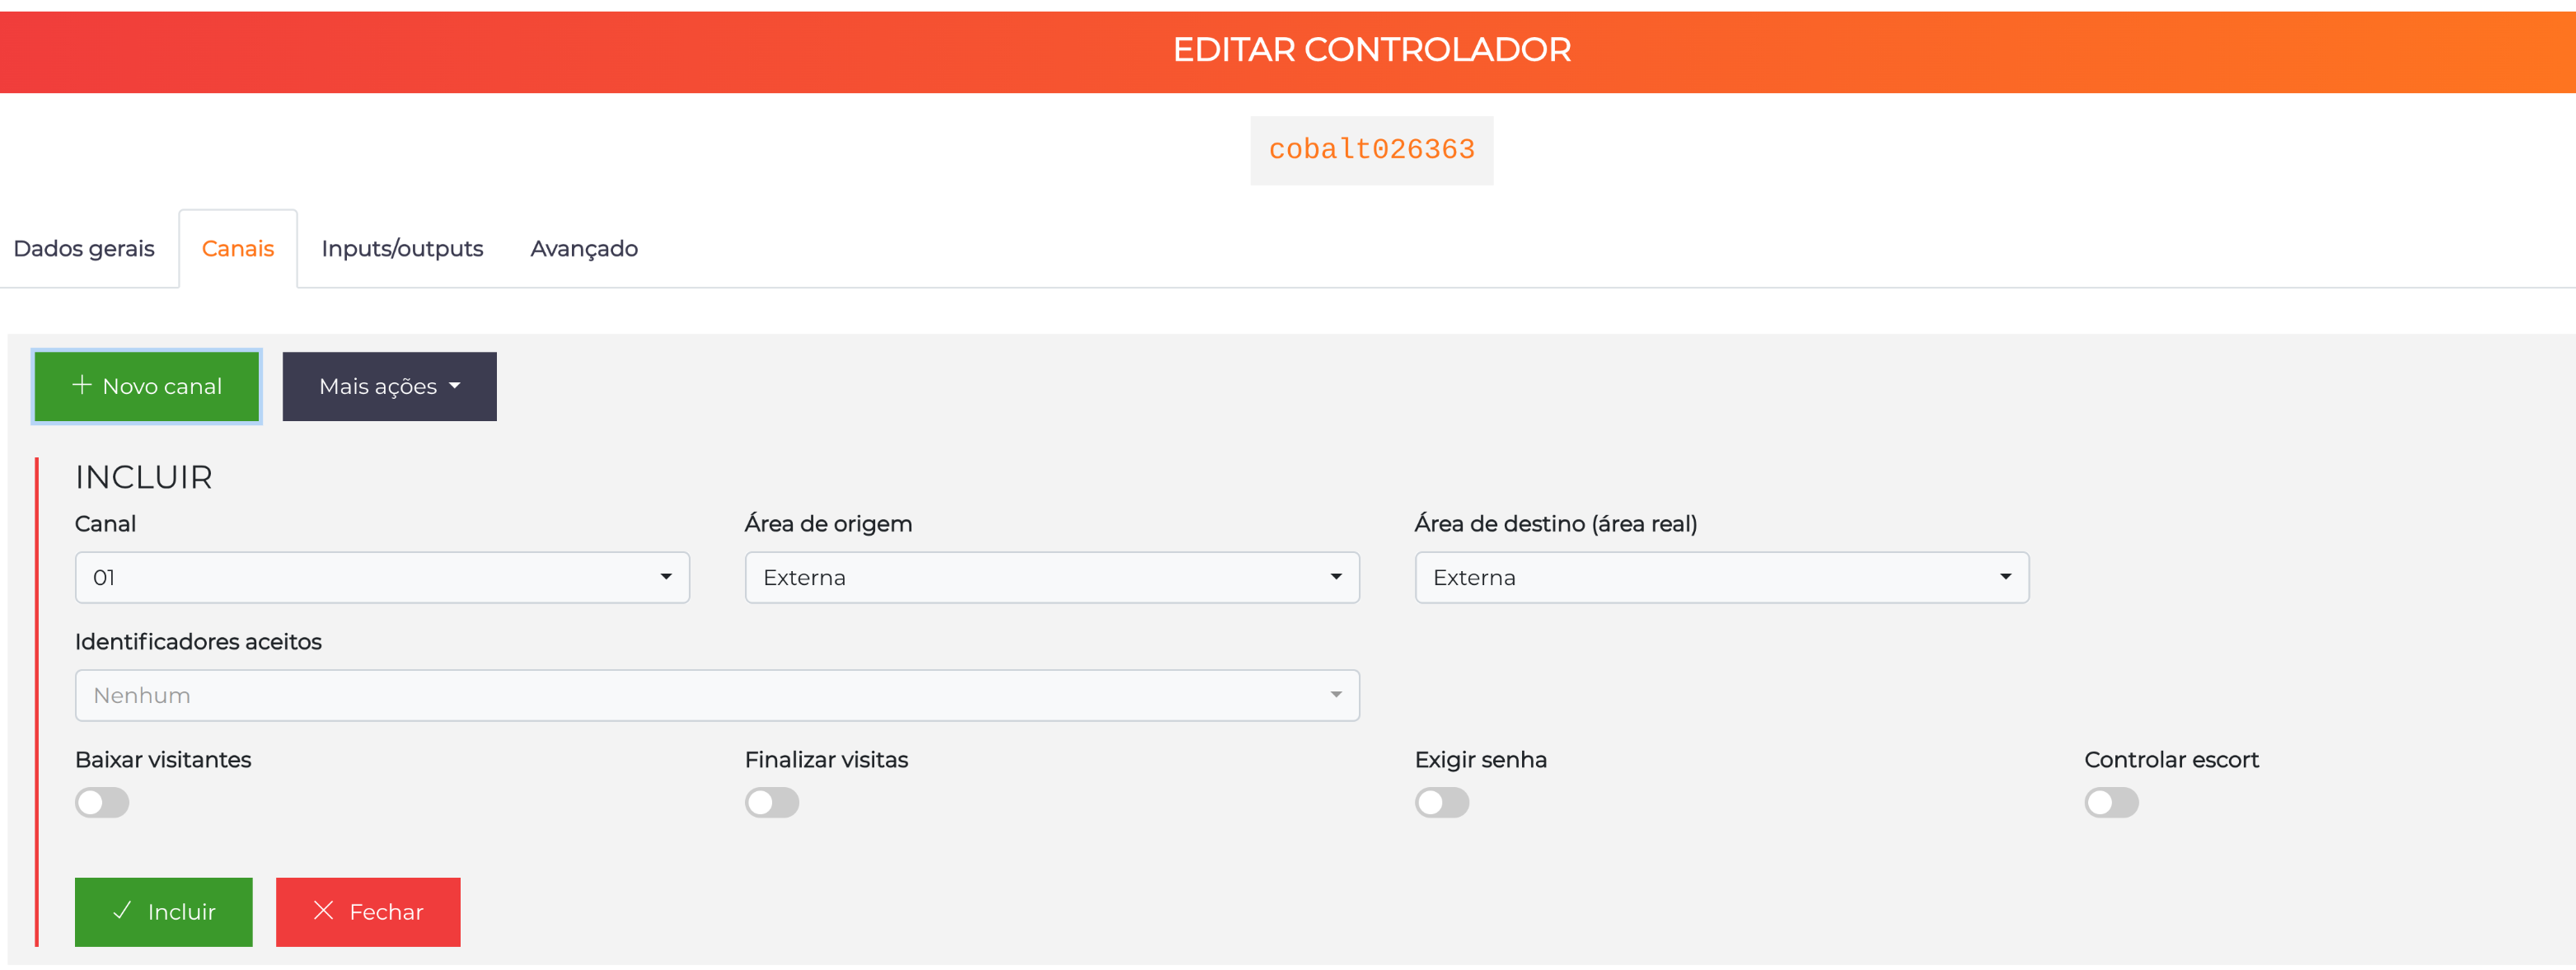
- On the edit screen, go to the Channels tab.
- Click Add to include Channel 1.
- Fill in the identifiers according to the installation.
- Click Add to confirm.
3.4 Enabling Elevator Integration

After adding the channel, click the channel's pencil icon to edit it. Enable the Elevator Integration option and select the corresponding Gateway, registered in the previous stage.
4. Releasing Floors by Person
Navigation path: People > All
With the controller integrated, access to the floors is released in each person's record.
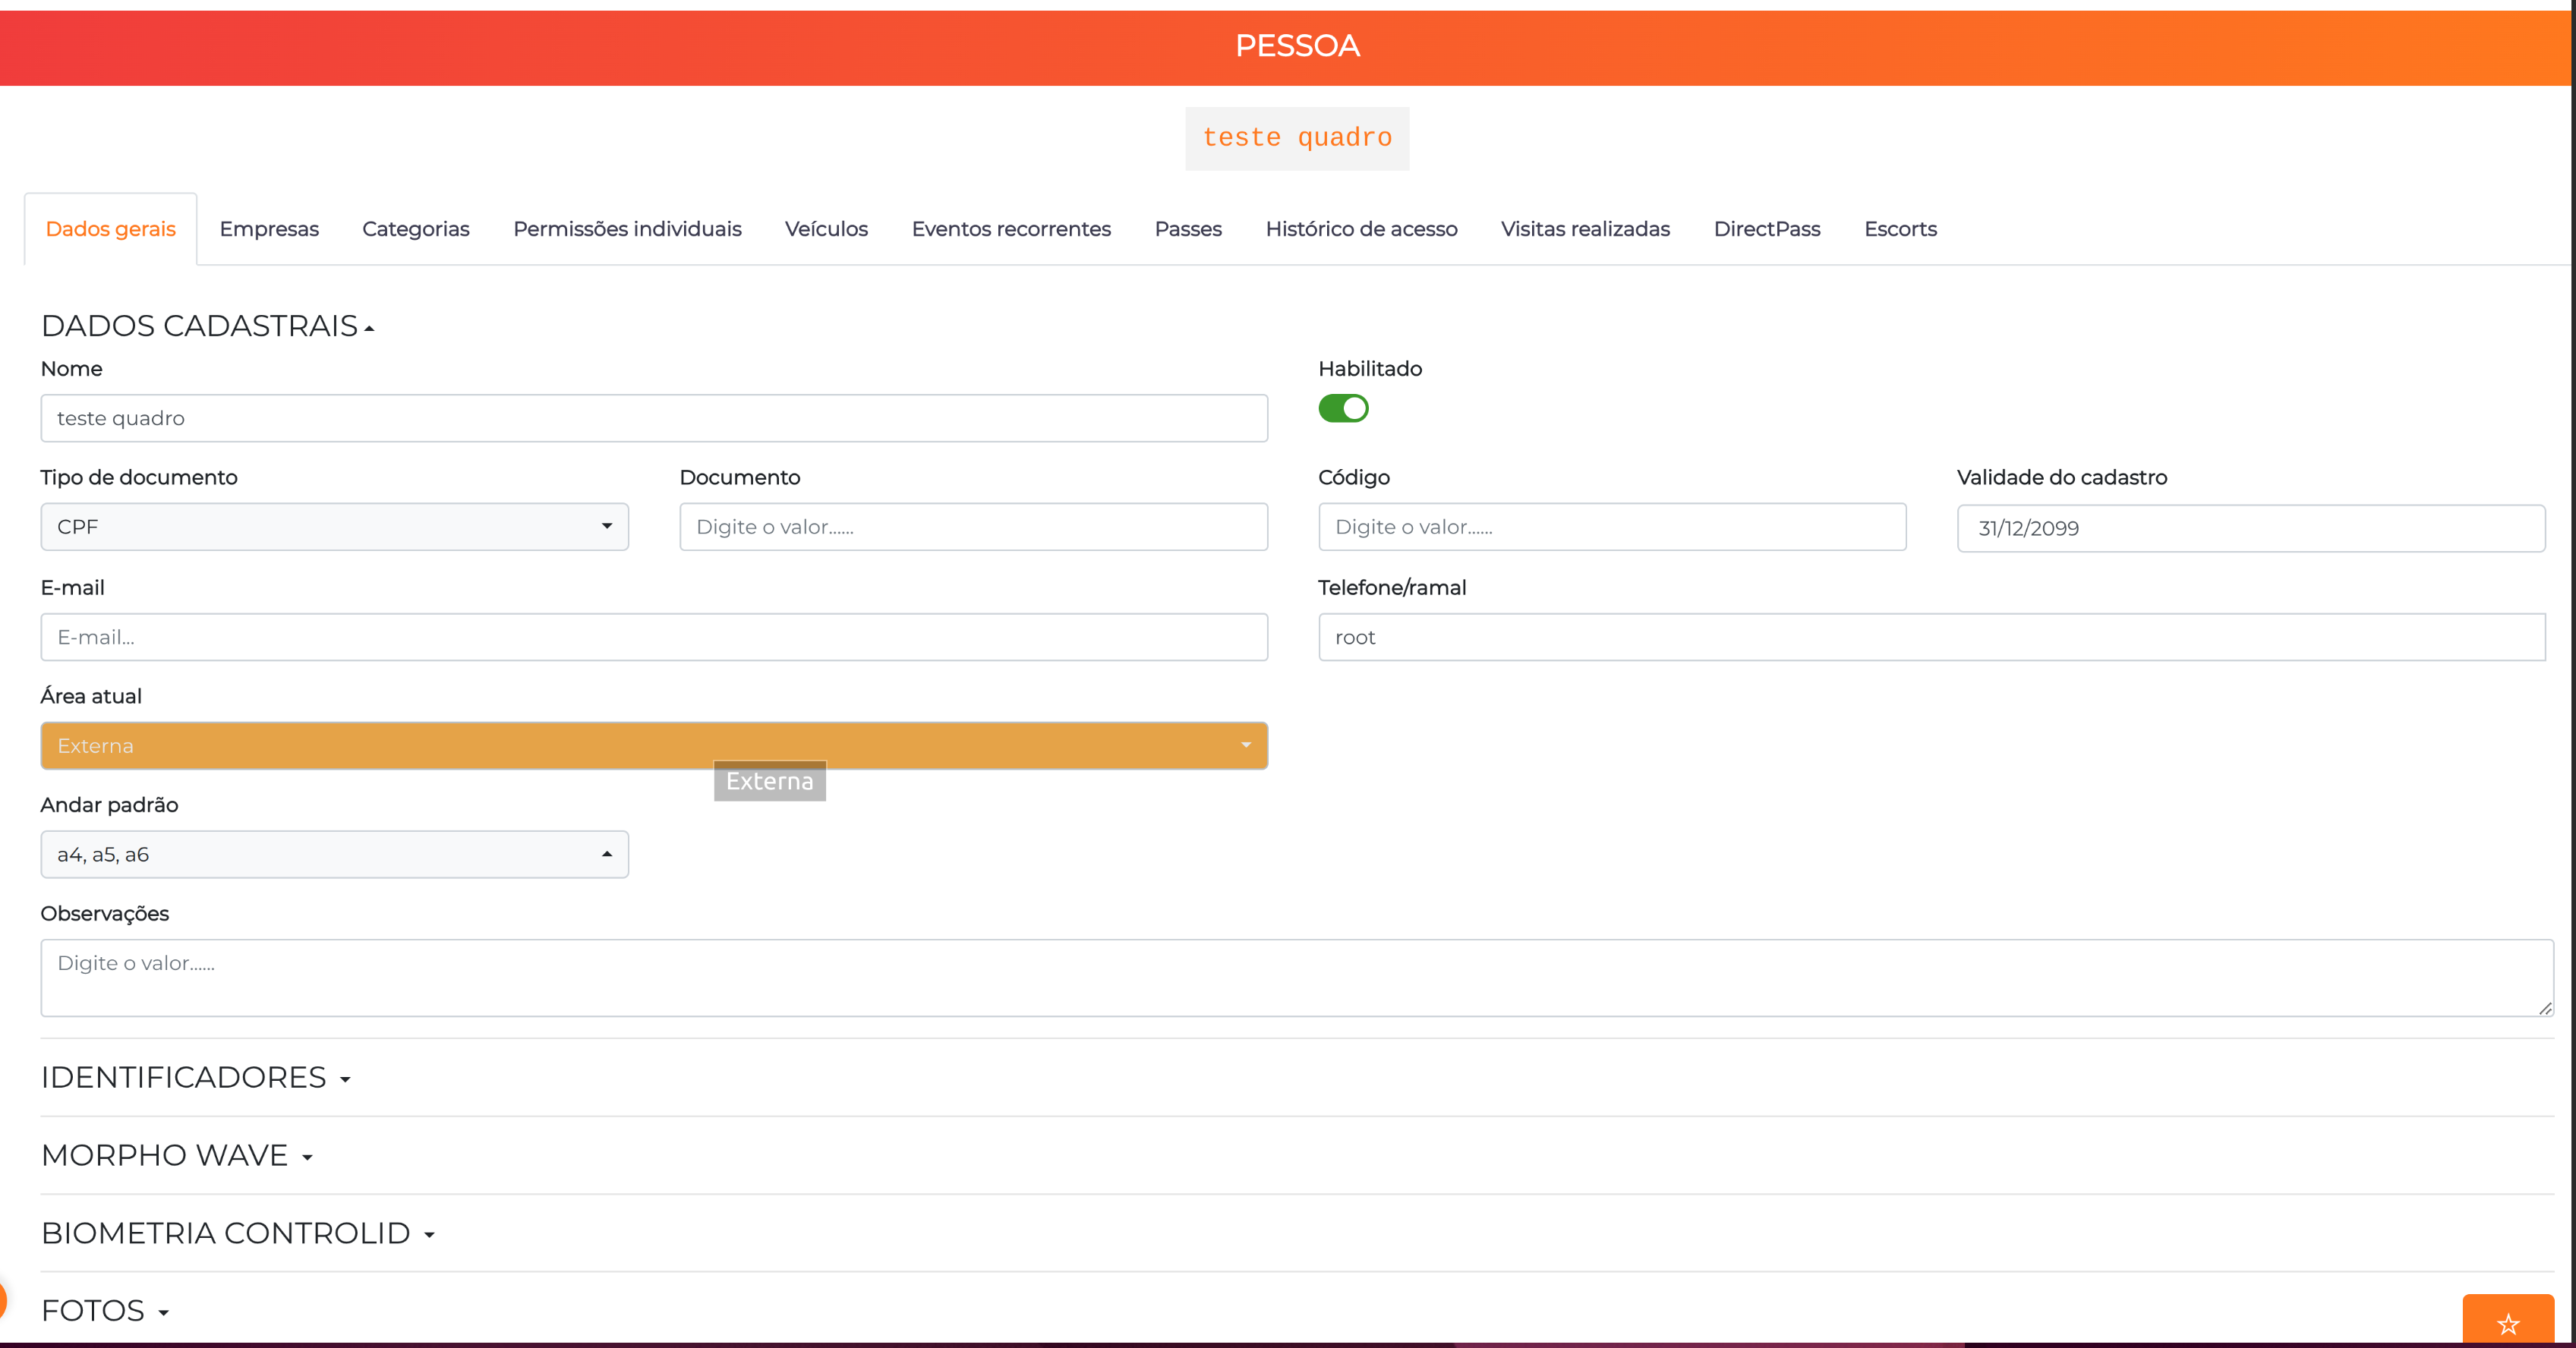
- Go to
People > All. - Click New Person to register a new user, or find an existing person and click the pencil icon to edit.
- In the Default Floor field, associate the allowed floors by selecting the previously registered floors the person is authorized to access.
For floor control to work correctly, the person must have at least one registered identifier and be linked to a category.
5. Releasing Floors by Visitor
Navigation path: Visits > New Event
Releasing a visitor's access to the floors does not require any configuration in the visitor's record: the visitor automatically inherits the floor defined in the record of the company linked to the visit event — usually the company of the person being visited.
The visitor's floor comes from the Floor field of the company record (Settings > Companies), not from the record of the person being visited. Without that field filled in, the visitor's access is authorized but no button is released.
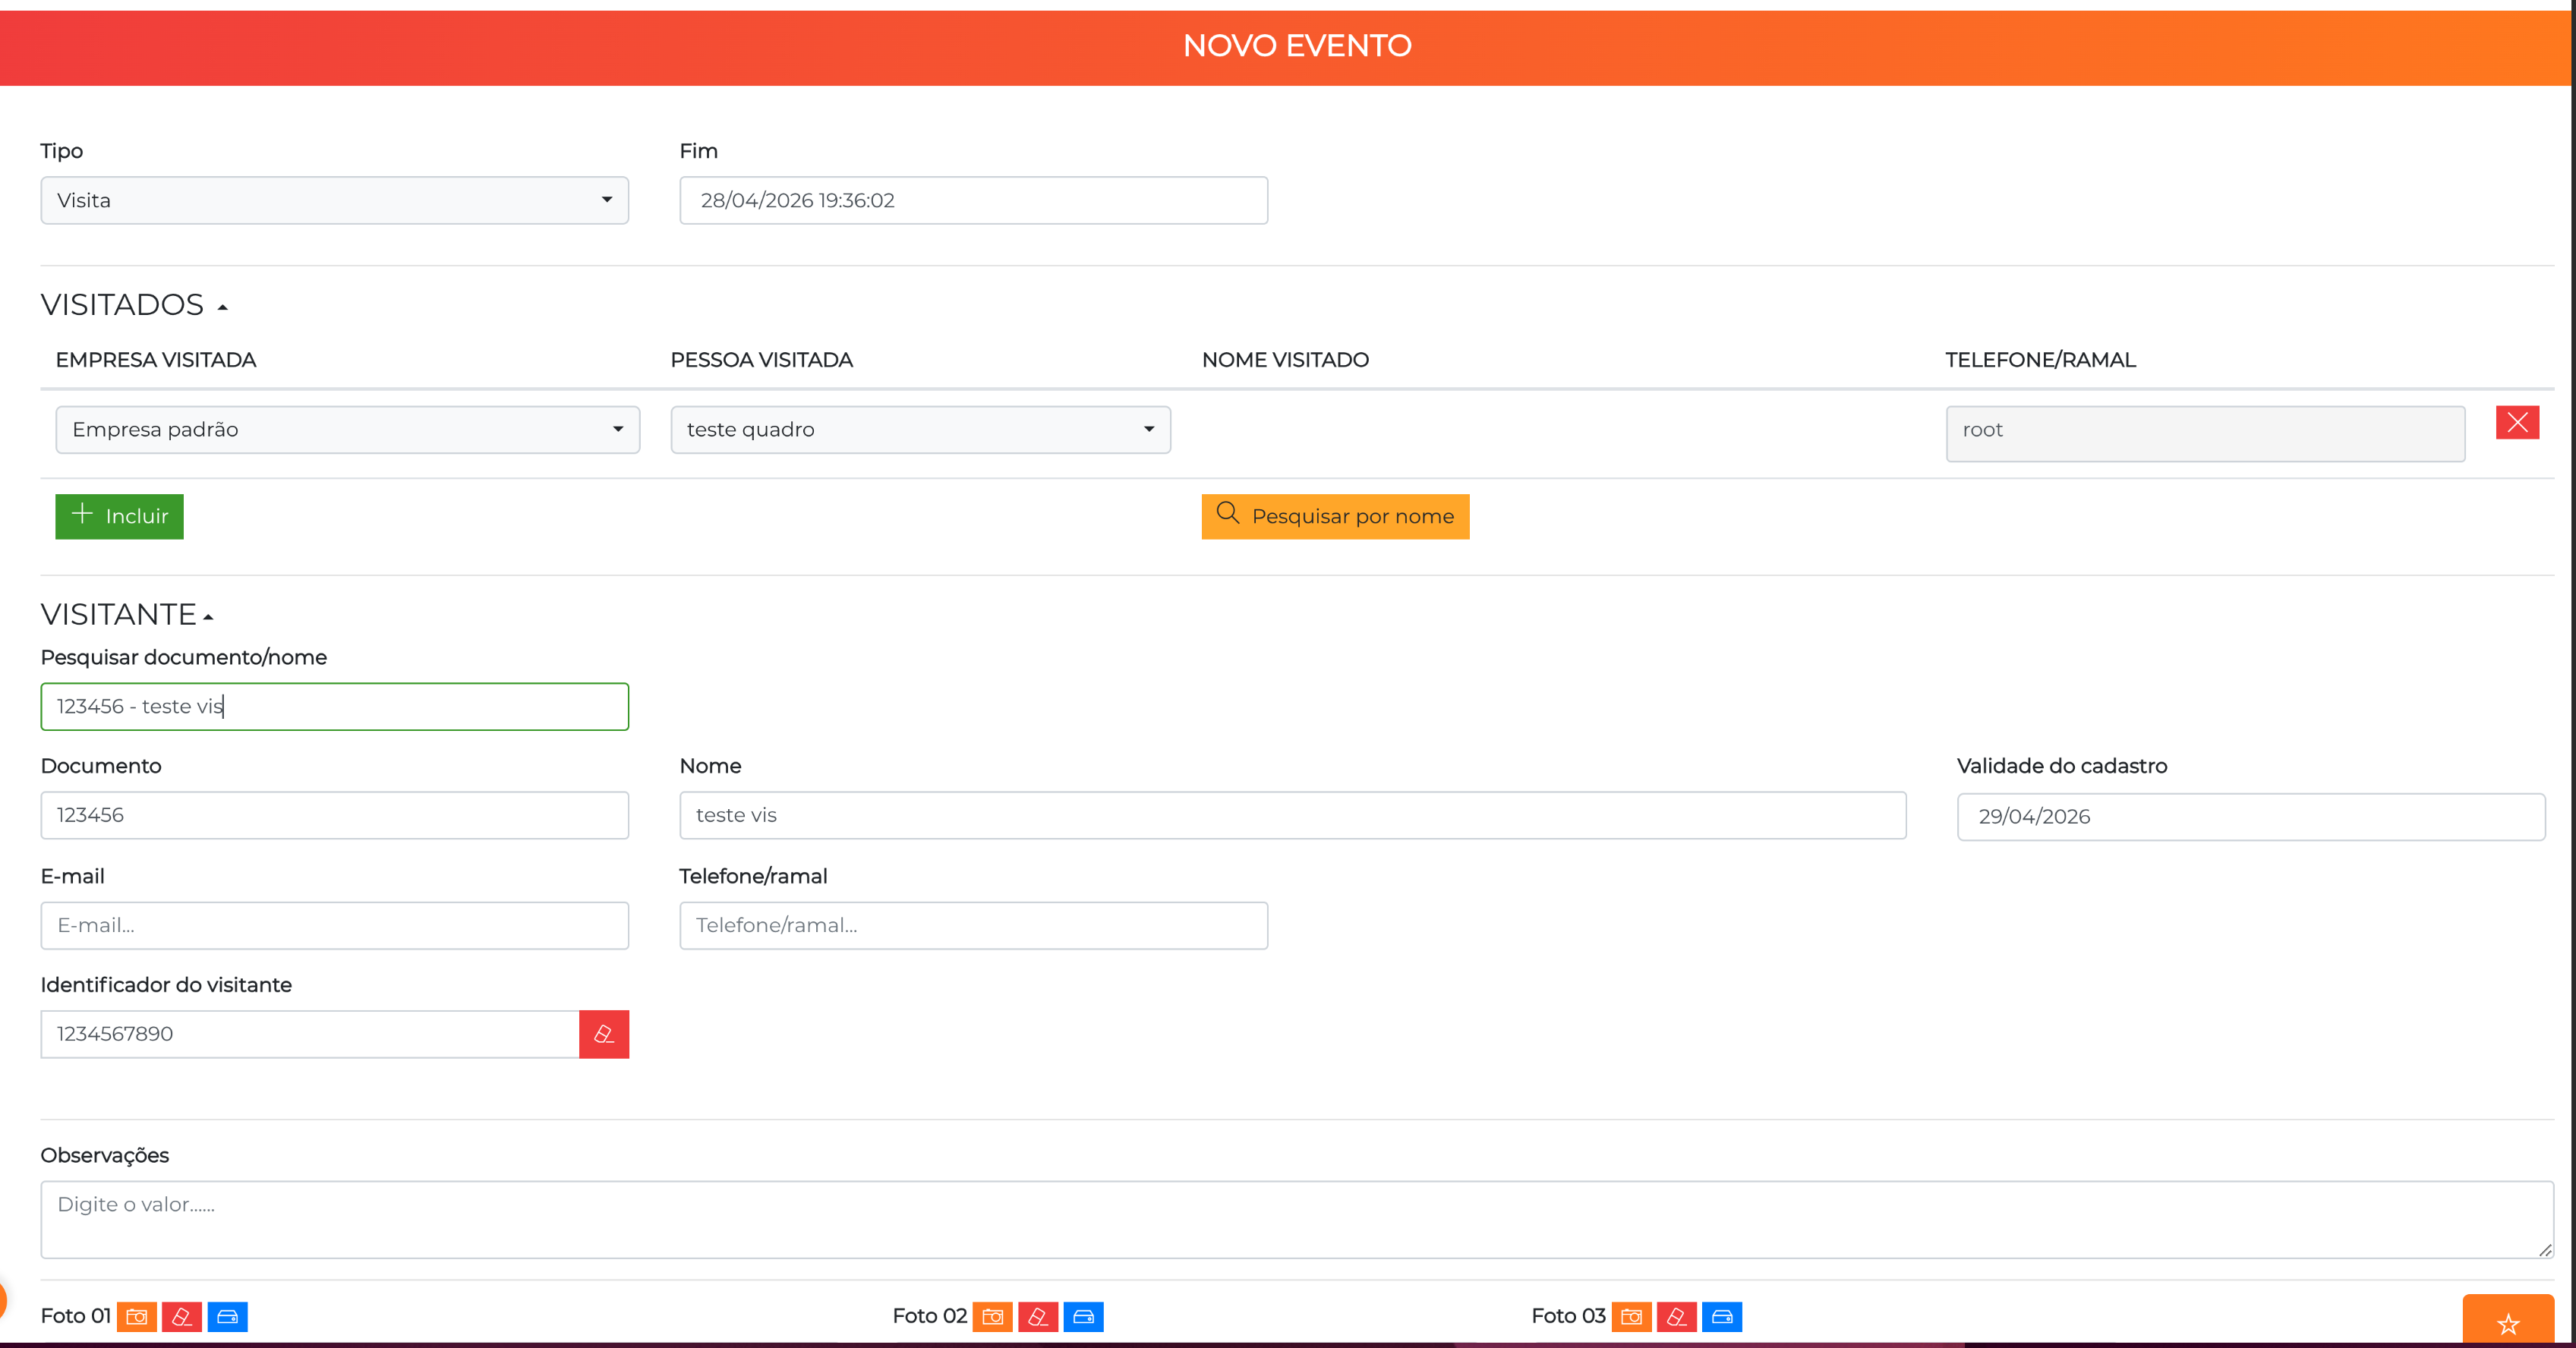
- Go to
Visits > New Event. - Fill in the type as Visit.
- Enter the Person Visited and the visitor's data.
Access to the floors is granted according to the floor registered for the company linked to the visit event.
Next Steps
- Elevator Button Panel Control — the feature in the Accelero manual: how the system decides the floors, use cases, limits, and troubleshooting
- Operation Manual — local configuration of the module through the embedded web server