Installation Manual
This manual describes the physical installation of the Communication Gateway and the network configuration required to put it into operation.
Items Included
- 01 Gateway
- 01 5 V power adapter
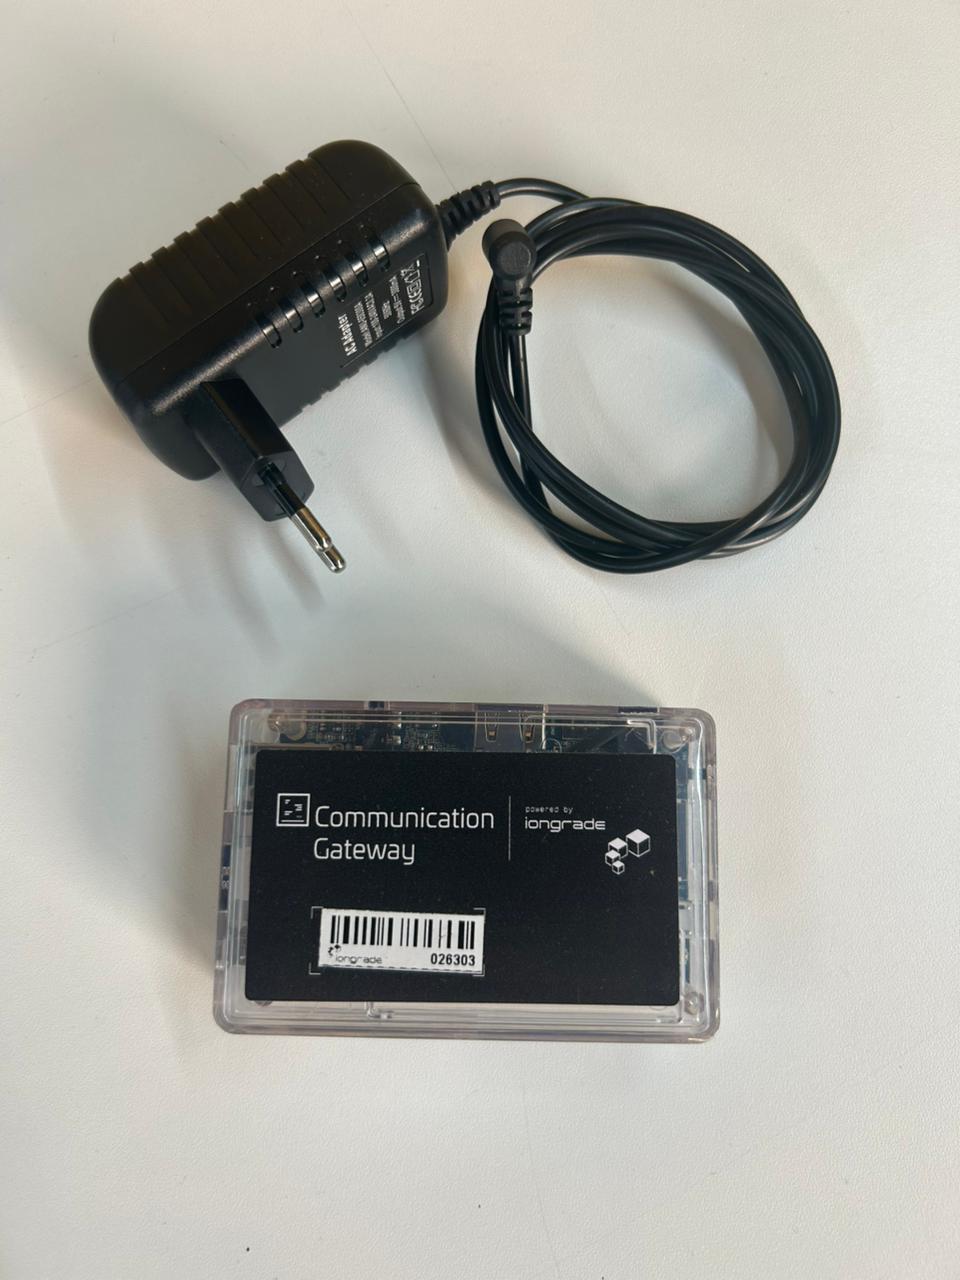
Physical Installation
Installing the Gateway is simple. All you need is:
- A TCP/IP network port (Ethernet RJ45 10/100)
- Electrical power at 110 V / 220 V for the power adapter
Connect the network cable and plug the 5 V power adapter into the Gateway.
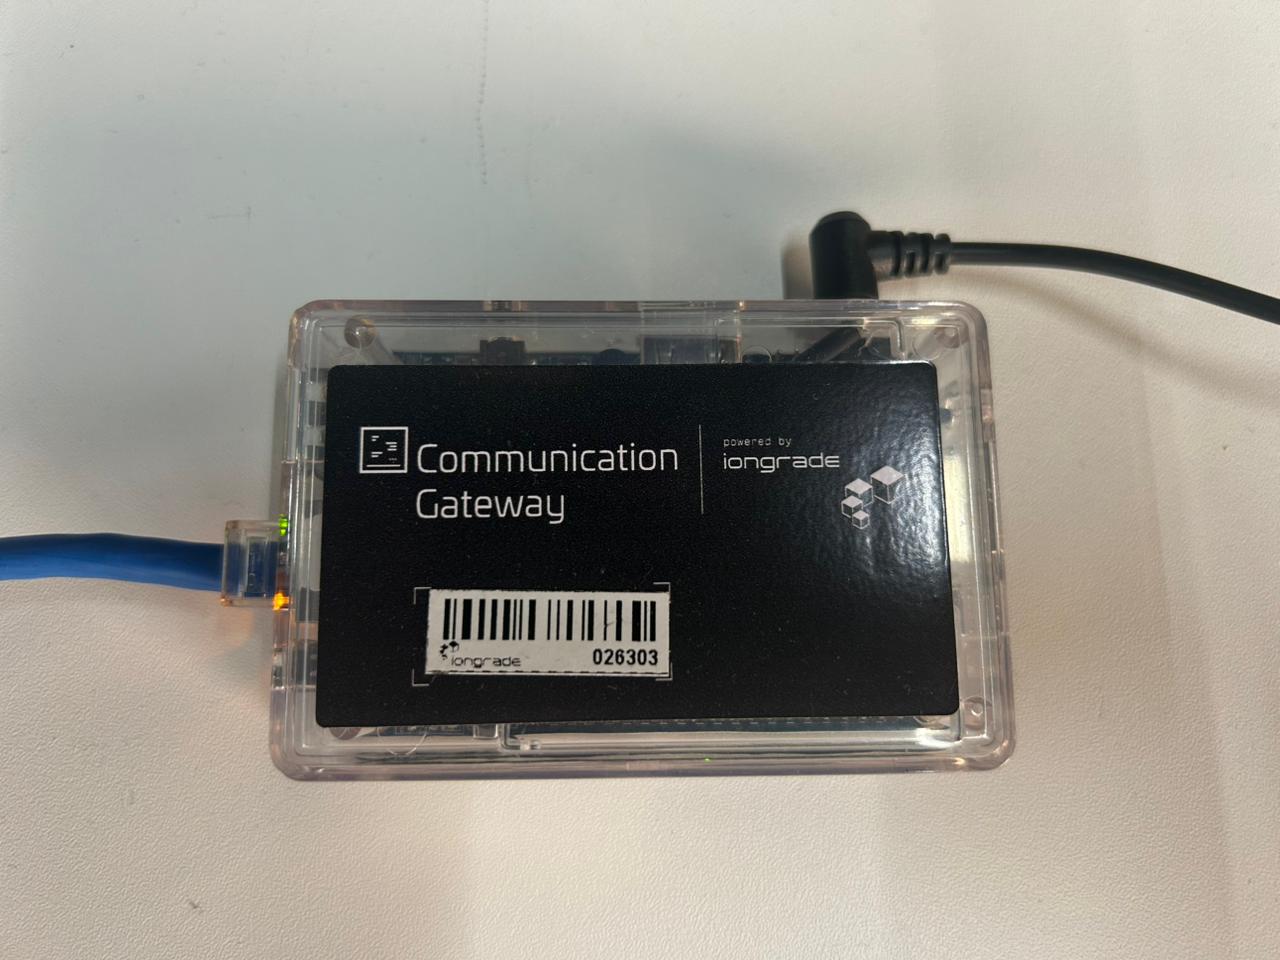
By default, the Gateway ships from the factory already configured with the customer's system data and the network set to DHCP (dynamic IP). In most installations, all you need to do is connect it to the network and to power.
Static IP Configuration
If the network requires a static IP, you must configure the Gateway locally using a monitor with an HDMI input and a USB keyboard.
With the Gateway powered on, connect the monitor and the keyboard. The login screen is displayed (iongrade_gateway_<no.> login:).
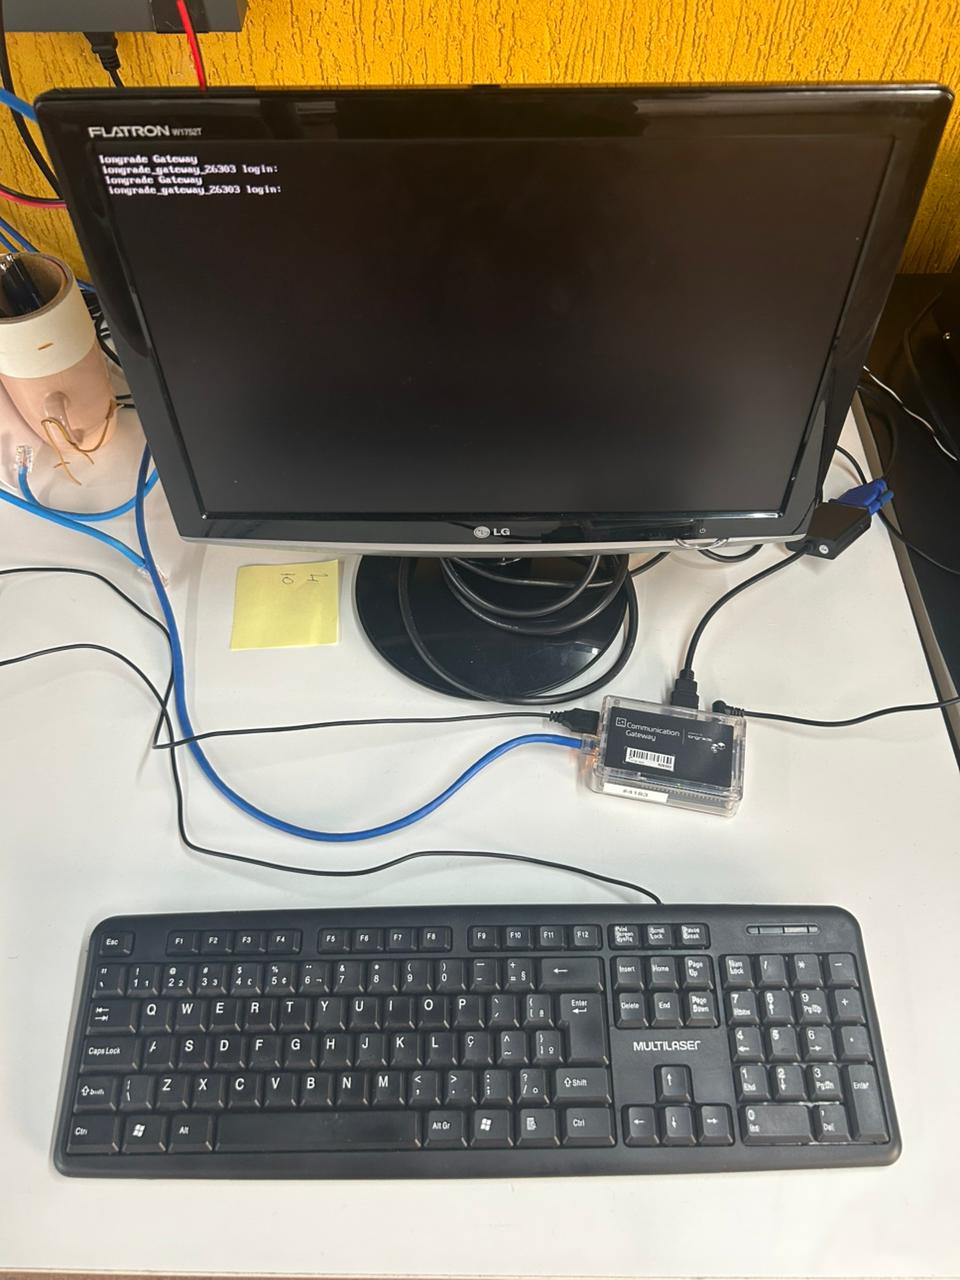
Press ENTER and enter the access credentials:
- User:
config - Password:
config
The terminal does not display the password characters while you type them. Type the password and press ENTER normally.
In the System Menu, select the Configure IP option.
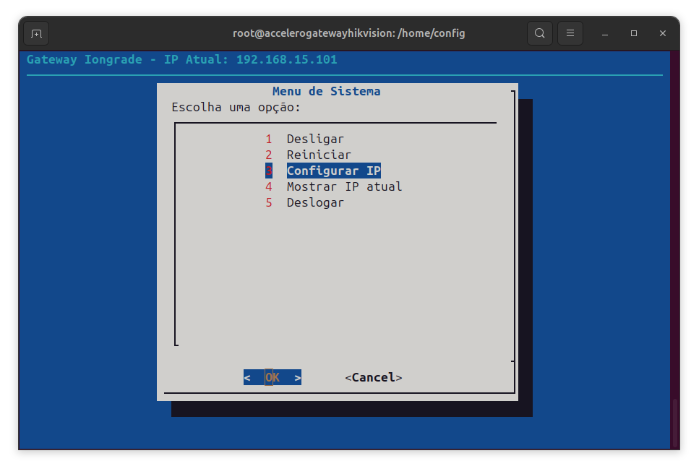
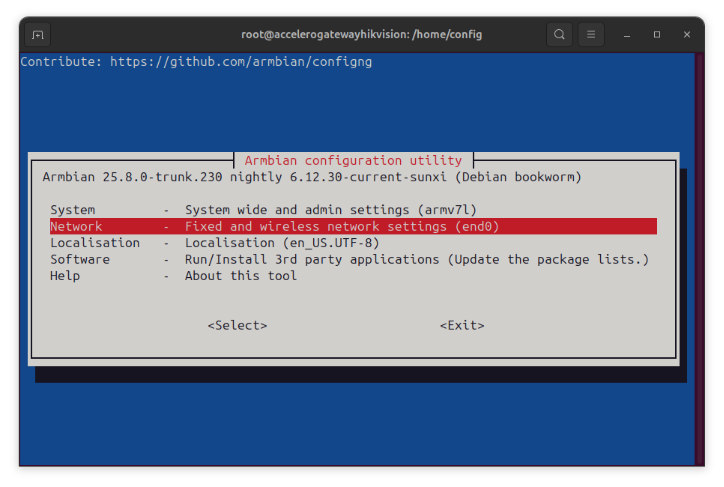
On the configuration utility screen, select Network.
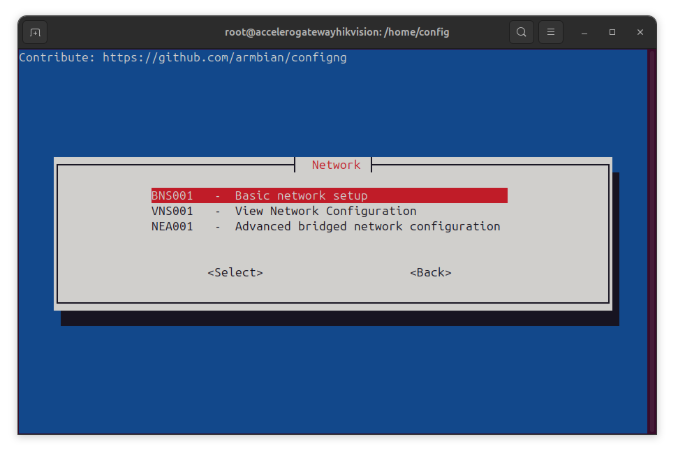
Select Basic network setup.
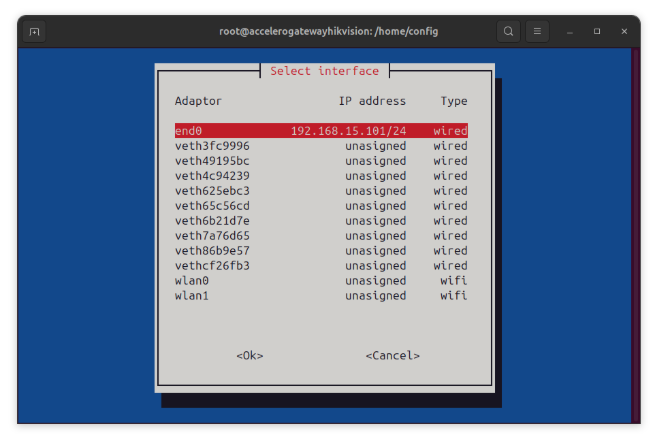
Select the end0 interface (the wired network interface).
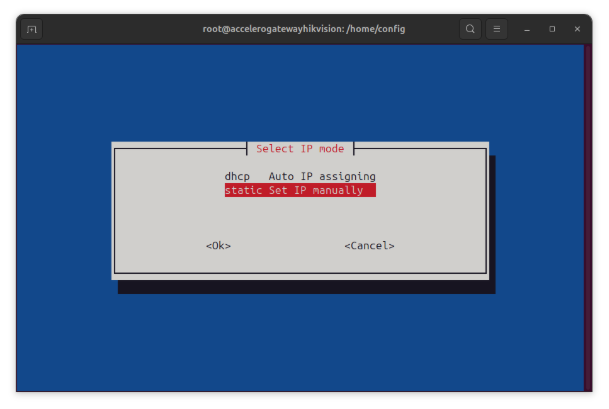
Choose the static — Set IP manually mode.
Proceed with the network data:
-
On the MAC Address screen, press Enter.
-
On the Enter IP for end0 screen, type the IP and the subnet mask (format
192.168.15.101/24).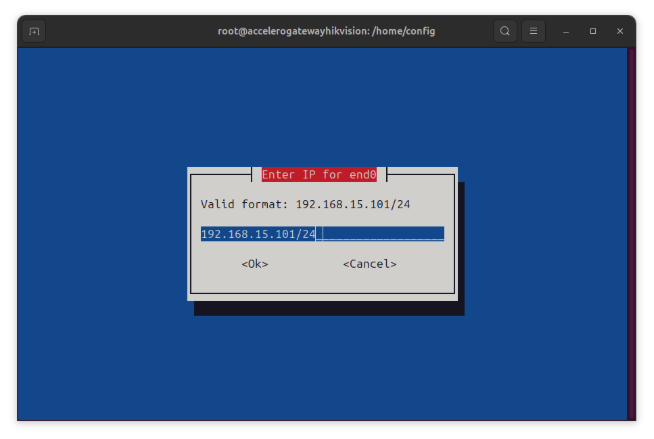
-
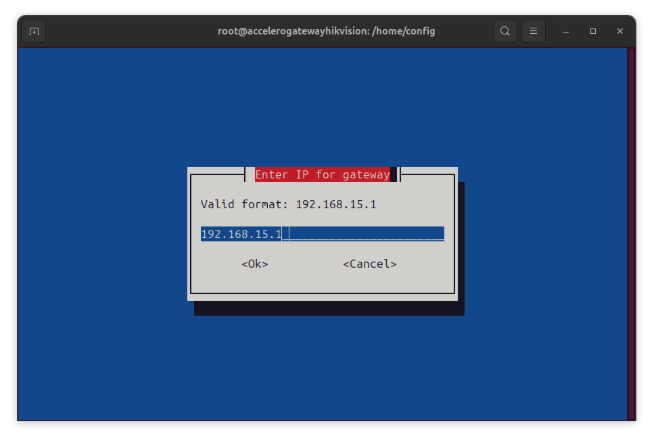
On the Enter IP for gateway screen, type the local network gateway.
-
On the Enter DNS server screen, enter the local network DNS. If there is more than one DNS, separate them with a comma (e.g.,
8.8.8.8,1.1.1.1).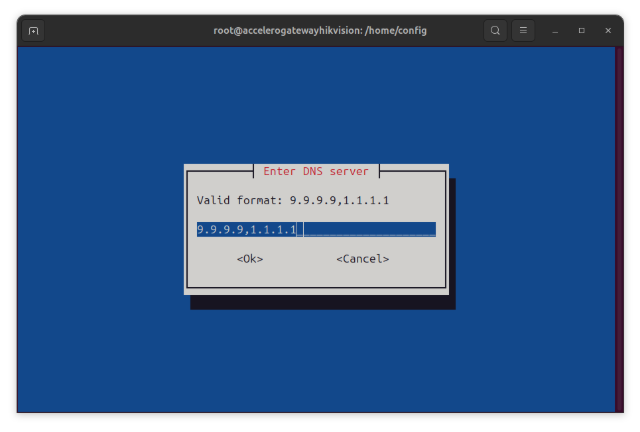
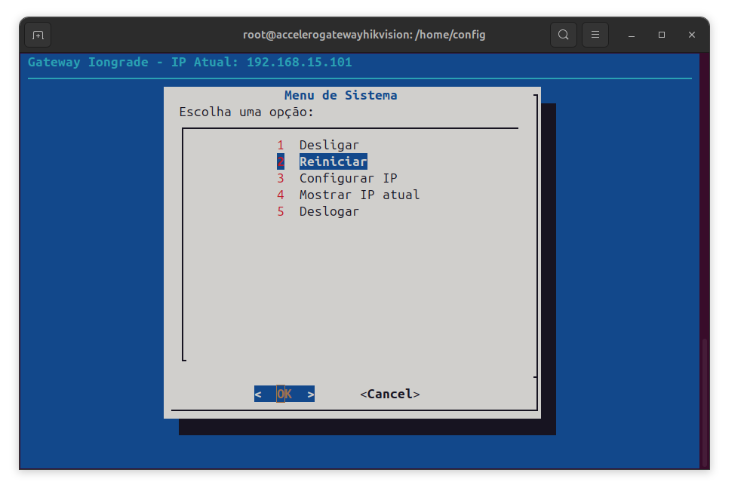
After configuring all the data, go back to the System Menu and select Restart.
- Always use a static IP in production environments.
- Document the IPs used in each project.
- Validate communication after the installation (see the FAQ).
Next Steps
- Operation Manual — how it works in Accelero and monitoring
- FAQ and Troubleshooting — common issues and frequently asked questions