Installation Manual - Palladium Noise Monitor
Palladium has been discontinued and is no longer sold for new projects. This documentation remains available to support existing installations. For new projects or replacement, contact the Iongrade sales team.
This manual guides the physical installation and first access to the Palladium noise monitor. Installation is extremely simple: once plugged into the outlet, the device starts operating and begins storing the ambient sound level information.
Power Supply
To put Palladium into operation, simply connect it to the power outlet using the power supply provided with the device. The power supply is dual-voltage, and can be used in 110 VAC or 220 VAC installations.
| Specification | Value |
|---|---|
| Supply voltage | 5 VDC |
| Consumption | 250 mA |
| Power supply | Dual-voltage (110 / 220 VAC) |
As soon as it is plugged into the outlet, Palladium is already operating, storing the ambient sound level measurements — even before any configuration.
Mounting and Positioning
The measurement microphone is on the front of the device, protected by an anti-wind foam. Good positioning is essential so that the measurements faithfully represent the noise of the environment you want to monitor.
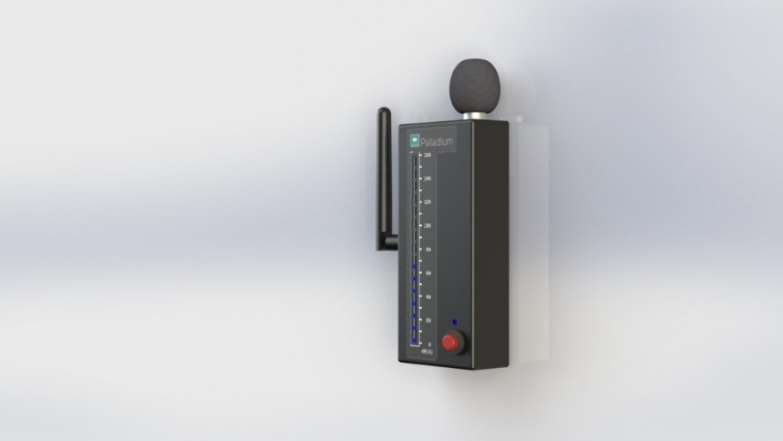
Positioning recommendations:
- Aim the front microphone toward the area whose noise you want to monitor, with no immediate obstacles in front of it.
- Install the device in the environment that will be measured (for example, inside the party room, the telemarketing room, etc.), avoiding placing it behind doors, inside cabinets or in places acoustically isolated from the actual environment.
- Avoid sources of direct wind on the microphone (air conditioning outlets, fans), which can interfere with the measurement despite the anti-wind foam.
- Keep the power supply accessible, since turning the power supply off and on again is the procedure used to restart the device after some configurations.
Front Panel: Bargraph, LED and Button
The front of Palladium has a bargraph, an LED indicator and a button.
Bargraph
The bargraph shows, on a scale, the dB(A) sound signal level currently being measured. The color changes according to the measured noise level and the configured limits:
| Color | Meaning |
|---|---|
| Blue | Noise within normal conditions |
| Orange | Noise close to the maximum limit (80%) |
| Red | Noise above the established limit |
Status LED
The LED blinks a certain number of times every two seconds, indicating the communication state Palladium is in:
| Blinks | Meaning |
|---|---|
| 1 blink | No WiFi connection |
| 2 blinks | Connected to the WiFi network |
| 3 blinks | Connected to the WiFi network and to Palladium Cloud |
Button
The button has dual functionality:
| Action | Function |
|---|---|
| Short tap | Acknowledges the alarm: turns off the horn and records the alarm acknowledgment. |
| Press for 7 seconds | Enables (or disables) the device WiFi access point. |
When the access point is enabled, Palladium emits a double beep. To disable it, simply press the button again for seven seconds; the device emits a beep to indicate the operation was successful.
First Access
To configure Palladium for the first time you need to enable Basic Mode (Access Point): the device creates its own WiFi network, and configuration is done through a browser.
1. Enable the Palladium WiFi network
With the device plugged into the outlet, press and hold the front button for seven seconds. Palladium emits two beeps when the WiFi network is enabled — at that moment, release the button. The network is then ready to accept connections.
2. Connect to the Palladium WiFi network
The access point created by Palladium has a unique name (SSID) exclusive to each device, formed by the word palladium followed by a device identification code (for example, palladiumF67A or palladiumF7A4). This network is open (no password); simply connect to it.
3. Access the browser (login)
Once connected to the Palladium WiFi network, open a browser and enter the address:
http://192.168.4.1
You will be asked for a user name and password. The default access data is:
| Field | Default value |
|---|---|
| Usuário (User) | admin |
| Senha (Password) | palladiumpwd |
After identification, the Palladium page server presents the functions available for configuration and operation.
For security, change the default access password after the first login. Write down the new password and keep it in a safe place: it cannot be recovered.
Next Steps
- Overview — what Palladium is, operating modes, applications and technical specifications