Operation Manual - Radium
How the RADIUM gateway operates once installed and connected, and what each page and each field of the configuration portal does.
Access to the portal (magnet, gateway WiFi network and the 192.168.4.1 address) is covered in the Installation Manual.
How the Gateway Operates
BLE scanning and filters
The RADIUM scans Bluetooth continuously, scanning LE 1M and LE Coded PHY (long range) in parallel. Scanning is described by two parameters (Hardware ▸ Bluetooth):
- scan interval — the period of each scan (20 to 10000 ms; default 100 ms);
- scan window — how long the radio listens within each interval (20 to 10000 ms; default 80 ms). A smaller window saves power, but may miss beacons.
Before publishing, the gateway applies the filters under Hardware ▸ Filters to reduce noise and traffic:
- minimum RSSI — discards signals weaker than the limit (-100 to -30 dBm; default -90 dBm);
- prefix filters — by MAC, by BLE name and by raw data: type the beginning of the value that should pass; empty lets everything through;
- categories — enables/disables publishing of iBeacon, Eddystone and unknown;
- remove duplicates — publishes the repeated signal of the same beacon only once within a cycle.
MAC filter examples:
| Value typed | Effect |
|---|---|
AC233F | Only beacons whose MAC starts with AC233F pass |
AC233F|C30000 | The same, for two beacon families (up to 8 prefixes, separated by |) |
^AC233F.*|^C30000.* | Accepted for compatibility with other gateways; works exactly like the previous one (the ^ and the .* are ignored) |
Always type the beginning of the value. Other symbols have no special function — the filter looks for the text exactly as it was typed.
Remove duplicates criteria: No (off — publishes every repetition), by MAC (one publication per beacon), by MAC+type (one per beacon for each signal type) or by MAC+raw (discards only repetitions with identical content).
PANIC signals are never discarded — not by the minimum RSSI, not by disabled categories, not by duplicate removal. Panic is always published.
Beacon registration
The gateway publishes signals from any beacon in range, whether it is registered or not. Registration serves to enrich each signal with a role and to enable the local rules (panic, beacon battery and lost beacon alarms) for that specific beacon.
Registration is done through a CSV file, on the Beacons page — available from the integrator account upwards. The full procedure, with every column, is in Installation Commissioning.
Panic detection
The gateway detects panic from two origins, both with top priority:
Panic by beacon — a BLE panic button registered as a panic model. On detecting the press, the gateway publishes a panic event with the MAC and the RSSI and triggers the panic alarm (by default, output S1, latched). The LED does not change.
Panic by input — a physical input (IN1–IN4) with the Panic role. When activated, the gateway publishes two events (the input activation and the panic) and triggers the corresponding alarm (factory default the same: S1, latched).
The panic counter records one event per press (repeated presses in very quick succession count only once). Panic events have durable storage: even offline they go straight to a dedicated area of permanent memory and are the first to be re-sent when the connection returns.
Alarm engine
The alarm engine is local and works even without internet. Each alarm has an origin (the cause), a driven output, a delay before triggering, an output hold time and a latch option. When an alarm fires, the gateway drives the mapped output and publishes an alarm event.
Origins, mapping and factory defaults:
| Alarm (origin) | Output | Latch? | Delay | Threshold | Enabled from the factory? |
|---|---|---|---|---|---|
| Panic (beacon) | S1 | yes | 0 s | — | yes |
| Panic (input) | S1 | yes | 0 s | — | yes |
| Tamper | S4 | yes | 0 s | — | yes |
| MQTT offline | S3 | no | 30 s | — | yes |
| Gateway battery | S2 | no | 10 s | < 20 % | yes |
| Beacon battery | S2 | no | 0 s | < 25 % | no |
| Lost beacon (man-down) | S2 | no | 0 s | per beacon | no |
Behavior of the output engine:
- an output stays driven while any alarm that commands it is active; it only returns to its default state when all of them clear;
- when they clear, the output returns to its configured default state (with inversion applied), not to a forced off;
- latch — the alarm keeps the output driven even after the cause is gone; it is only released by an Acknowledge (button on the Alarms page or a remote command from the platform). If the cause persists, it re-fires by itself. Latch only governs when Hold output = 0;
- hold output (time) — if greater than zero, it turns the alarm into a timed pulse that switches off after N seconds and re-arms if the condition continues; Acknowledge ends the pulse early. In this mode the timer always wins: the output switches off after N seconds even with Latch checked;
- with Hold output = 0 and Latch unchecked, the output simply follows the cause — it drives while the condition lasts and switches off by itself when it clears;
- with the output set to None, the alarm drives no relay at all — it only publishes the event over MQTT.
Offline buffer and re-delivery
If the network or the MQTT broker goes down, the gateway does not stop: it keeps scanning, detecting panic and driving alarms, and stores the events to re-send them later. Storage is layered:
- normal signals go first to temporary memory and, as they age, to the reports area of permanent memory;
- panic events go straight to a dedicated area of permanent memory;
- spontaneous events (panic, alarm, input) go to a record of their own, also in permanent memory.
When the connection returns, re-delivery is fast and ordered: it first drains the panic events, then temporary memory, then the oldest reports. Events are republished with the original timestamp at which they occurred. The Info page shows the size of the offline buffer (normal and panic).
Power saving on battery
When external power goes down, the gateway starts running on battery and activates the power-saving profile, if enabled — configurable from the integrator account (see Installation Commissioning).
Depending on the configuration, the gateway can: reduce the LED brightness; reduce the BLE scan window (with a floor of 30 ms, so as not to miss panic); scan LE 1M only (without Coded PHY); enable WiFi power saving (modem-sleep); cap the CPU frequency (with optional DFS); and switch off Ethernet when no cable is connected.
The send interval and the keep-alive do not change on battery — they keep the values configured under MQTT ▸ Telemetry.
When external power returns, the gateway records the transition (recharge counter), goes back to the normal profile and restores the parameters. A firmware update (OTA) is blocked if the battery is below the required minimum.
Login
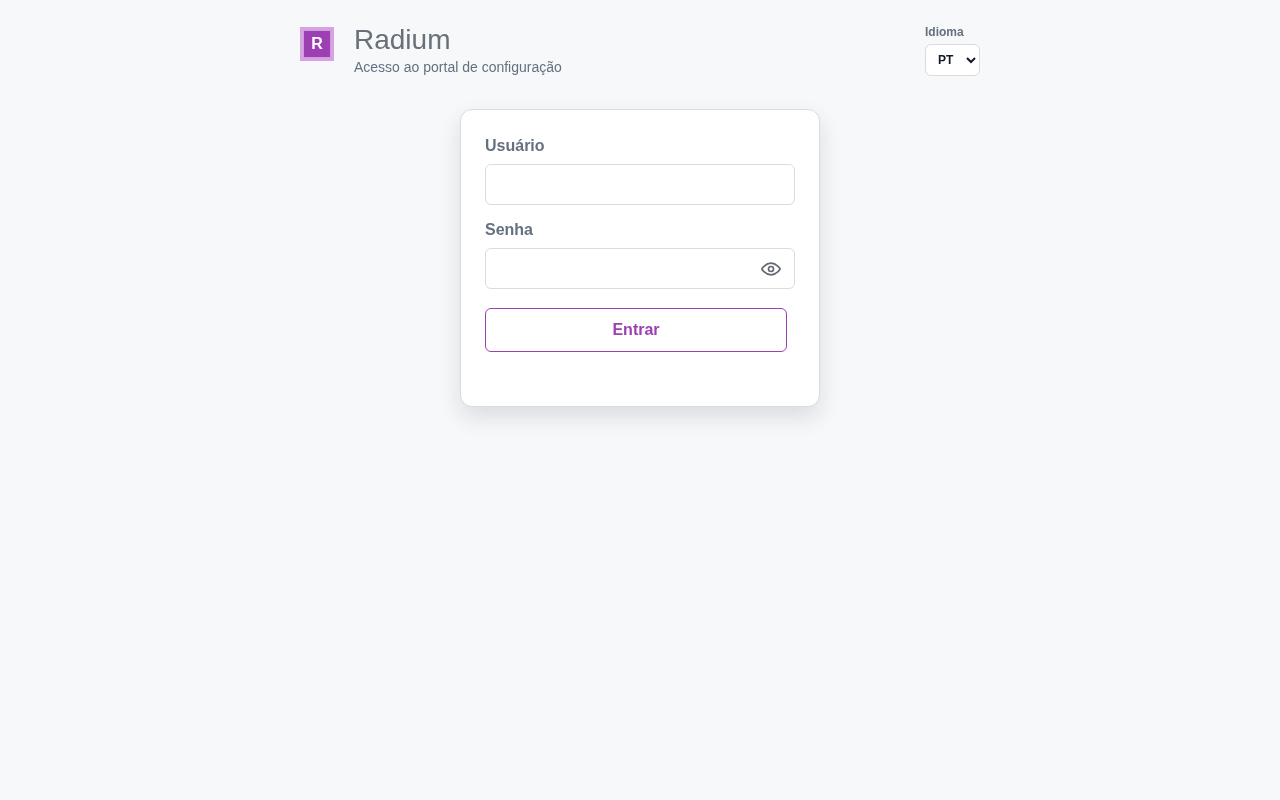
Log in with the operation account (radium). The corner of the screen lets you switch the language (Portuguese / English) and log out.
Main Menu
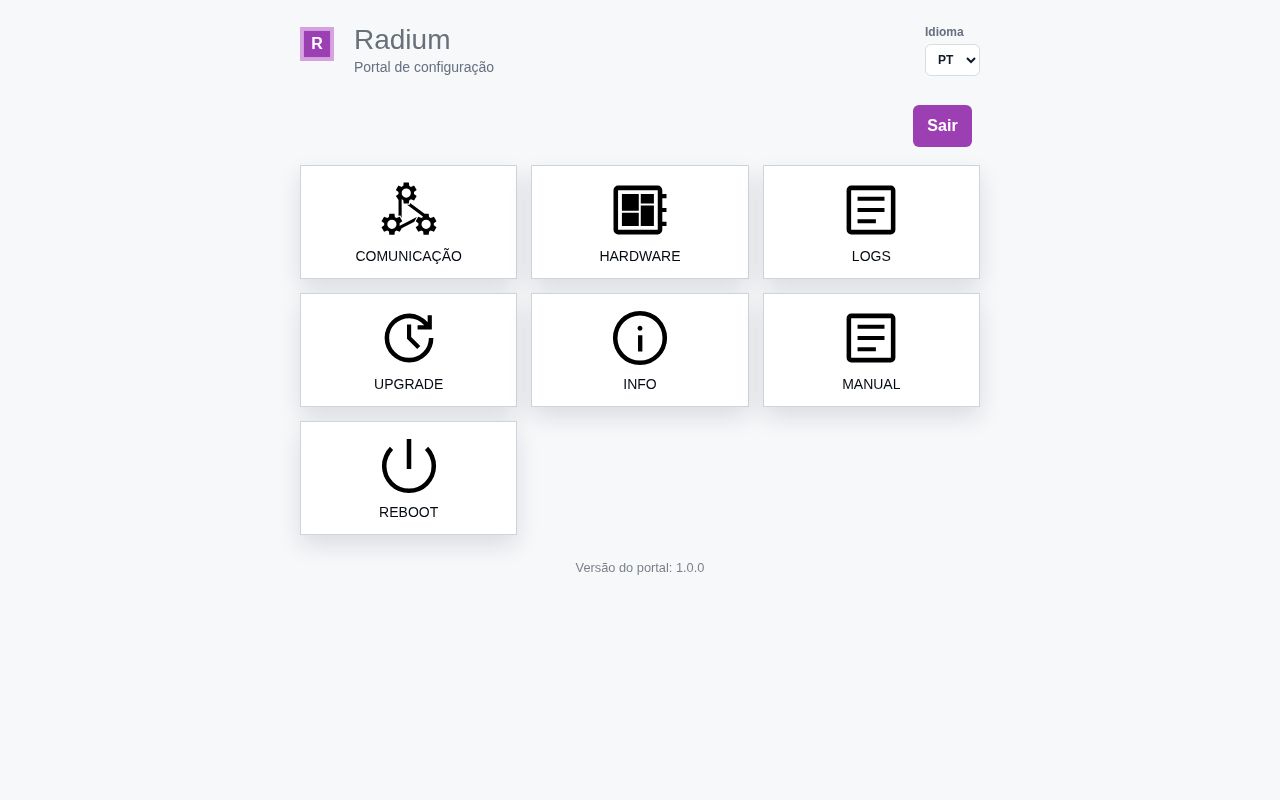
The home screen presents the groups: Communication, Hardware, Logs, Upgrade, Info, Manual and Reboot. Higher-level accounts see additional groups.
Communication
Gathers the network screens: connection priority, WiFi, Ethernet, MQTT (server and telemetry) and network tools.
A UDP item appears disabled in the menu — it is a reserved feature, not available in this version.
Connection (network priority)
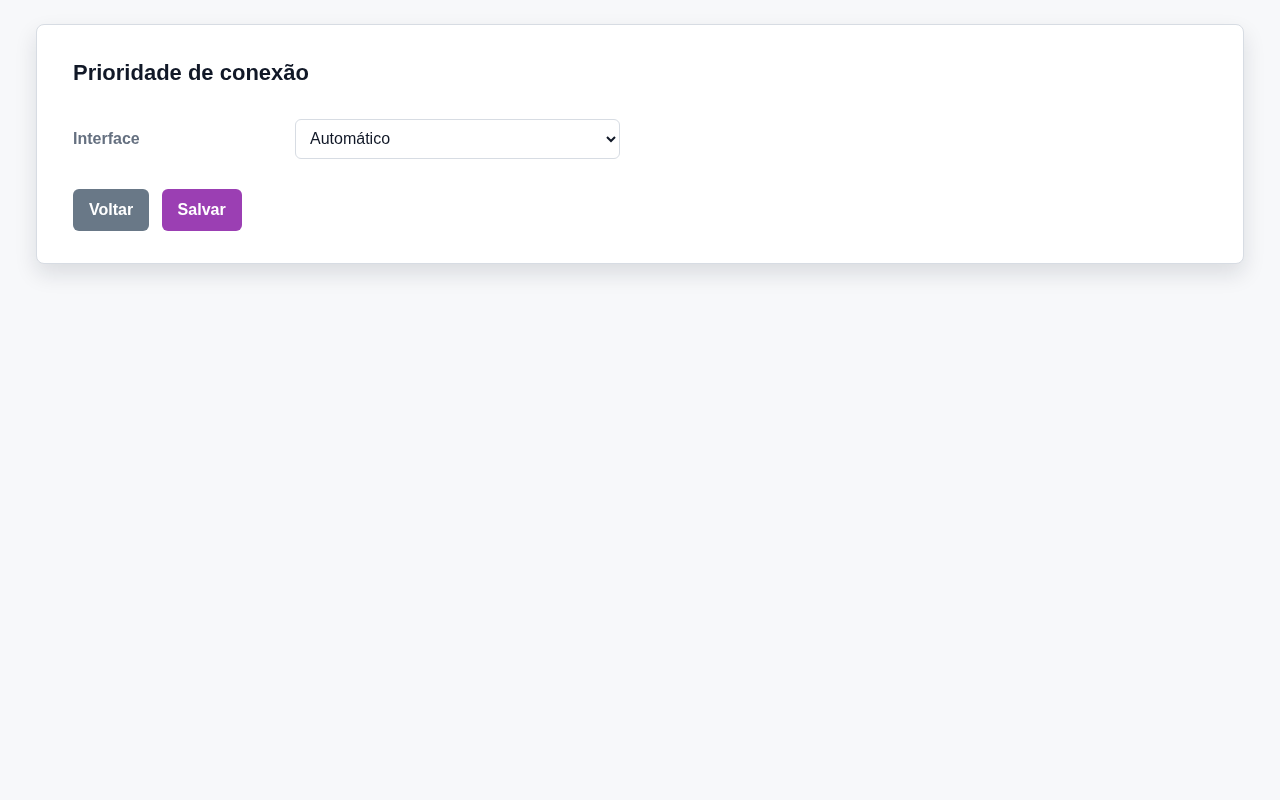
Defines which interface the gateway prefers to use. Failover between the two is always automatic; this option only sets the preference.
Interface: Automatic, Ethernet RJ45 or WiFi. Default: Automatic.
WiFi
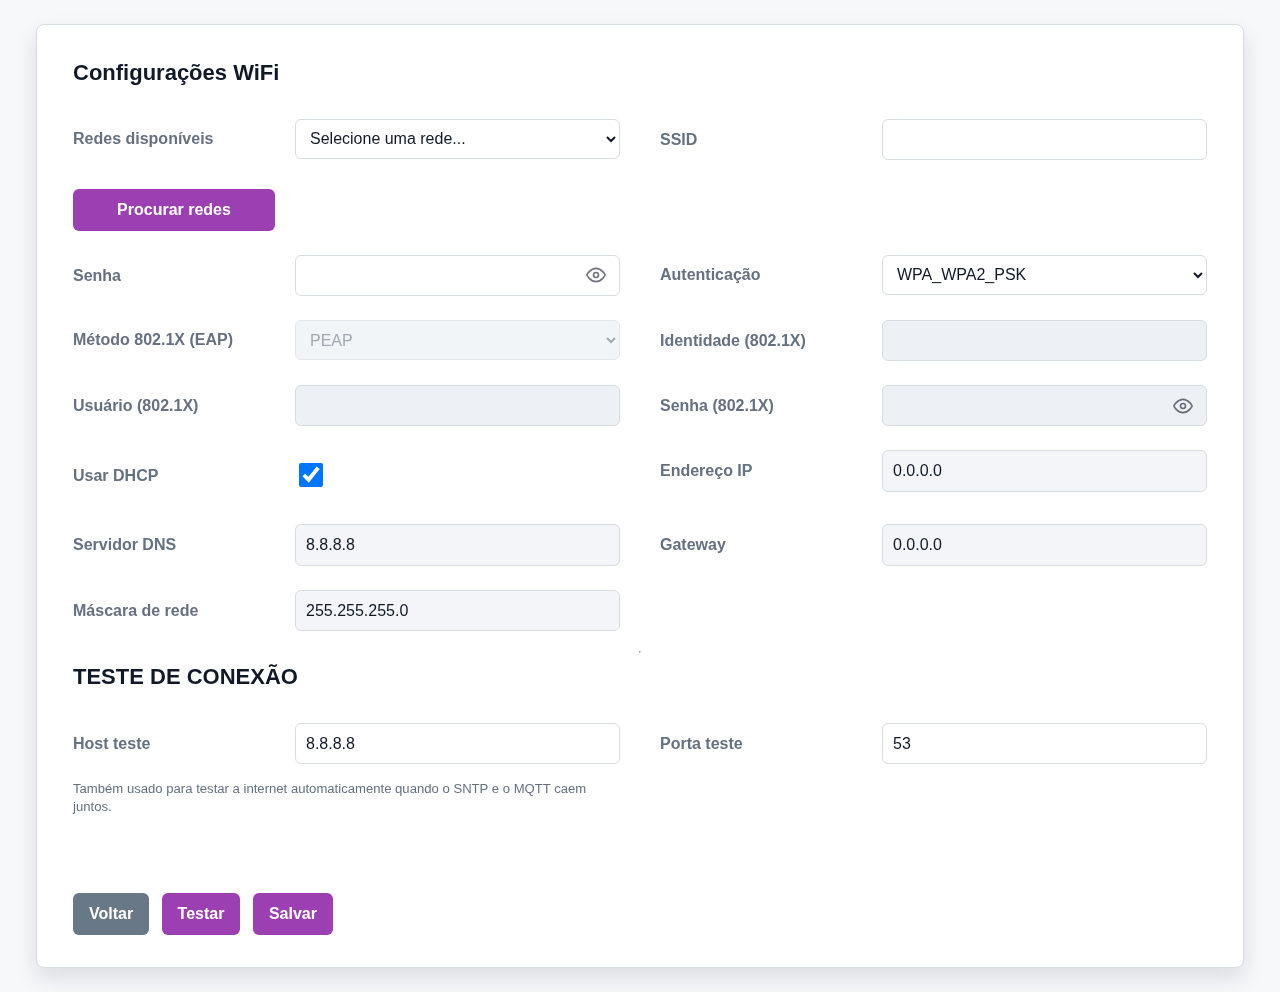
Configures the gateway's WiFi connection. The Scan networks button lists the available networks.
SSID: WiFi network name.
Password: network password.
Authentication: OPEN, WPA2_PSK, WPA_WPA2_PSK, WPA3_PSK, WPA2_WPA3_PSK or WPA2_ENTERPRISE.
In Enterprise (802.1X) mode the EAP fields are enabled — Method (PEAP or TTLS), Identity, User and 802.1X password; outside it, they appear locked.
Use DHCP: check for automatic IP; uncheck to enter static IP, DNS, Gateway and Netmask.
Connection test: enter Test host (default 8.8.8.8) and Test port (default 53; 1–65535) and click Test. The test shows progress in stages (connecting, obtaining IP, server OK) and, in Enterprise mode, also validates RADIUS. The page is locked during the test.
Testing WiFi may momentarily drop the portal's access point — the radio is a single one and follows the channel of the network being tested. The session recovers by itself.
Ethernet
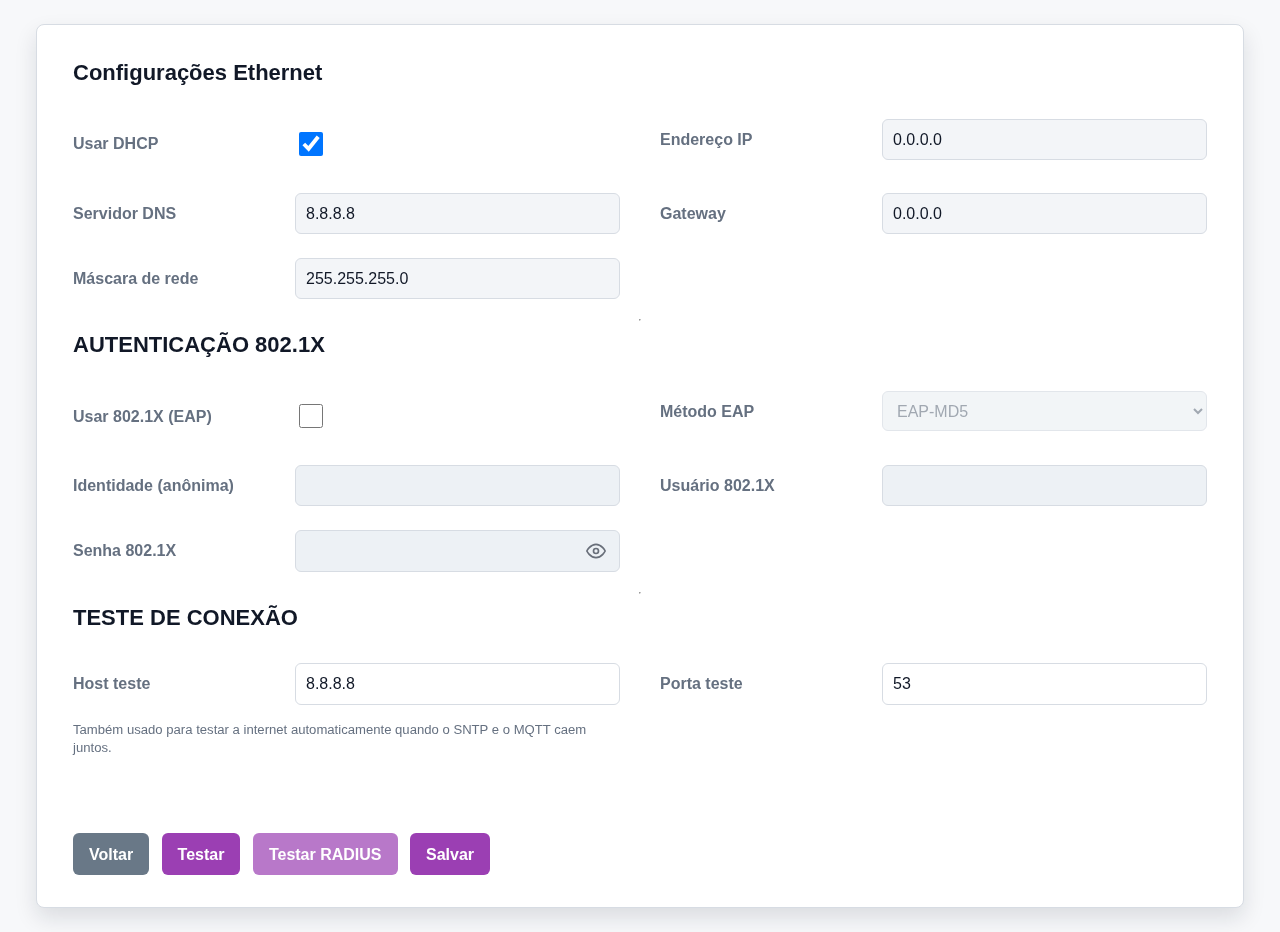
Configures the wired connection.
Use DHCP: check for automatic IP; uncheck for static IP, DNS, Gateway and Netmask.
802.1X authentication: enable Use 802.1X (EAP) for networks with an authenticated port. EAP method: EAP-MD5 or PEAP (MS-CHAPv2). Enter User and 802.1X password. The Identity (anonymous) applies only to PEAP (a tunneled method) — with EAP-MD5 the field is locked.
Connection test: same as WiFi (Test host / Test port), with a Test button and, where applicable, Test RADIUS.
MQTT — Server
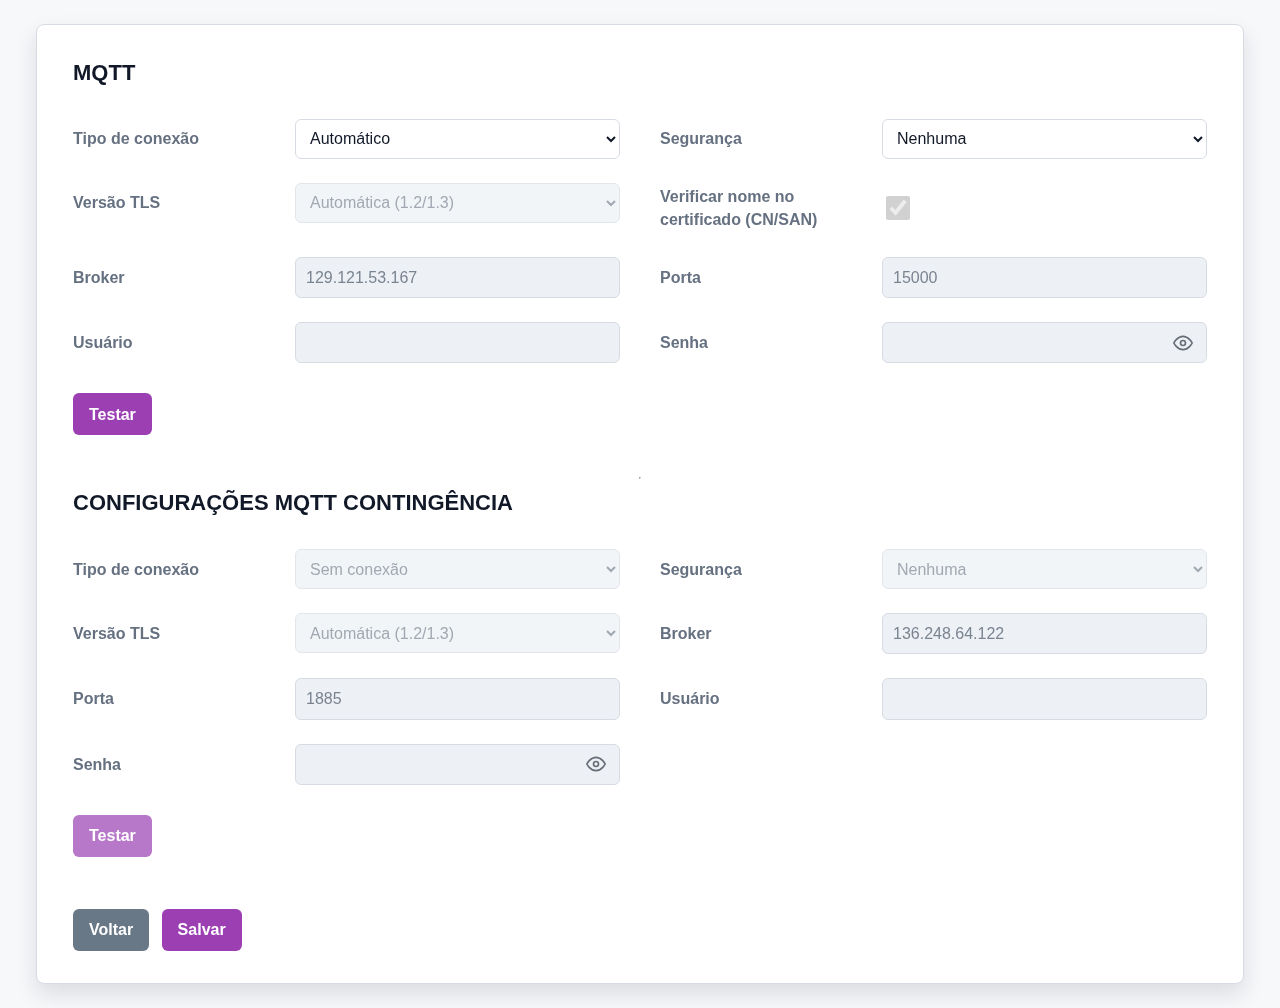
Defines the connection to the platform's MQTT broker.
Connection type:
| Option | What it does |
|---|---|
No connection | Broker off — the gateway does not connect |
Manual | Address, port and credentials editable below |
Automatic | Platform broker; the access user becomes the device MAC |
The Broker, Port, User and Password fields are only editable in Manual mode.
Security: None, TLS or mTLS (mutual). With TLS or mTLS the TLS version (Automatic 1.2/1.3, TLS 1.2 or TLS 1.3) and the Verify name in certificate (CN/SAN) option are enabled.
Broker: broker address. · Port: 1–65535; default 15000. · User / Password: access credentials.
Test: the Test button connects and publishes to a test topic, showing progress and the result in stages.
The MQTT contingency settings block (contingency broker) appears below, but is disabled in this version: the fields are read-only, locked, and cannot be edited or tested.
In an ION Guard installation, the broker address and the user/password pair are generated on the platform, on the antenna page — see ION Guard ▸ Antennas. The MQTT password is displayed only once: copy it before leaving the screen.
For security reasons, the broker and network configuration is done only through the portal — it is never changed remotely over MQTT. This prevents a remote command from locking the gateway out of the network.
MQTT — Telemetry
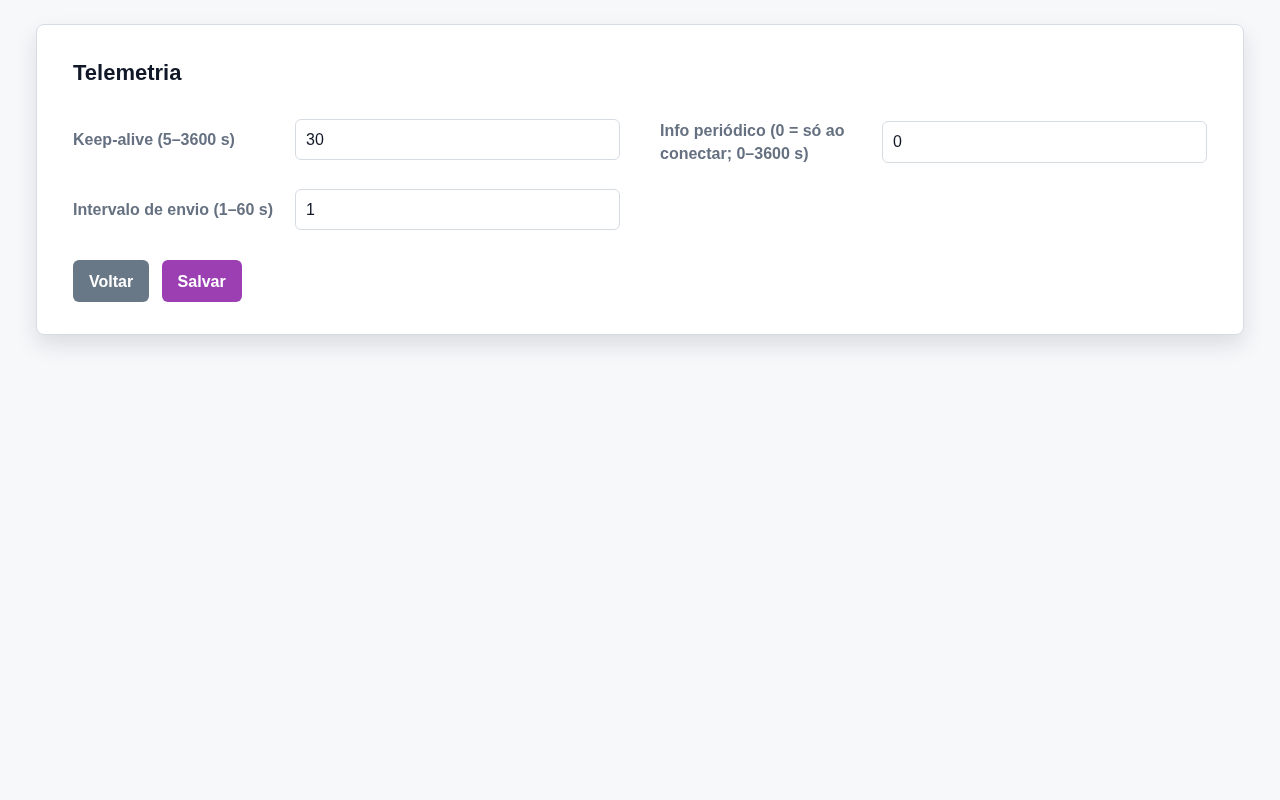
Keep-alive: interval of the "heartbeat" to the server (5–3600 s; default 30).
Periodic info: interval for sending the full board summary (0 = only on connect; 0–3600 s).
Send interval: interval for sending beacon signals (1–60 s; default 1).
Network tools
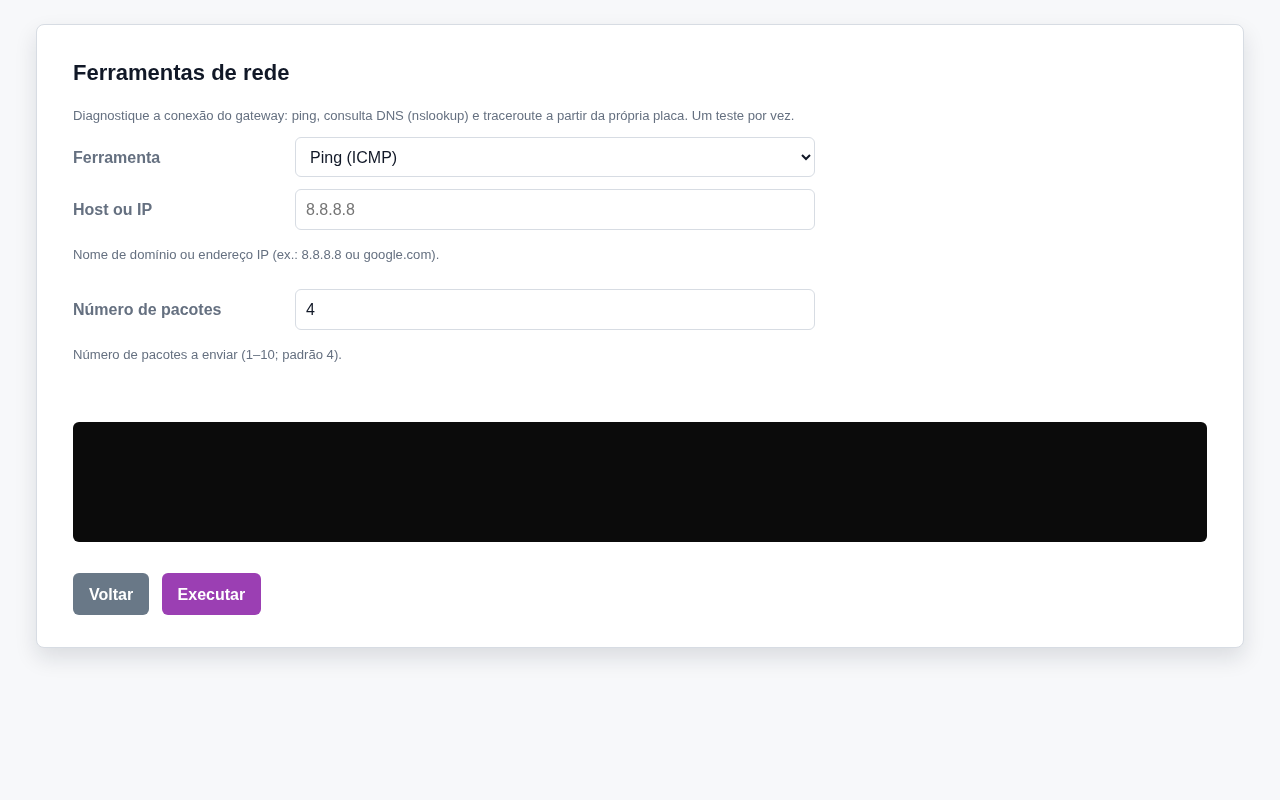
Diagnoses the connection from the board itself: ping (ICMP), DNS lookup (nslookup) and traceroute. One test at a time.
Host or IP: domain name or IP address (e.g., 8.8.8.8 or google.com).
Number of packets: for ping (1–10; default 4). · Maximum hops: for traceroute (1–30; default 30).
The result appears on the page itself. Invalid hosts are rejected before running.
Hardware
Gathers the time, inputs, outputs, Bluetooth scanning, filters, LED and alarms screens. The Power and Beacons pages require the integrator account or above — see Installation Commissioning.
Time
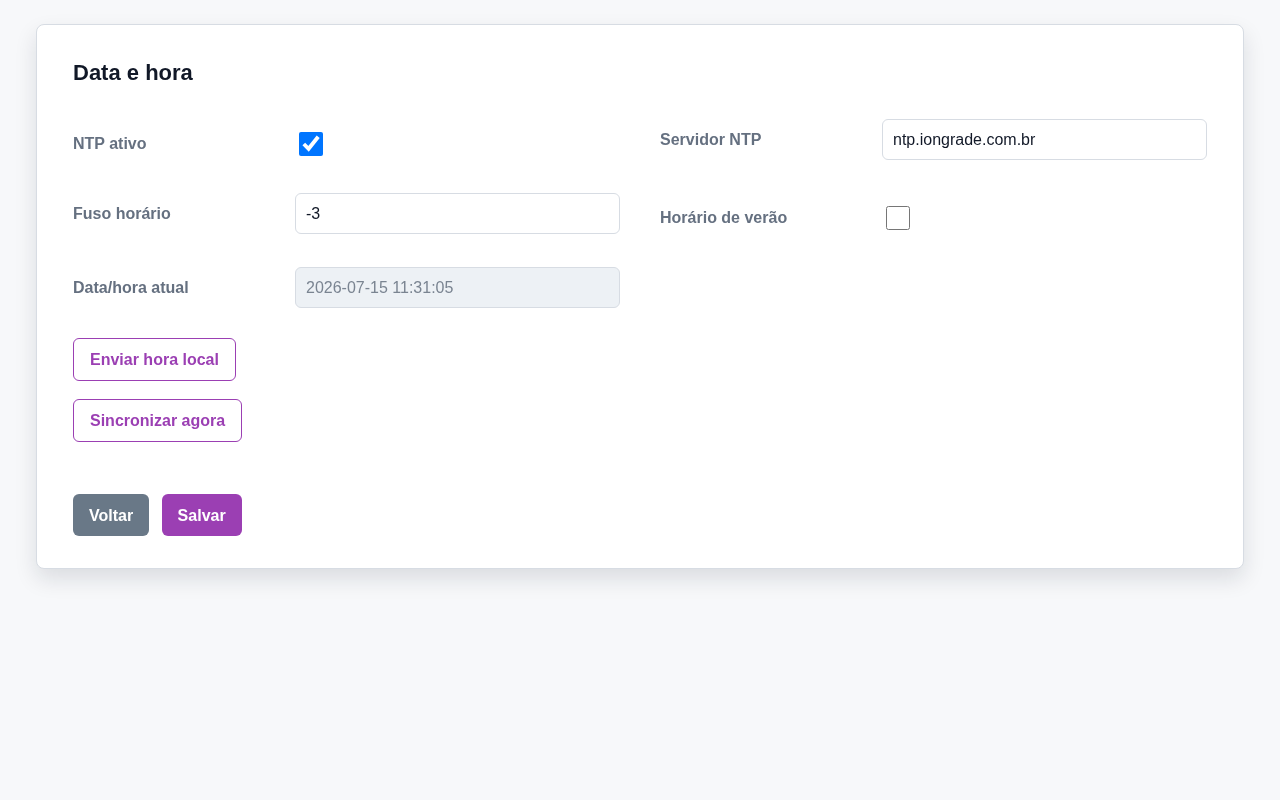
NTP enabled: turns on automatic time synchronization.
NTP server: server address (default ntp.iongrade.com.br).
Time zone: in hours (-12 to 14; default -3). · Daylight saving time: enables DST.
The Current date/time field shows the gateway clock; Send local time sets the clock from the computer's time and Sync now forces a query to the server.
Events go out with a zeroed timestamp (000000000000) until the first synchronization; afterwards they carry the real local time.
Inputs
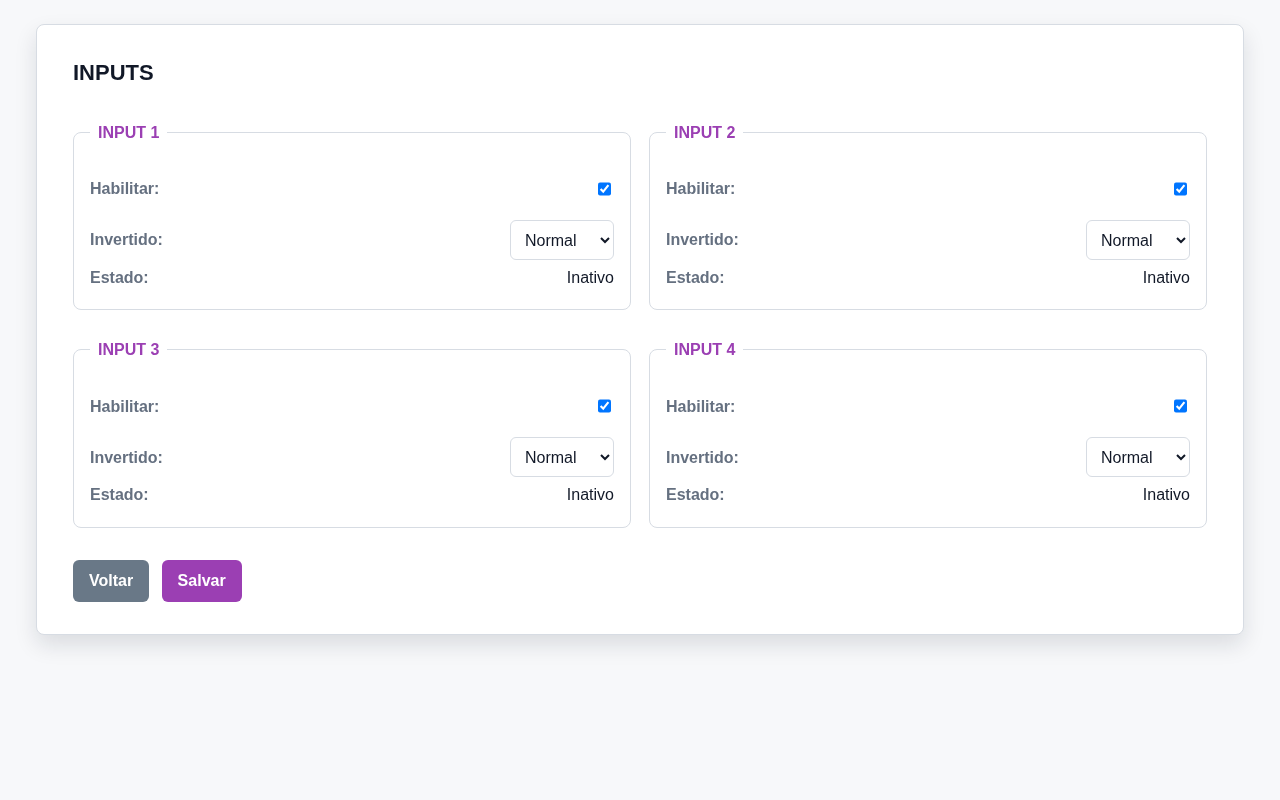
Configures the 4 physical inputs. Each input (INPUT 1 to 4) has:
Enable: turns the input on/off. · Inverted: Normal or Inverted (swaps the idle/active level). · State: shows live whether the input is Active or Inactive.
The role of each input (Panic, Tamper, Drive output) is set on the Alarms page.
Outputs
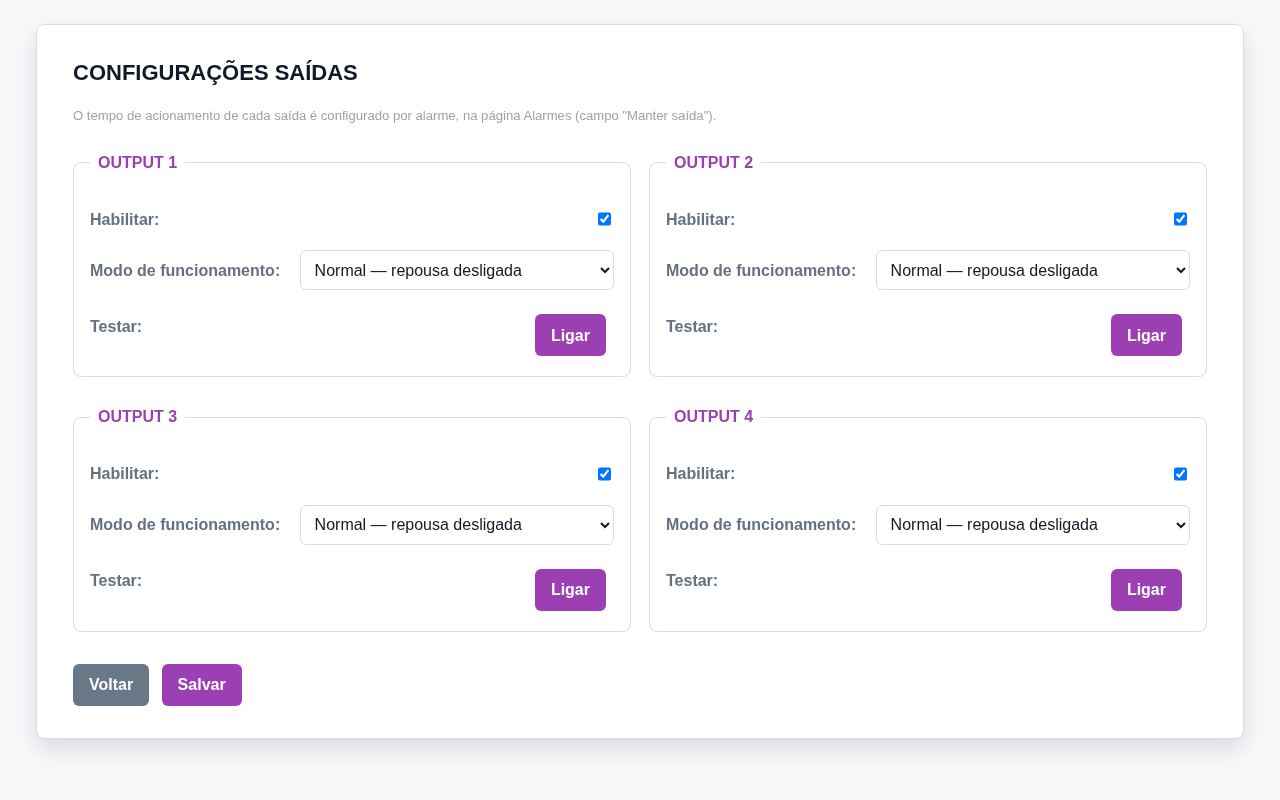
Configures the 4 physical outputs. Each output (OUTPUT 1 to 4) has:
Enable: turns the output on/off. · Operating mode: Normal (rests off) or Inverted (rests on). · Test: On/Off button to test it manually.
The activation time of each output is configured per alarm, on the Alarms page (Hold output field).
Bluetooth (scanning)
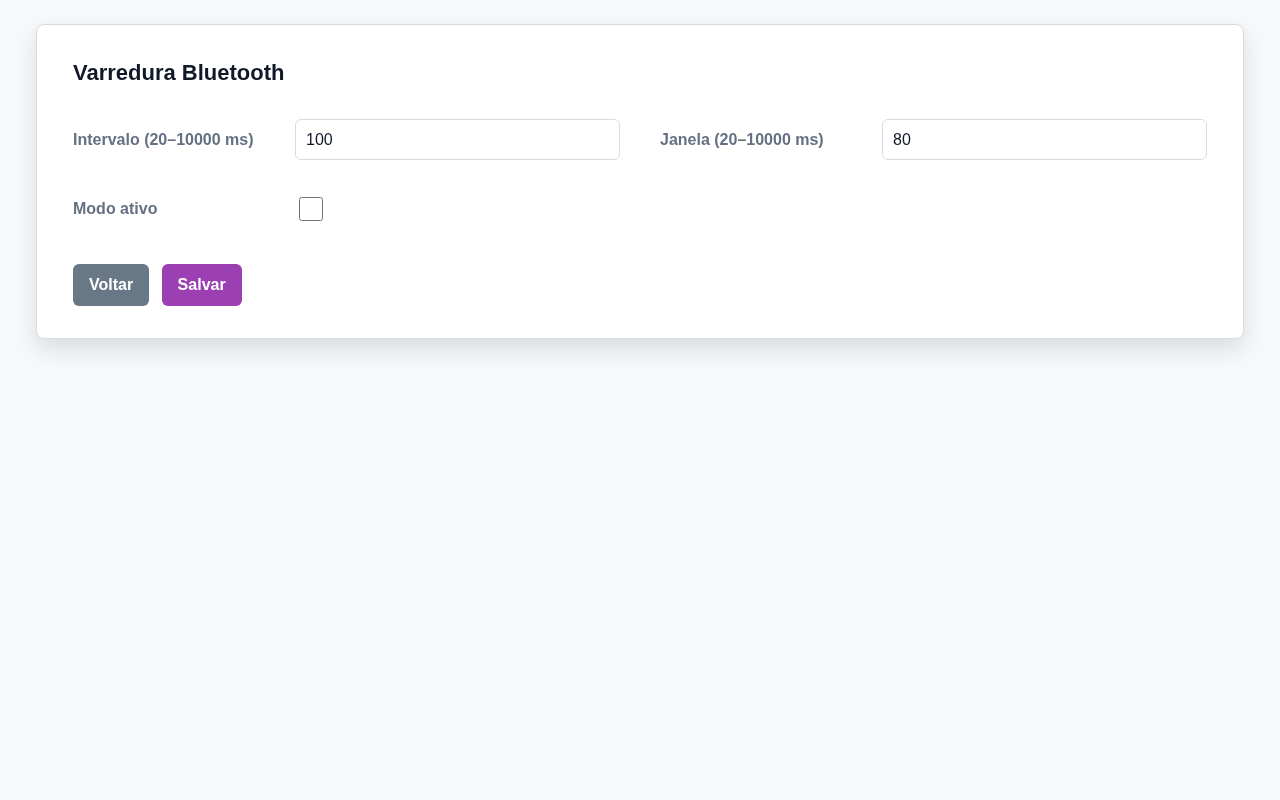
Interval: the period of each scan (20–10000 ms; default 100).
Window: listening time within each interval (20–10000 ms; default 80).
Active mode: active scanning — the gateway requests additional information from the beacons during the scan.
Filters and publishing
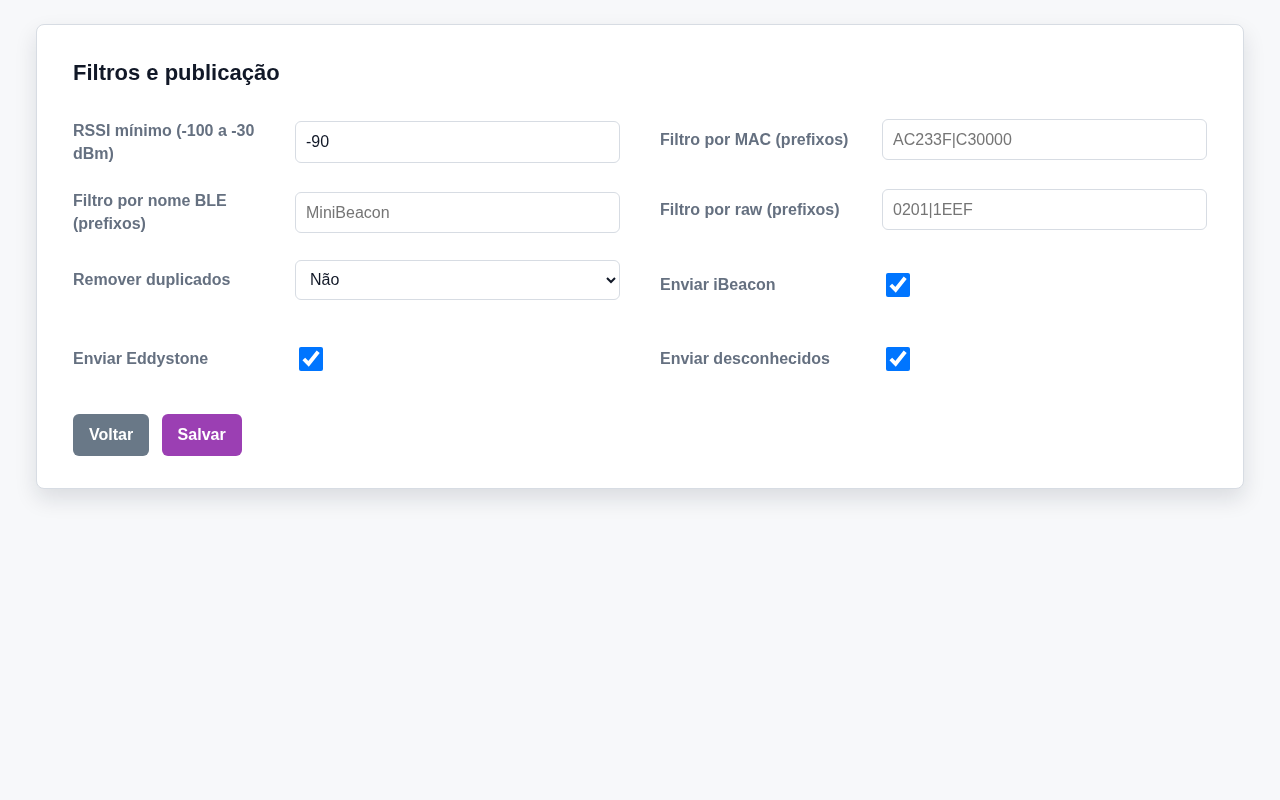
Minimum RSSI: discards signals weaker than the limit (-100 to -30 dBm; default -90).
MAC filter (prefixes): only lets through MACs starting with one of the given prefixes (up to 8, separated by |; empty lets everything through).
BLE name filter (prefixes): the same, by the beginning of the advertised BLE name.
Raw filter (prefixes): the same, by the beginning of the raw signal data.
Remove duplicates: criterion for publishing a beacon's repeated signals only once within the same cycle — No, by MAC, by MAC+type or by MAC+raw.
Send iBeacon / Eddystone / unknown: enables/disables publishing of each category.
LED
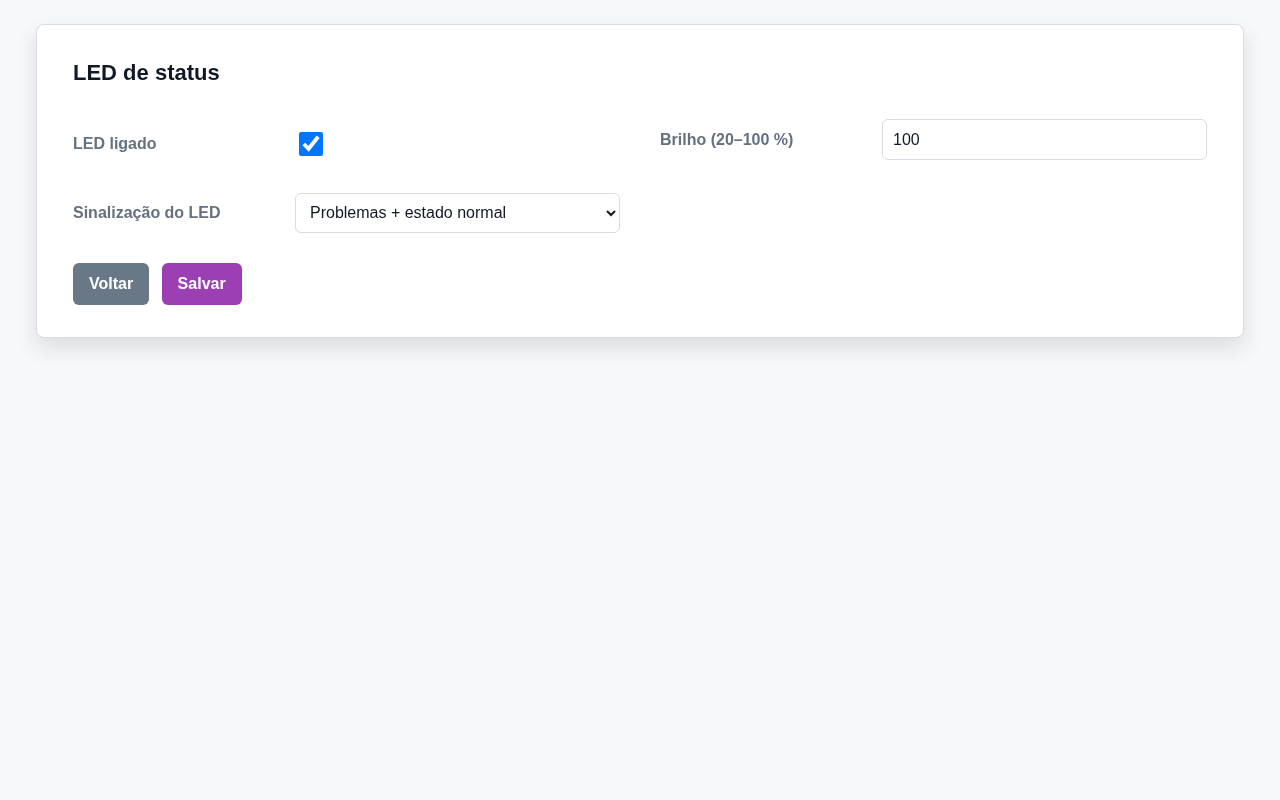
LED on: turns the status LED on/off. Unchecking it switches the LED off completely during operation, including the problem blink codes — only the boot color self-test still runs, to confirm the equipment powered up.
Brightness: 20–100 %; default 100. Brightness only reduces intensity; it never switches the LED off.
LED signaling: Problems + normal state or Problems only.
Alarms
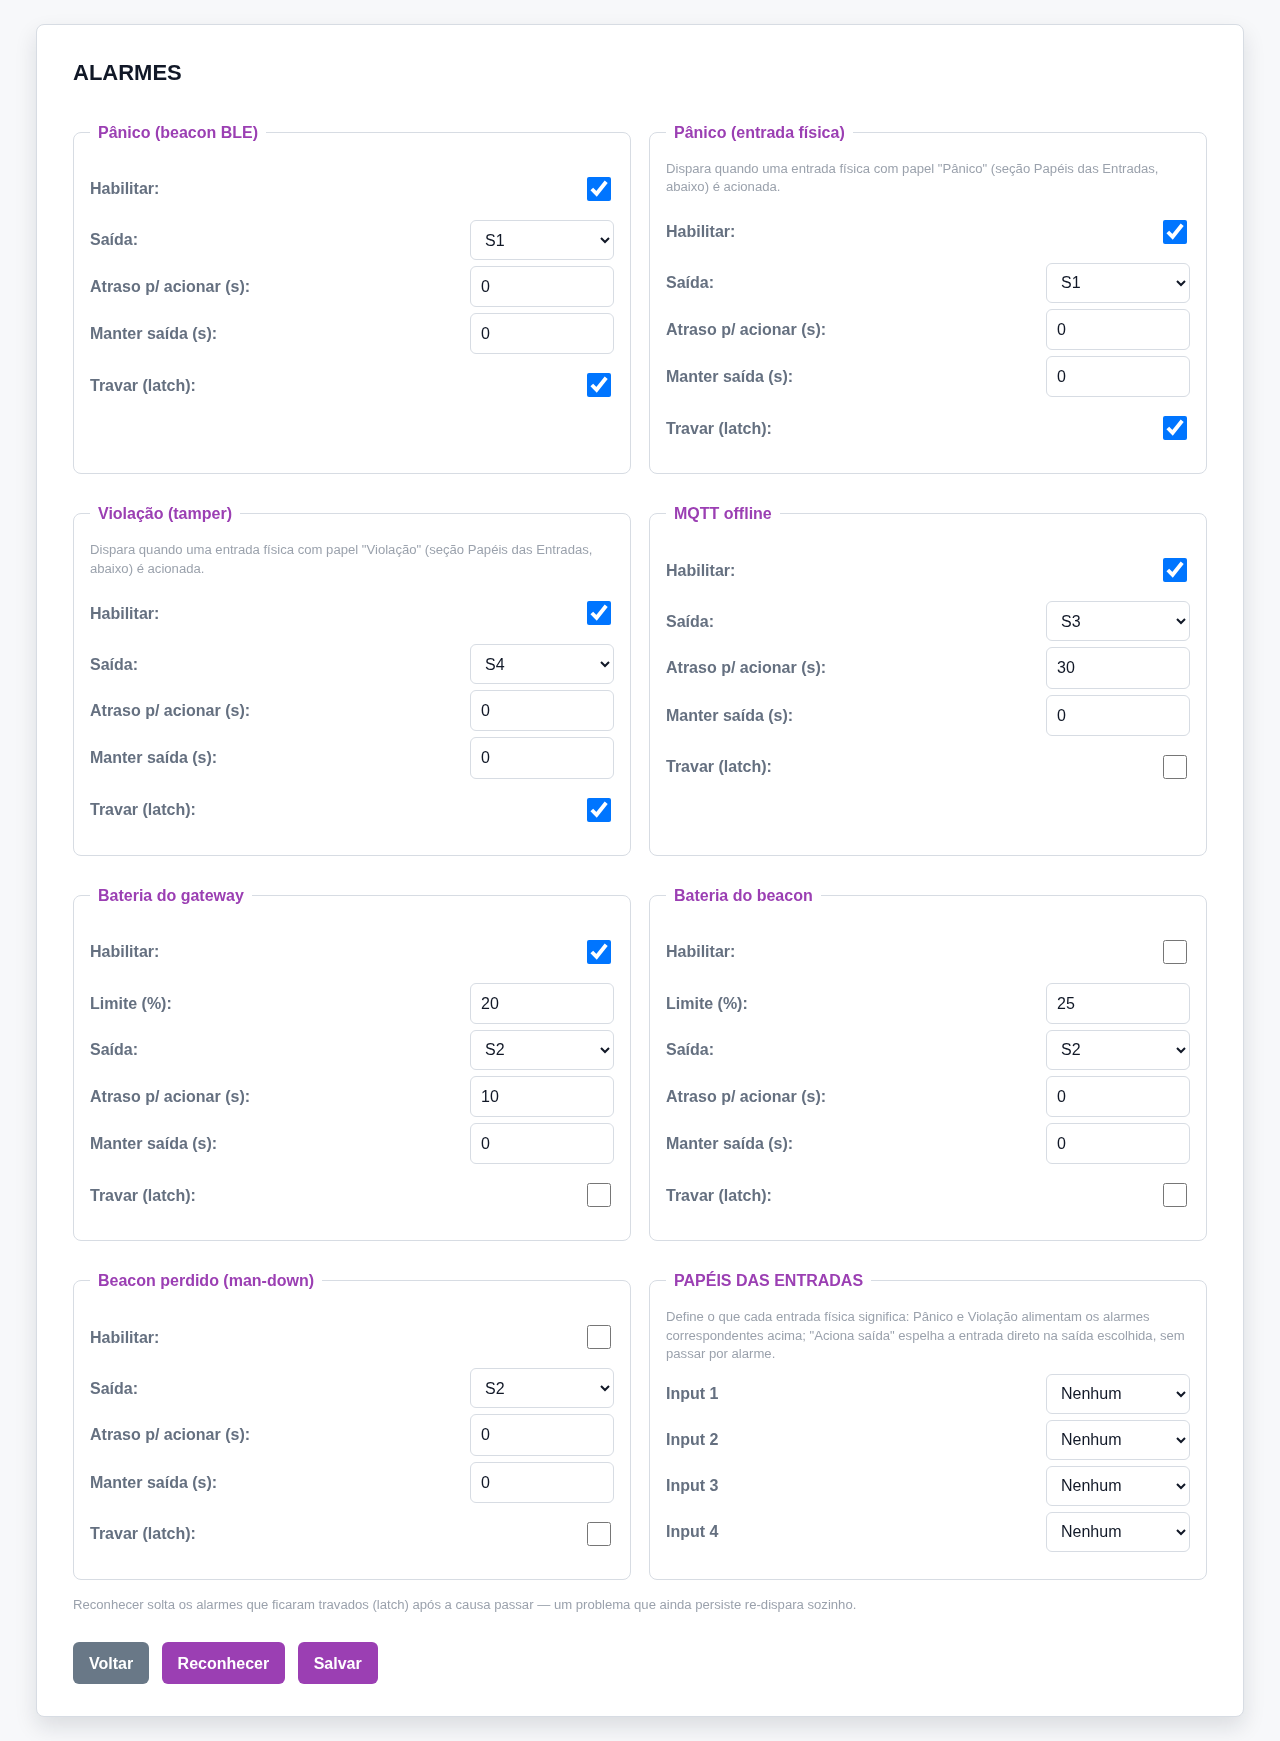
Configures the alarm engine. There is one card per origin: Panic (BLE beacon), Panic (physical input), Tamper, MQTT offline, Gateway battery, Beacon battery and Lost beacon (man-down). Each card has:
Enable: turns the alarm on/off.
Output: the driven output (None, S1, S2, S3 or S4).
Trigger delay: delay before triggering, in seconds.
Hold output: how long the output stays driven (pulse), in seconds; 0 = no pulse (the output follows the cause or the Latch). Greater than zero, the pulse wins: it switches off after N seconds even with Latch checked.
Latch: latches the output until an Acknowledge — valid only with Hold output = 0 (with Hold output > 0 the page disables the field).
Threshold (%): for the battery alarms, the percentage threshold.
Input roles: defines what each physical input means — None, Panic, Tamper or Drive output (the latter mirrors the input directly onto the chosen Mirrored output, bypassing the alarm engine).
The Acknowledge button releases alarms left latched after the cause has cleared.
Info
Read-only page with the gateway's complete state, in four tabs.
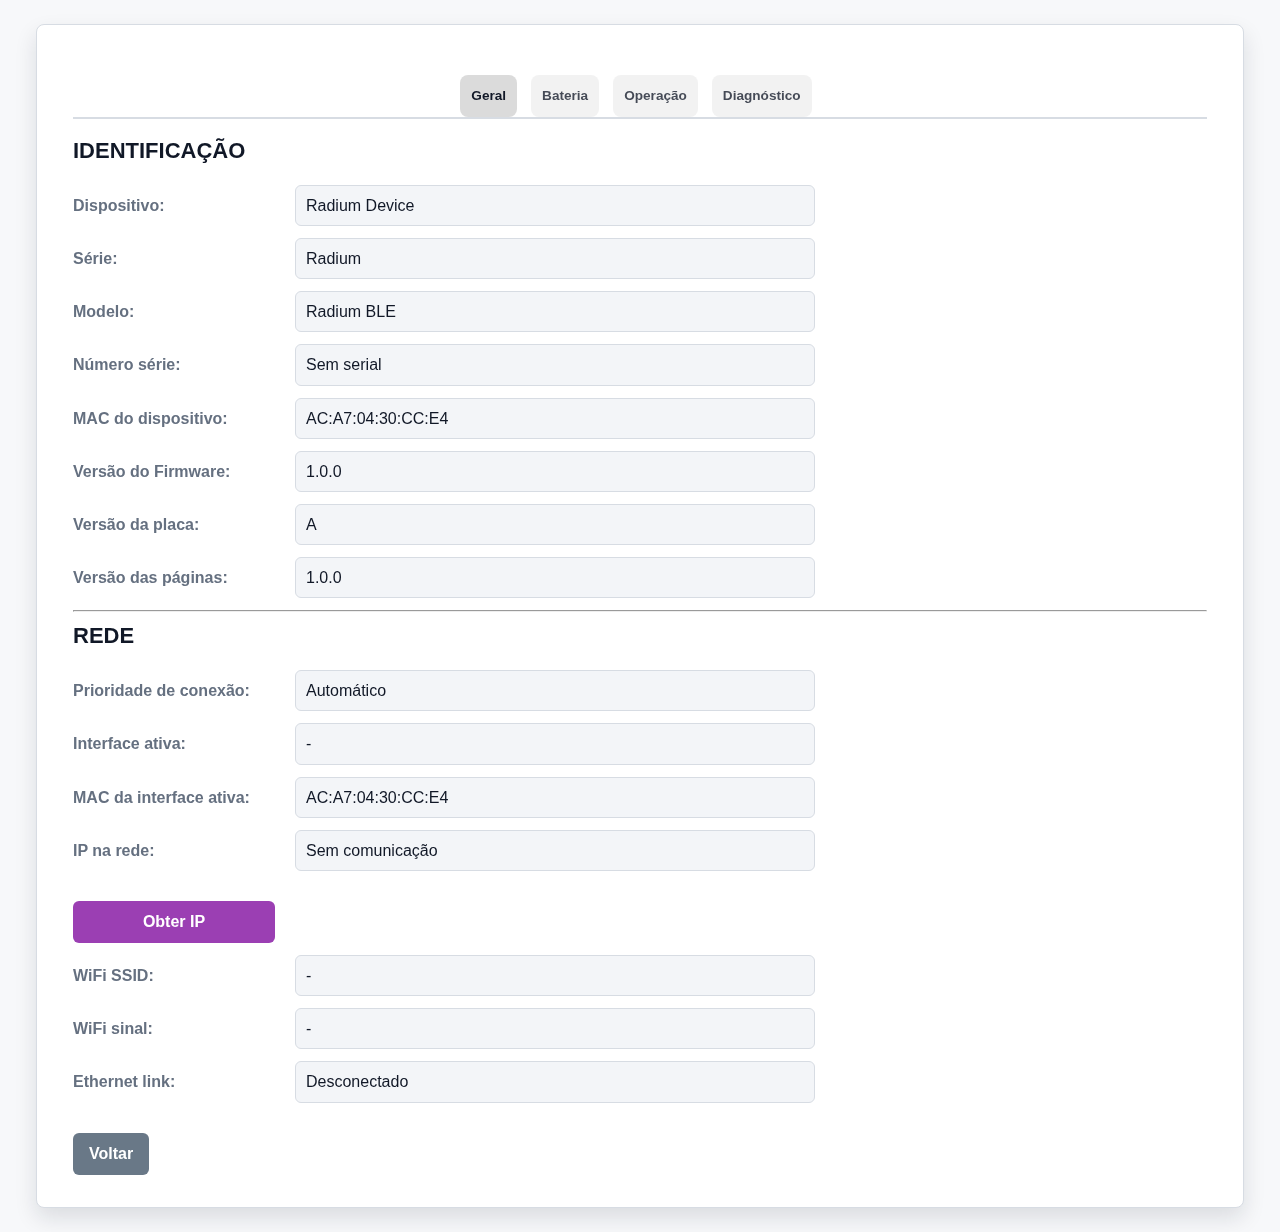
General tab — identification (Device, Series, Model, Serial number, Device MAC, Firmware version, Board version and Pages version) and network (connection priority, active interface, active interface MAC, IP on the network, WiFi SSID and signal, Ethernet link, with an Obtain IP button).
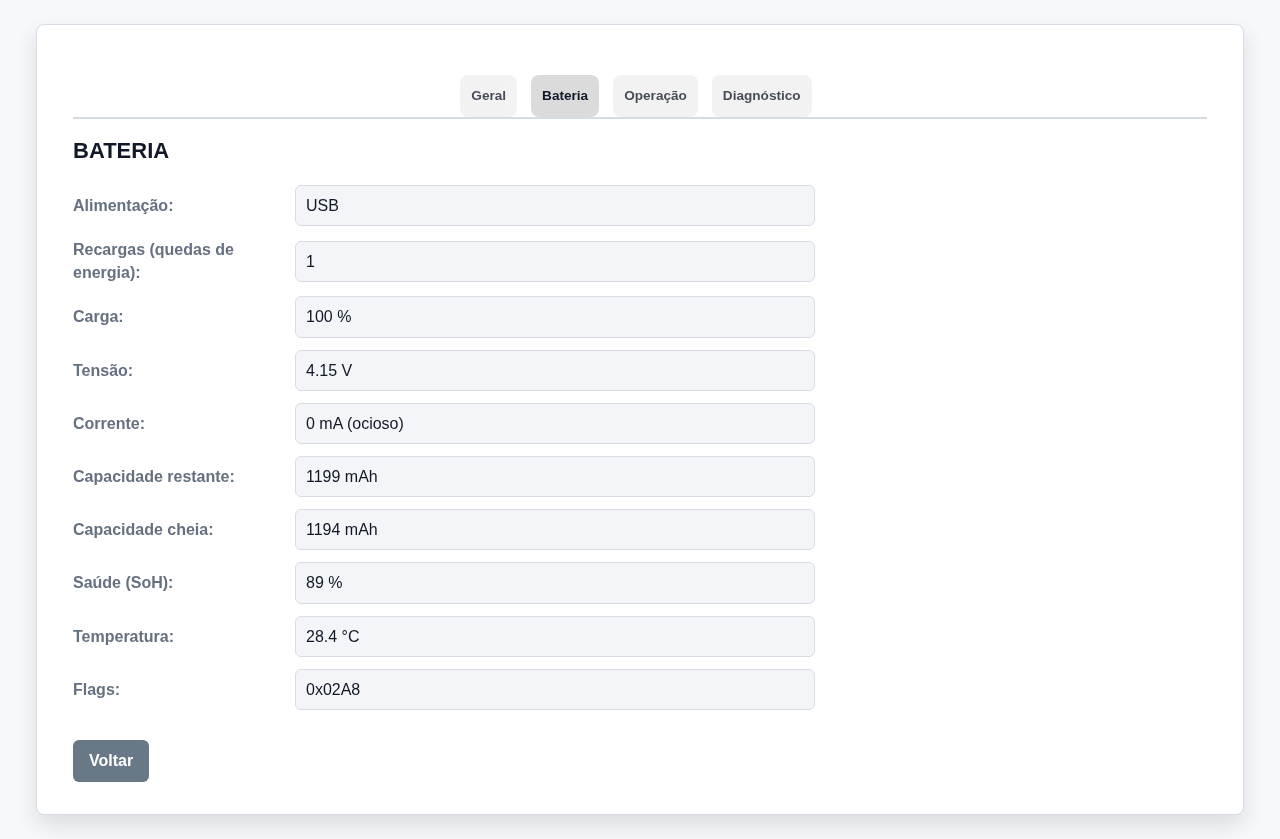
Battery tab — charge, voltage, current (with the charging / discharging / idle state), remaining and full capacity, health (SoH), temperature, technical gauge flags, power source (USB / PoE / Battery) and recharges (power outages).
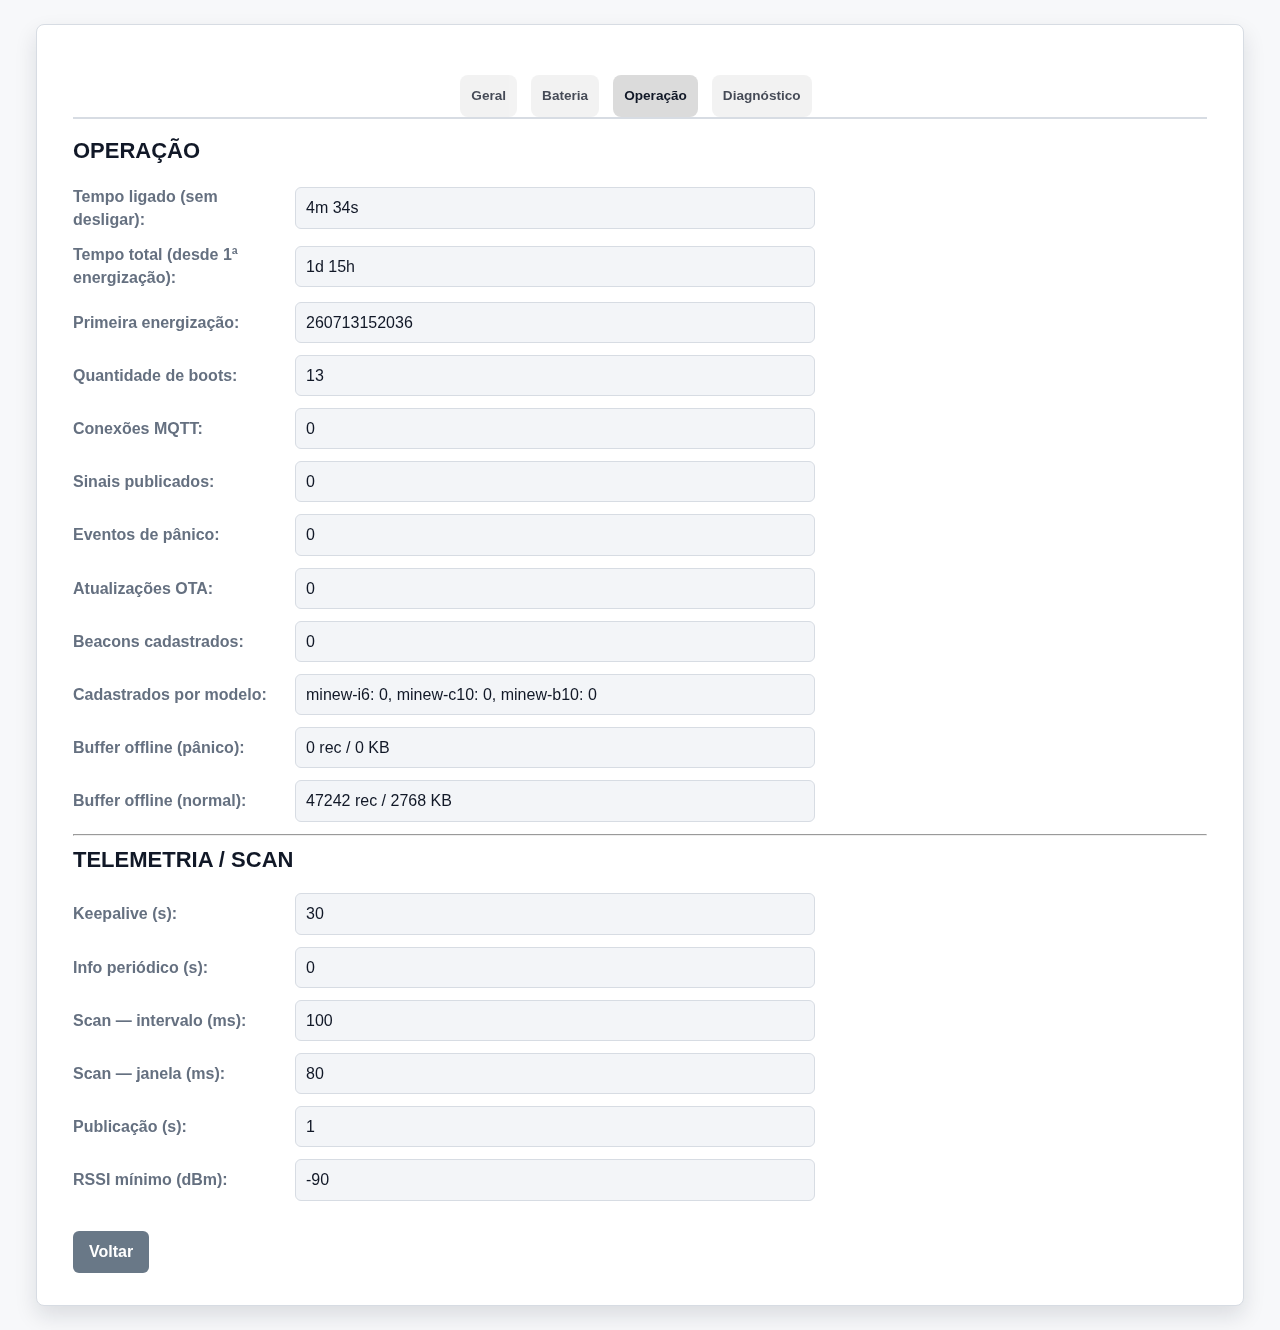
Operation tab — uptime, total time since first power-up, number of boots, MQTT connections, published signals, panic events, OTA updates, registered beacons (and per model), offline buffer (normal and panic) and the telemetry/scan parameters in use.
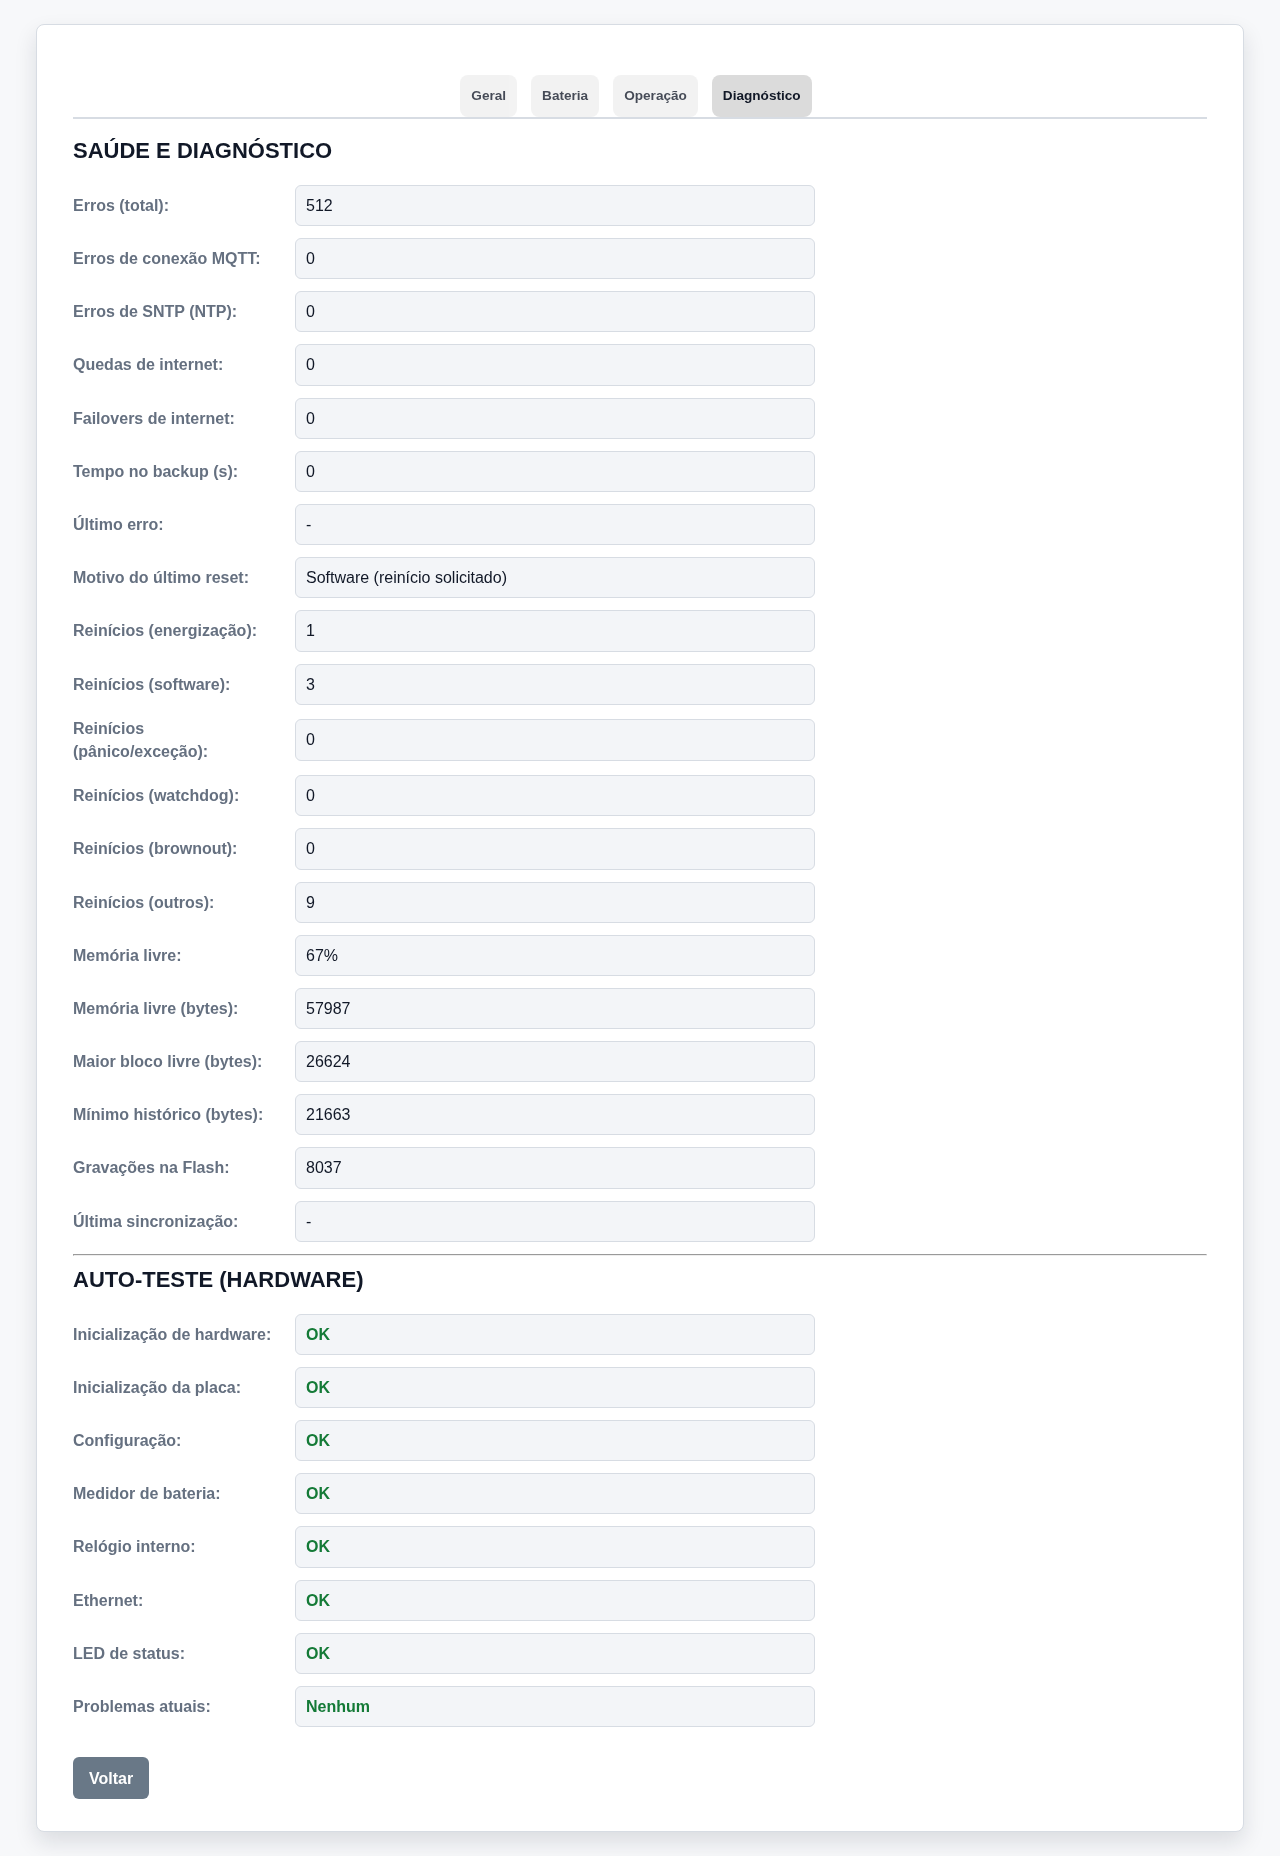
Diagnostics tab — hardware health and self-test item by item (Hardware initialization, Board initialization, Configuration, Battery gauge, Internal clock, Ethernet and Status LED), current problems, connection errors (MQTT, NTP and internet drops), last reset reason, restart count by cause, free memory and last synchronization.
Logs
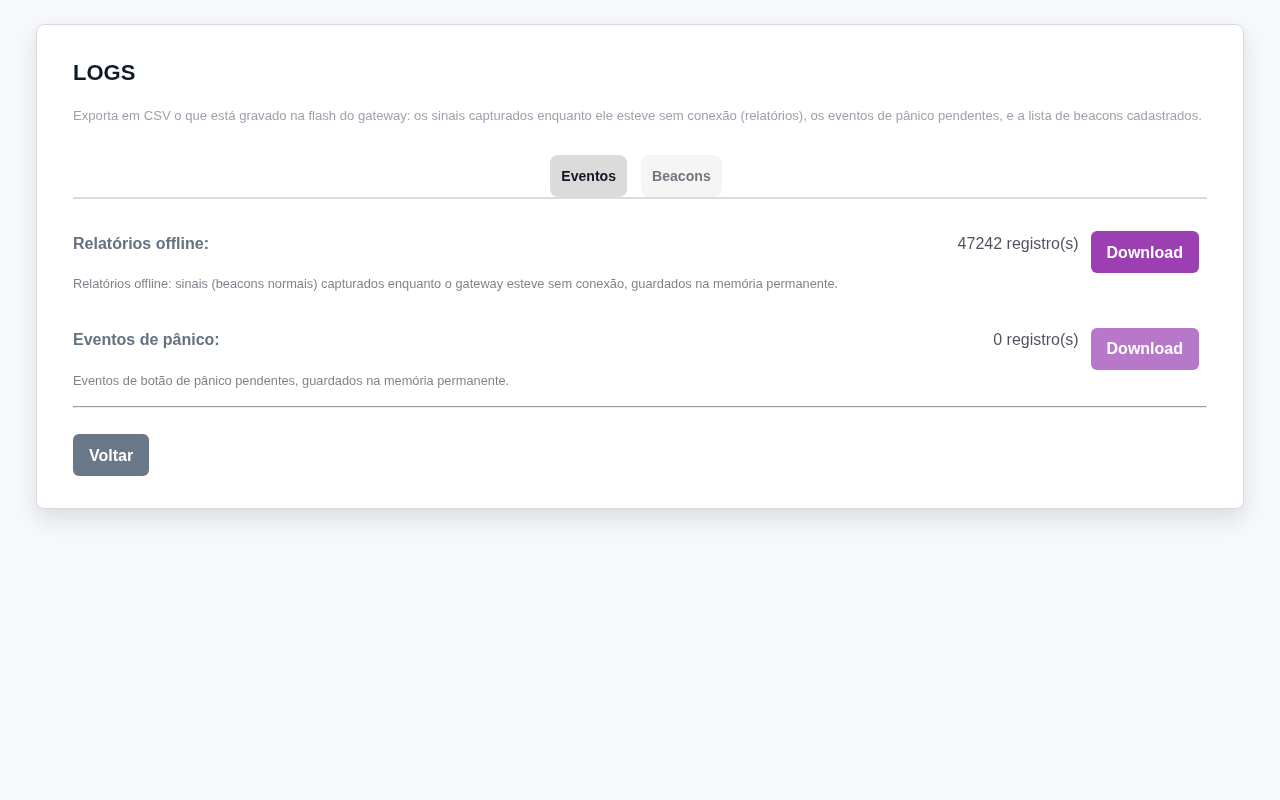
Exports what is stored in permanent memory as CSV, in two tabs:
- Events — the signals captured while offline and the pending panic events;
- Beacons — the list of registered beacons.
Each tab shows the number of records and the Download CSV button (disabled when there are no records).
There is no date filter and no deletion through the portal — the records are drained automatically to the platform when the connection returns.
Downloading the beacon list requires an account with additional permissions (the page disables the button and shows a notice when the account lacks that access). Offline reports and panic events can be downloaded by any account.
Upgrade (OTA update)
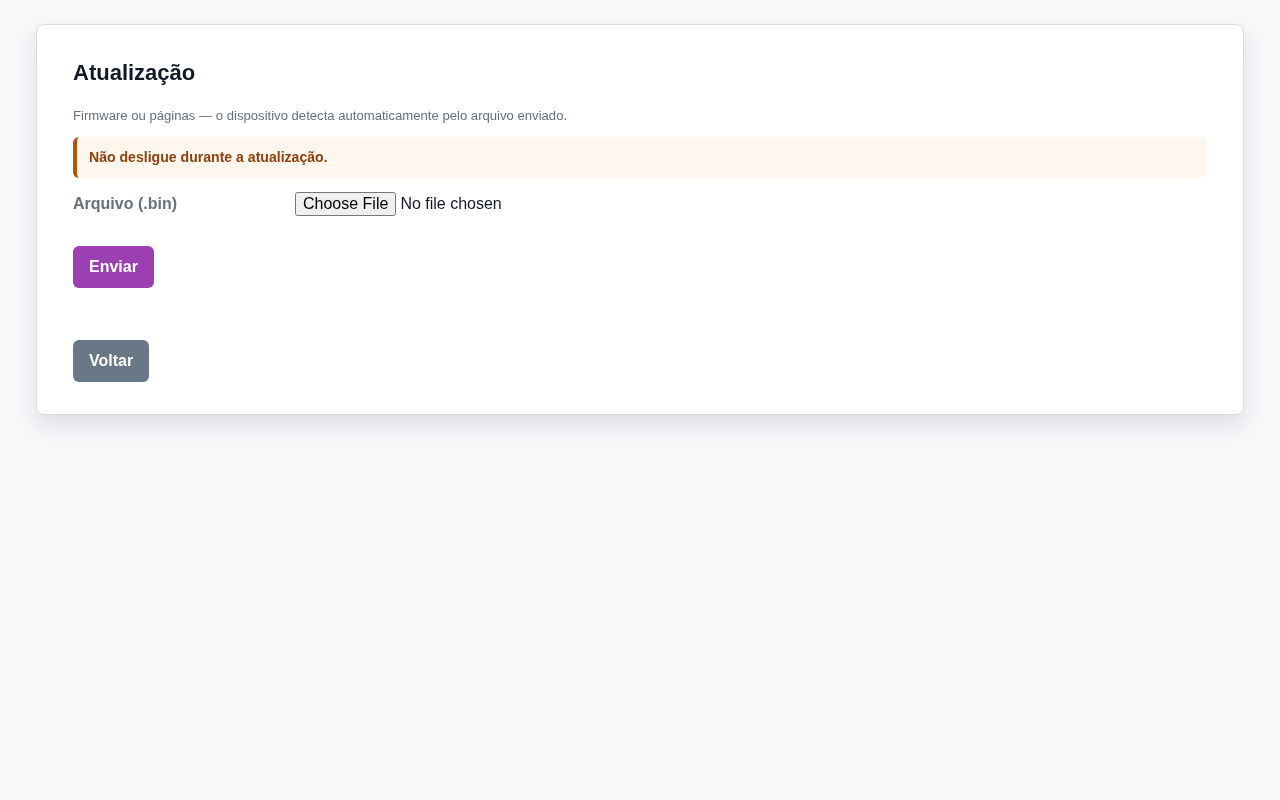
Updates the firmware or the portal pages. The device automatically detects which one it is from the uploaded file — there is no selector.
Select the .bin file and click Send. Progress is shown as a percentage; at the end, the gateway restarts on the new version. During an upload through the portal the LED stays white (configuration mode); in a remote update triggered by the platform, with the gateway in operation, the LED turns magenta and BLE scanning stays active.
Interrupting power while writing may leave the equipment inoperable.
The application firmware uses two banks (A/B), which allows rolling back to the previous version if the new one fails. Remote updates happen only over HTTPS, with mandatory integrity checking of the file and verification of the image's digital signature.
Reboot
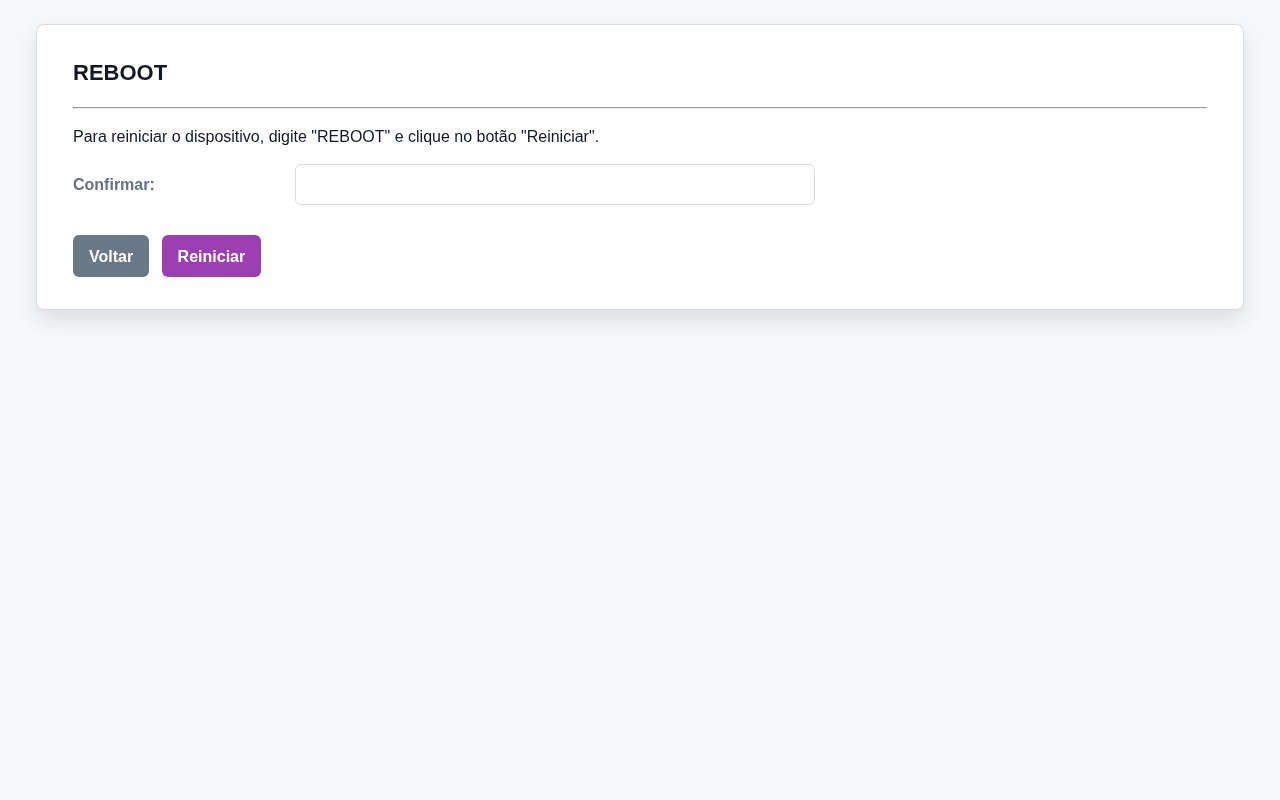
Restarts the device. To confirm, type REBOOT and click Restart. Counters persist and the restart is recorded as a software reset.
Next Steps
- Installation Commissioning — power profile and beacon registration
- Installation Manual — electrical connections, magnetic sensor and LED
- Overview — architecture and technical specifications