Areas
Areas represent the physical spaces controlled by the ACCELERO system. They are the places where access control is applied — rooms, floors, parking lots, outdoor areas, etc.
Between one area and another, there must be an access controller performing the physical control of passage so that the system can correctly apply the security policies.
Navigation path: Settings > Areas
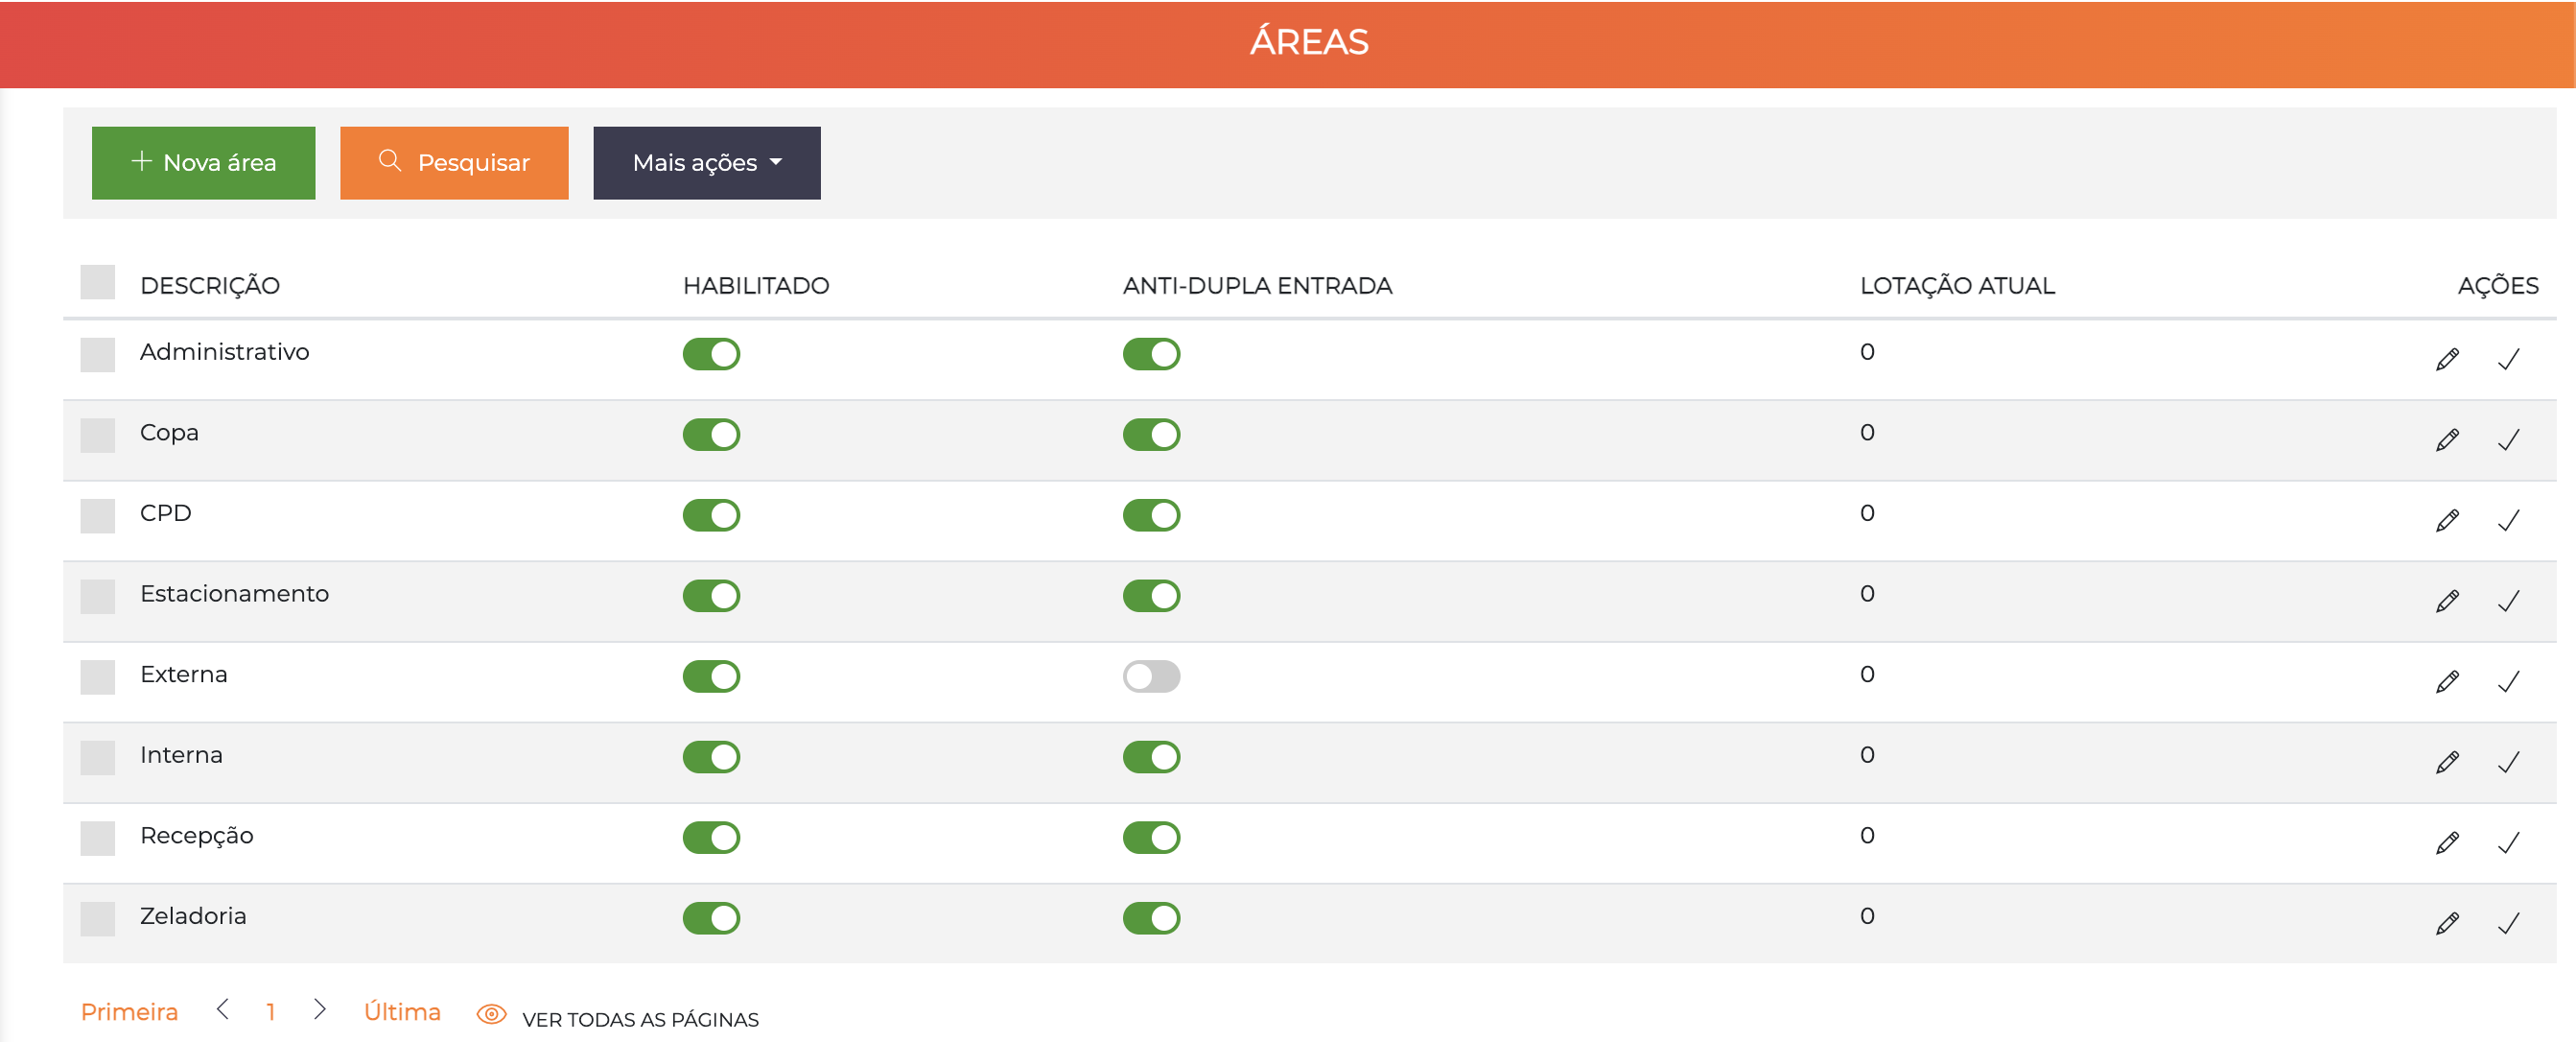
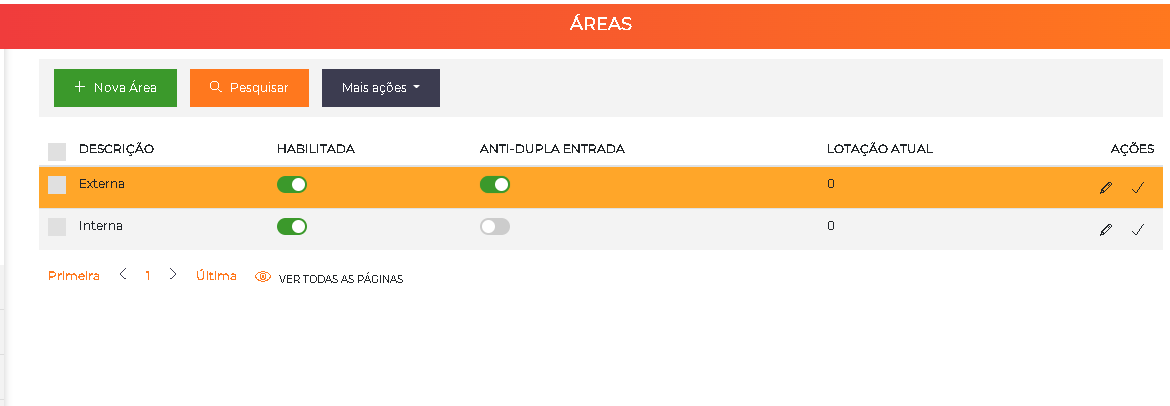
The list displays all registered areas with the columns Description, Enabled, Anti-passback, Current occupancy and Actions.
Concept
Areas are a fundamental part of the Access Policy. They define where access is controlled, while Categories and Time ranges define who and when.
A person can only access an area if they have a category (or individual permission) that authorizes access to that area during the corresponding time range.
How to Create an Area
Creating areas is the starting point for access control: it is from them that you assign channels to controllers and build the permission rules.
- Go to
Settings > Areas. - Click Add.
- Fill in the Description field with the area name.
- Keep the Enabled option active.
- If needed, enable Anti-passback right at creation.
- Click Save.
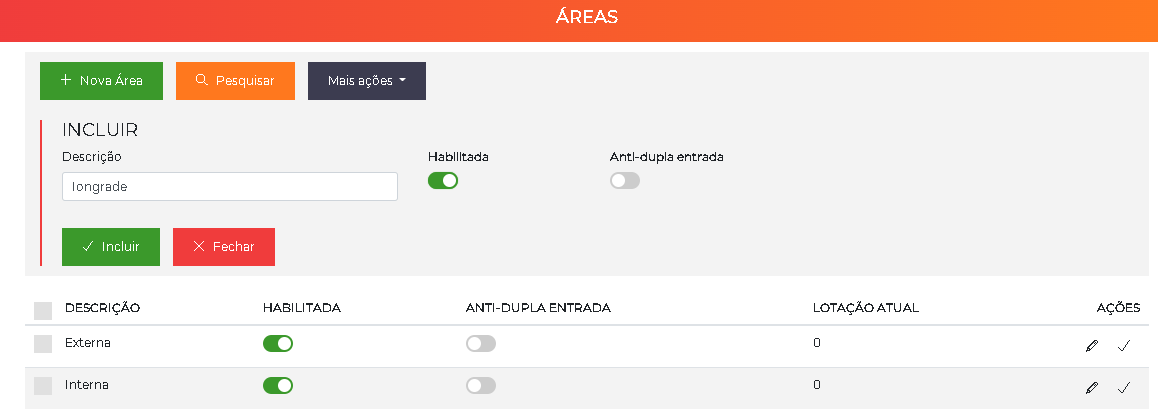
The newly created area now appears in the list. After creation, you can edit it to configure additional features such as occupancy control, anti-passback and timed re-entry — some of them dependent on licensed modules.
Where the Area Is Used
Once created, the area is referenced at two main points:
-
Categories (
Settings > Categories): when editing a category, open the Access areas tab and associate the area with a time range. This is what defines who accesses where and when.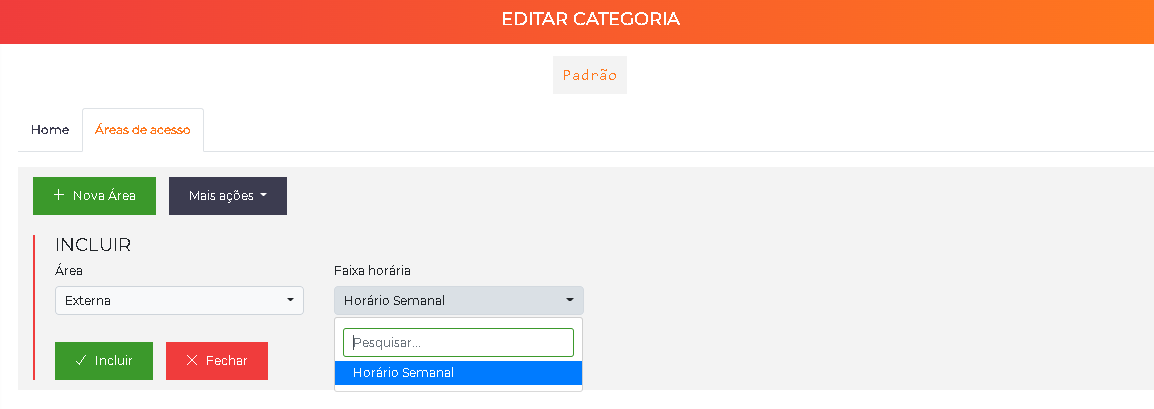
-
Controllers (
Settings > Controllers): when editing a controller, open the Channels tab and create the channels according to the source and destination areas. Each channel corresponds to a reader on the controller board.
See Categories and Controllers for the details of each configuration.
Edit Screen
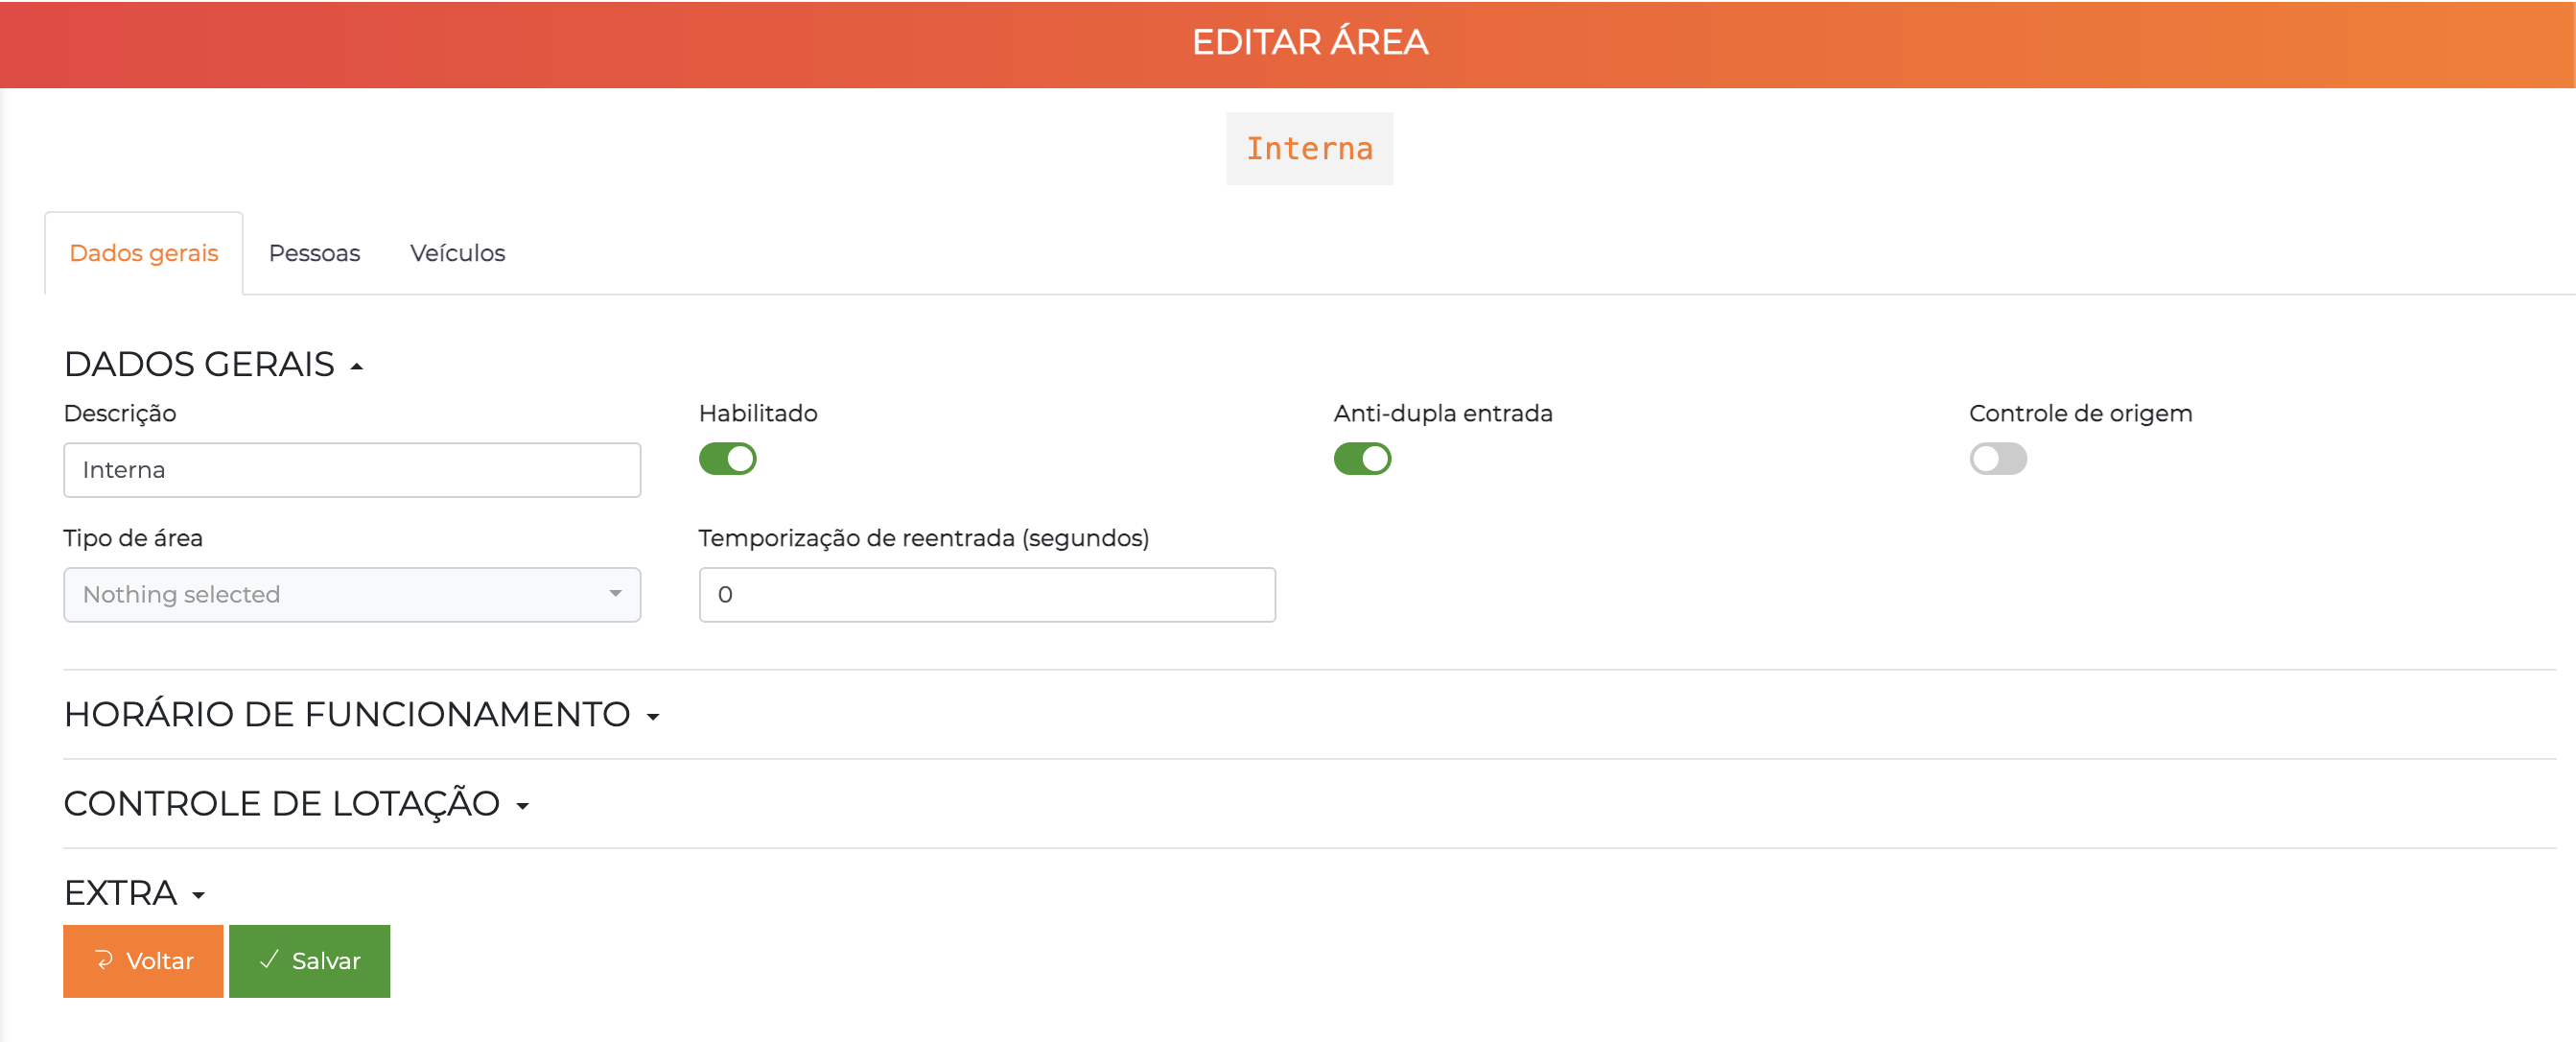
The area edit screen is organized into 3 tabs: General data, People and Vehicles.
Tab: General Data
When you click the pencil of an area in the list, the edit screen is displayed:
Section: General Data
| Field | Description |
|---|---|
| Description | Name of the area that will be shown in all logs and reports |
| Enabled | If disabled, all access to the area will be automatically denied |
| Anti-passback | Enables anti-passback control for the area |
| Source control | Enables verification of the source area before authorizing access |
| Area type | Area classification (dropdown) |
| Re-entry timing (seconds) | Minimum time between consecutive accesses to the same area. Enter 0 to disable |
When enabled, the system validates whether the person is in a source area different from the one they are heading to before authorizing access. It prevents a person from entering the same area twice without having exited first — useful, for example, to prevent a borrowed card from granting access to a "tailgater" at a turnstile.
Enable Anti-passback on the Area
Enabling anti-passback control starts with the area:
- Define which areas need the control. Places with button-based exit or that allow more than one person to pass without registering access are not compatible with the feature.
- Go to
Settings > Areasand edit the desired area. - Enable the Anti-passback toggle.
- Click Save.
Enabling the toggle on the area is only the first part. For the control to work, you must also enable the corresponding flag on the categories that should be controlled. See Categories.
Timed Re-entry on the Area
Timed re-entry blocks new accesses by the same person to an area for a defined period, preventing consecutive passages in a short interval.
- Go to
Settings > Areasand edit the desired area. - In the Re-entry timing (seconds) field, enter the time in seconds during which the rule will be applied.
- To disable the rule, enter
0. - Click Save.
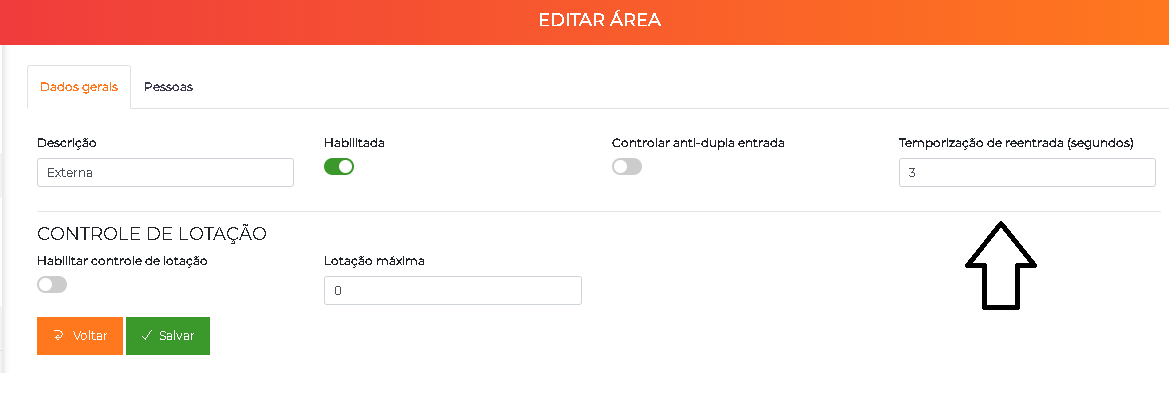
In areas with button-based exit or that allow more than one person to pass without access registration, timed re-entry will not work correctly.
As with anti-passback, the area part is only the beginning. The timed re-entry flag must also be enabled on the Categories that will be controlled.
Section: Operating Hours
Allows you to configure the hours during which the area accepts accesses. Outside the configured hours, access will be denied.
Section: Occupancy Control
| Field | Description |
|---|---|
| Enable people occupancy control | Activates occupancy control for the area |
| Maximum people occupancy | Maximum number of people allowed simultaneously in the area |
When the maximum occupancy is reached, the system automatically denies new accesses until someone leaves the area.
Vehicle occupancy control and parking spot control are available only if the Vehicles module is enabled in the license.
| Field | Description |
|---|---|
| Enable vehicle occupancy control | Activates vehicle occupancy control |
| Maximum vehicle occupancy | Maximum number of vehicles allowed simultaneously |
| Parking spot control | Access allowed only if the vehicle's company has available parking spots |
Section: Extra
Additional fields according to the modules enabled in the license (e.g. credits, passes).
Tab: People
The People tab displays the people who are currently present in the area.
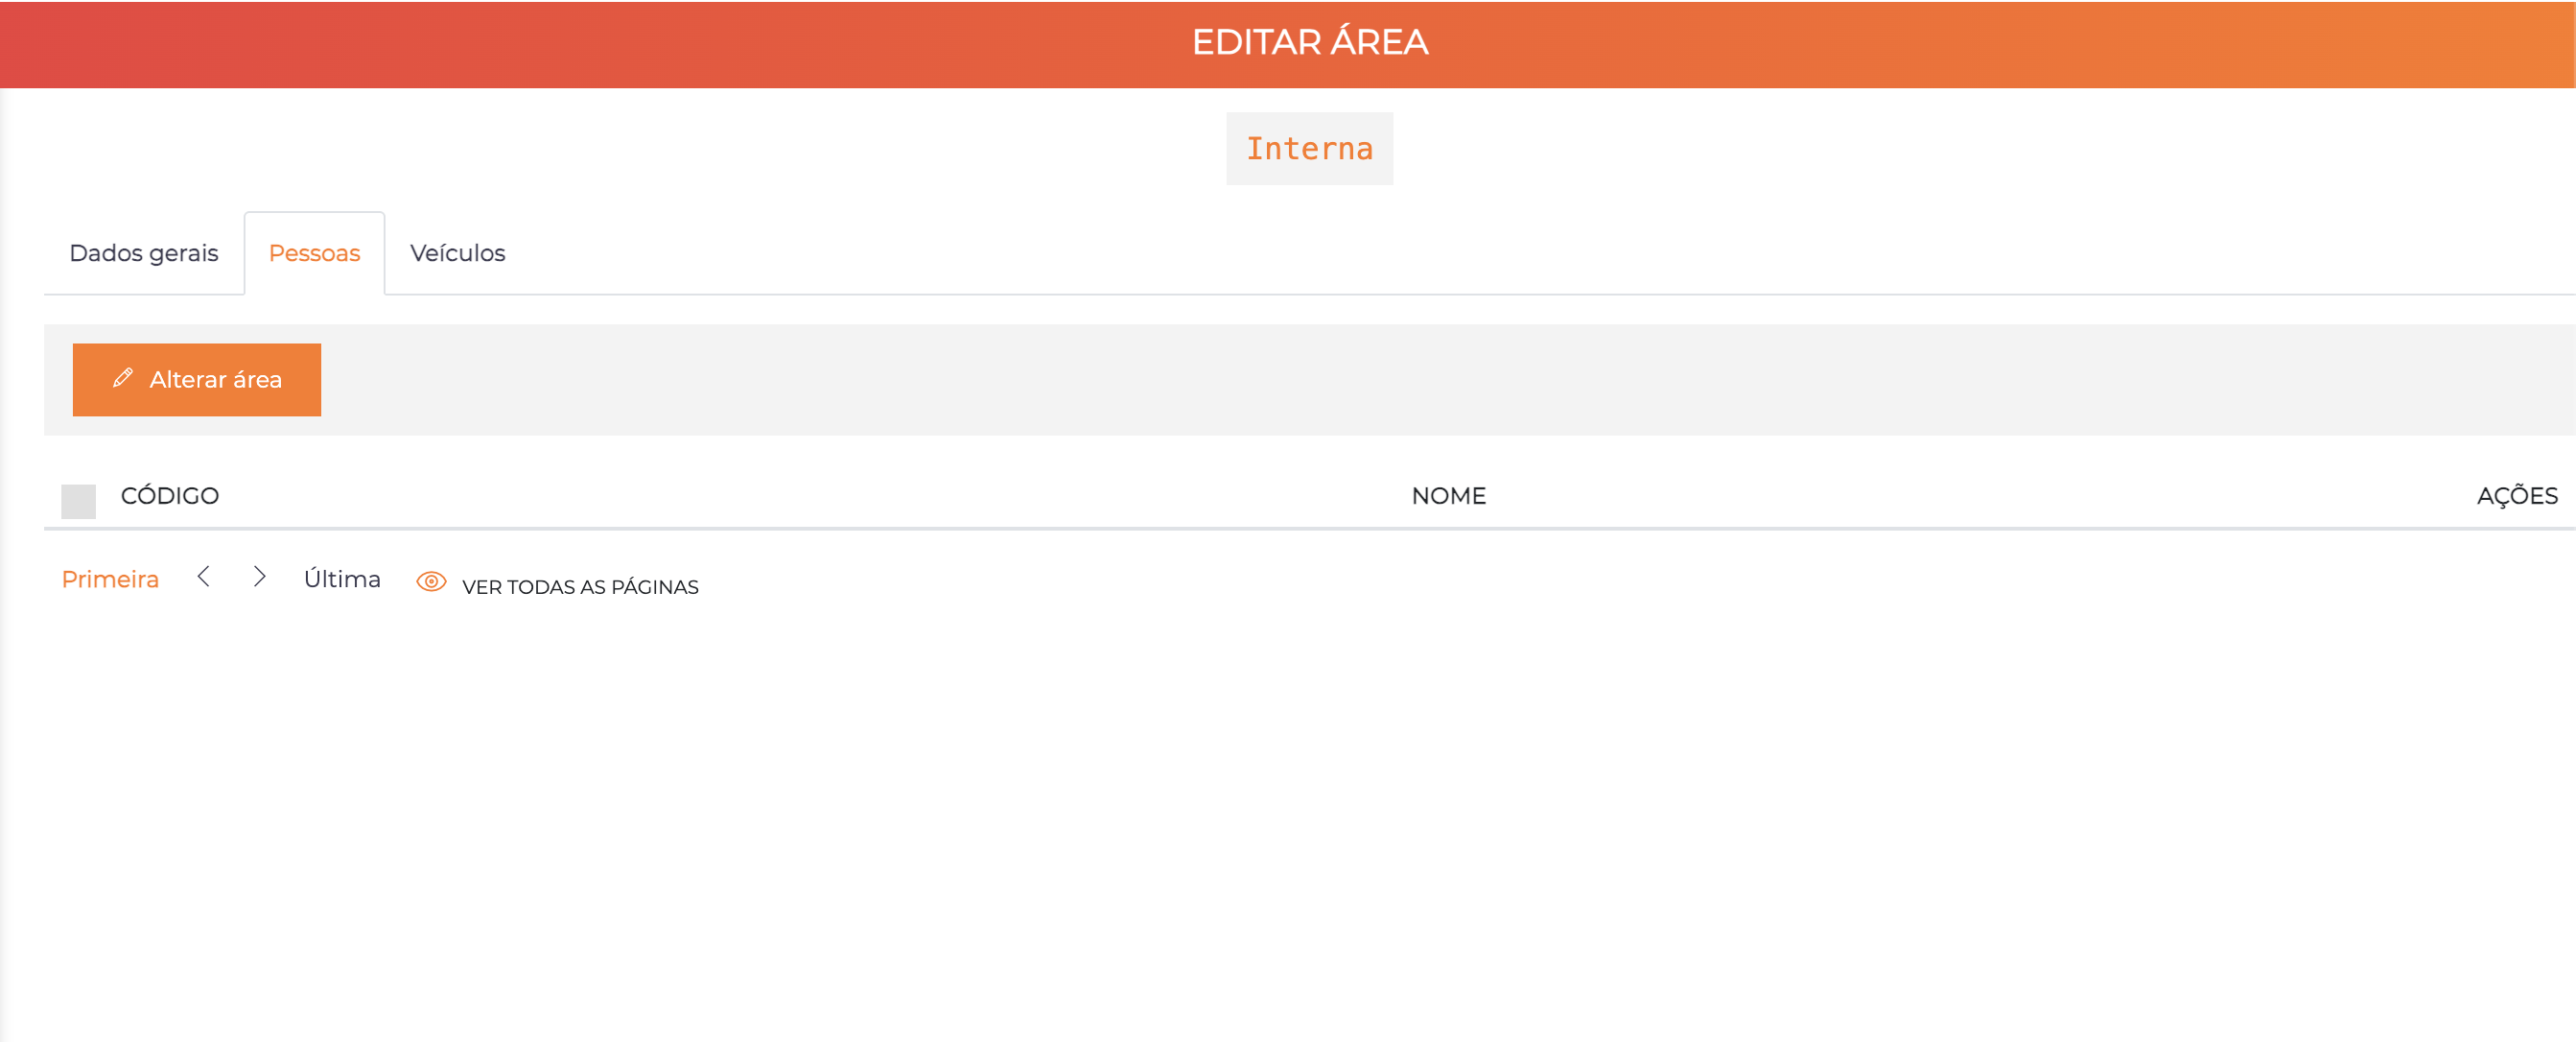
| Column | Description |
|---|---|
| Code | The person's code in the system |
| Name | The person's full name |
| Actions | Icon to access the person's registration |
The "Change area" button lets you transfer selected people to another area. Useful for corrections when the system missed a passage event or the person entered without going through the controller.
Manual transfer does not generate access logs. Use only for corrections.
Tab: Vehicles
The Vehicles tab displays the vehicles that are currently present in the area.
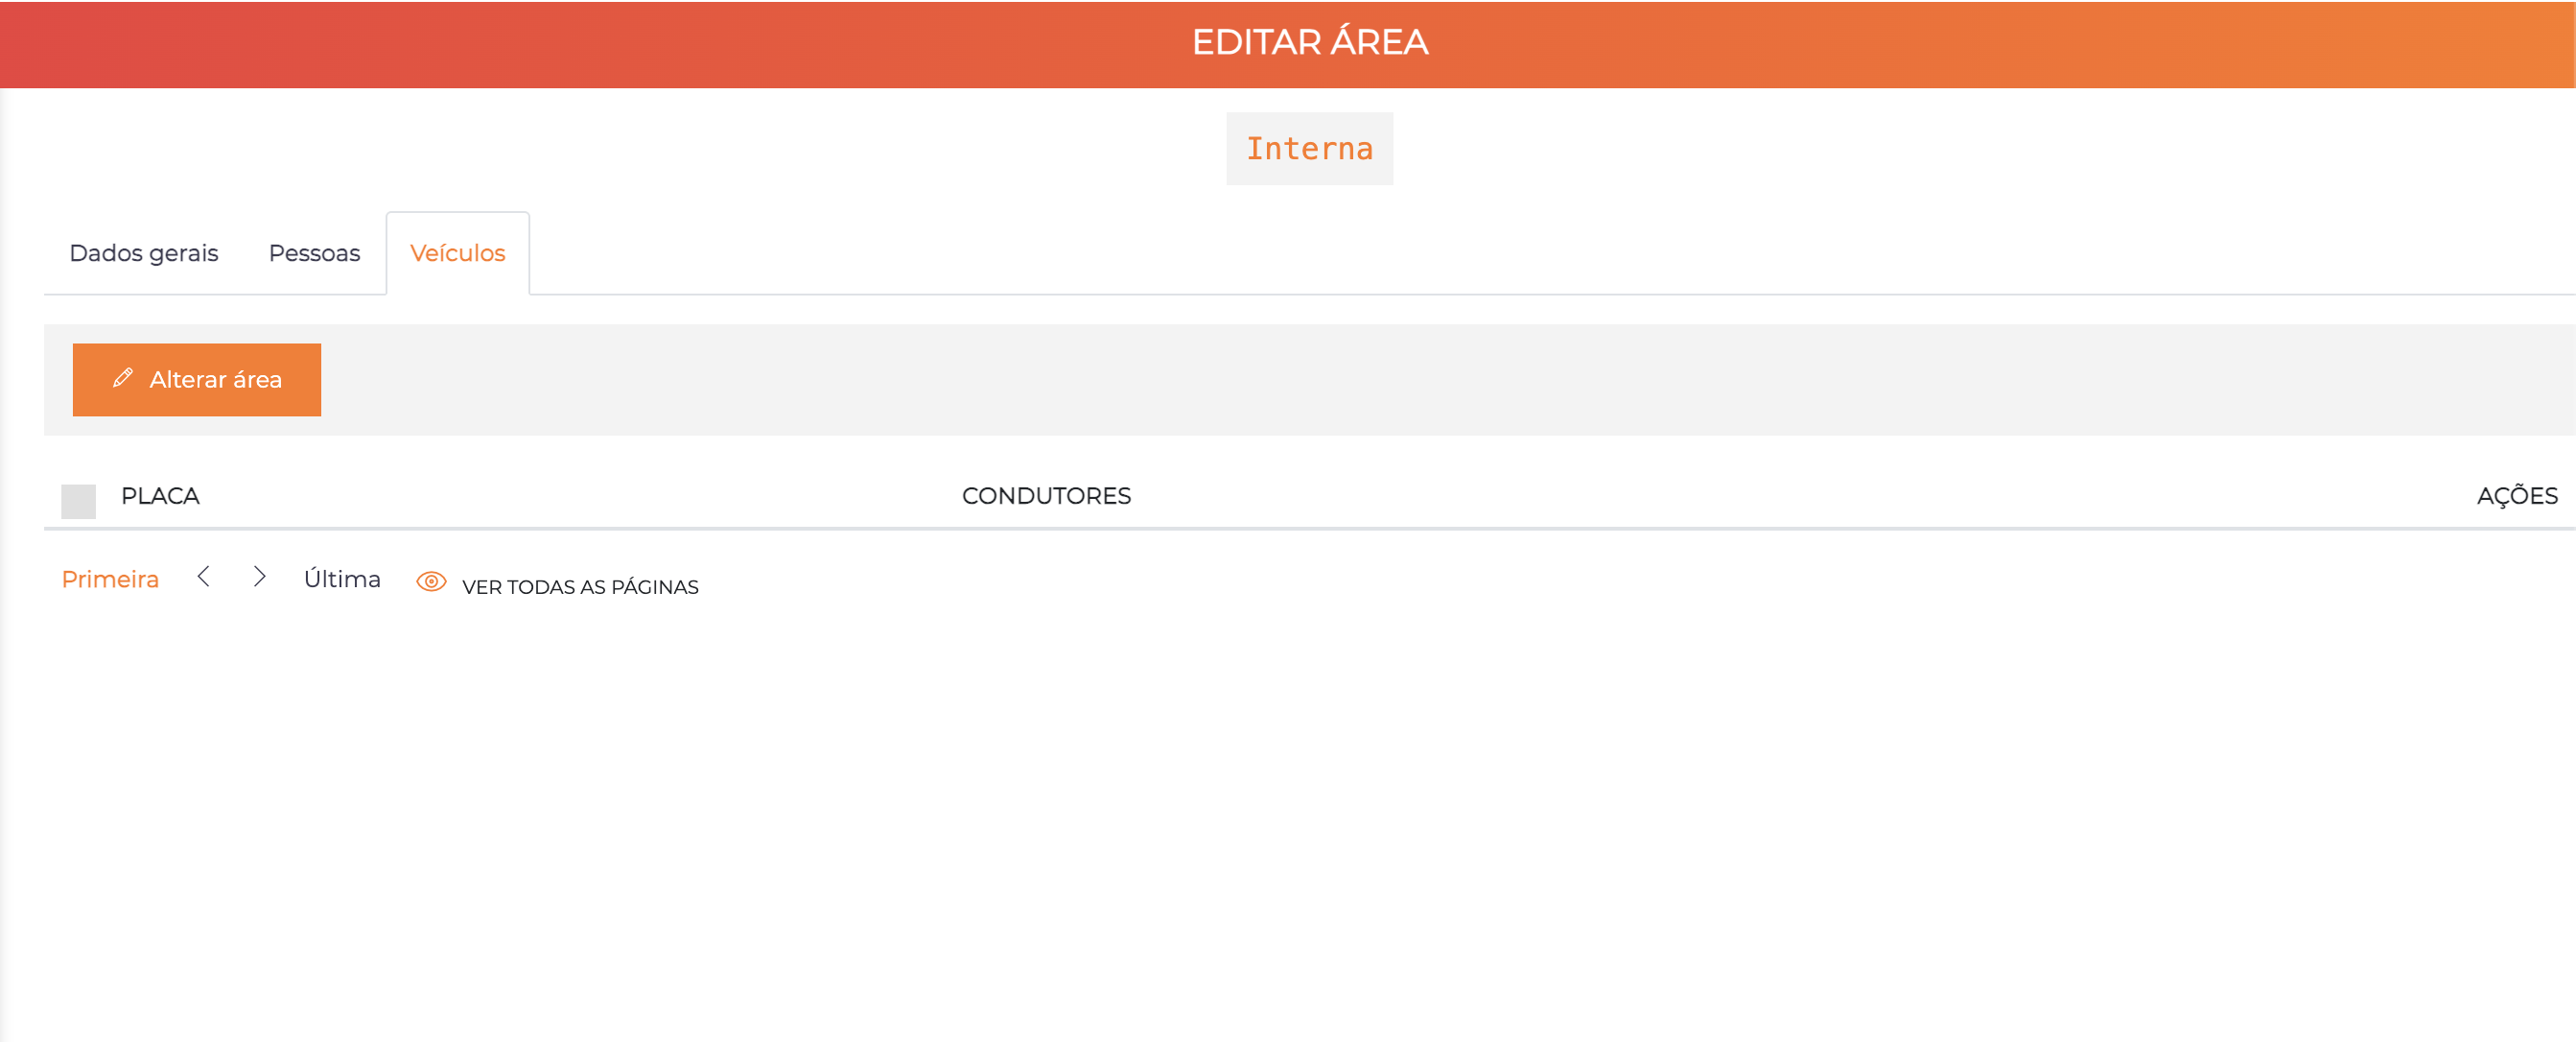
| Column | Description |
|---|---|
| Plate | The vehicle's plate |
| Drivers | Drivers associated with the vehicle |
| Actions | Icon to access the vehicle's registration |
The "Change area" button lets you transfer selected vehicles to another area, following the same logic as the People tab.
Configuration Examples
Area: Reception
Description: Main Reception
Enabled: ✅
Anti-passback: ❌
People occupancy: ❌
Credits: 0
Characteristics: Free-passage area, without occupancy restrictions.
Area: VIP Meeting Room
Description: VIP Meeting Room
Enabled: ✅
Anti-passback: ✅
People occupancy: ✅ (Maximum: 12)
Credits: 0
Characteristics: Access control and limited occupancy.
Area: Cafeteria
Description: Cafeteria
Enabled: ✅
Anti-passback: ❌
Re-entry timing: 3600 (1 hour)
People occupancy: ✅ (Maximum: 150)
Credits: 1 (Require credits: ✅)
Characteristics: Credit control, occupancy and re-entry (only 1 access per hour).
Area: VIP Parking
Description: VIP Parking
Enabled: ✅
Vehicle anti-passback: ✅
Vehicle occupancy: ✅ (Maximum: 50)
Parking spot control: ✅
Characteristics: Parking spot control per company, limited total occupancy.
Area: Production Area
Description: Production Area A
Enabled: ✅
Anti-passback: ✅
Require passes: ✅ (Medical Exam, NR-12 Training)
People occupancy: ✅ (Maximum: 80)
Characteristics: High security, requires valid passes, controlled occupancy.
Area Hierarchy and Flow
Areas are connected through the controllers' channels:
- Each channel defines a source area and a destination area
- The flow of people/vehicles is tracked through these connections
- The system keeps a record of each person's/vehicle's current area
See Controllers for channel configuration.
Best Practices
-
Clear naming: Use descriptive names (e.g. "Parking Tower A - Basement 1" instead of "Park A B1")
-
Balanced areas: Do not create too many areas (unnecessary complexity) nor too few (loss of control)
-
Realistic occupancy: Configure occupancy considering the real physical capacity of the space
-
Periodic review: Check for people/vehicles "stuck" in areas (without checkout) and correct them via manual transfer
Next Steps
- Controllers - Configure devices and channels between areas
- Categories - Define access rules by category and area
- Time ranges - Configure access hours
- Access Policy - Understand the complete permissions model