Events
Visitor registration is a fundamental point of any access control system. To simplify and make the operation more flexible, ACCELERO starts from a slightly different concept than the traditional one: we use the concept of an EVENT.
Overview
An event can mean several things:
- A person going to a medical appointment at the office on the fourth floor
- A delivery person bringing a package for the building administration
- A group of people coming for three meetings in a row at different companies within the same condominium
Each situation may require different procedures. The patient may have access to the social elevator hall, while the delivery person should only have access to the service elevator hall. The system can issue an alert if the delivery person does not leave within 30 minutes, but this time can be longer for the group of people who came for various meetings.
All these situations can be solved with ACCELERO's Event types.
Event Types
Event types in ACCELERO define access rules and validations for each kind of visit.
Navigation path: Advanced > Event types
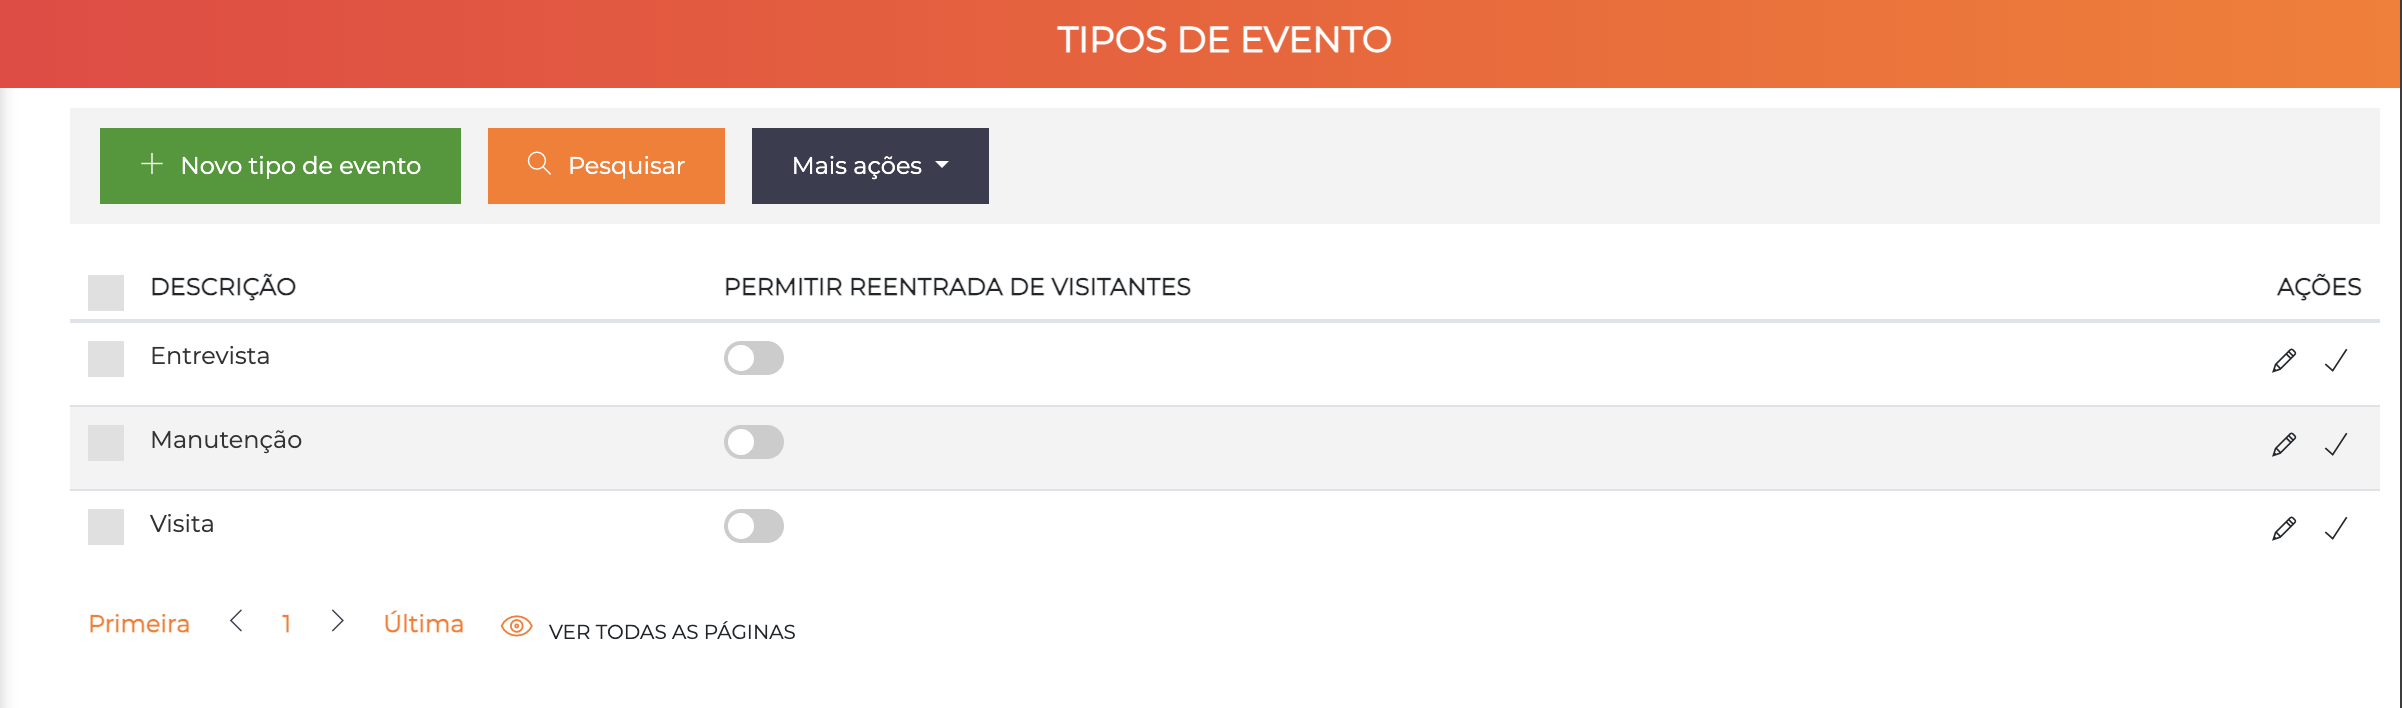
The listing shows the registered types with the columns Description, Allow Visitor Re-entry and Actions.
Configuration Fields
Each event type allows the following settings:
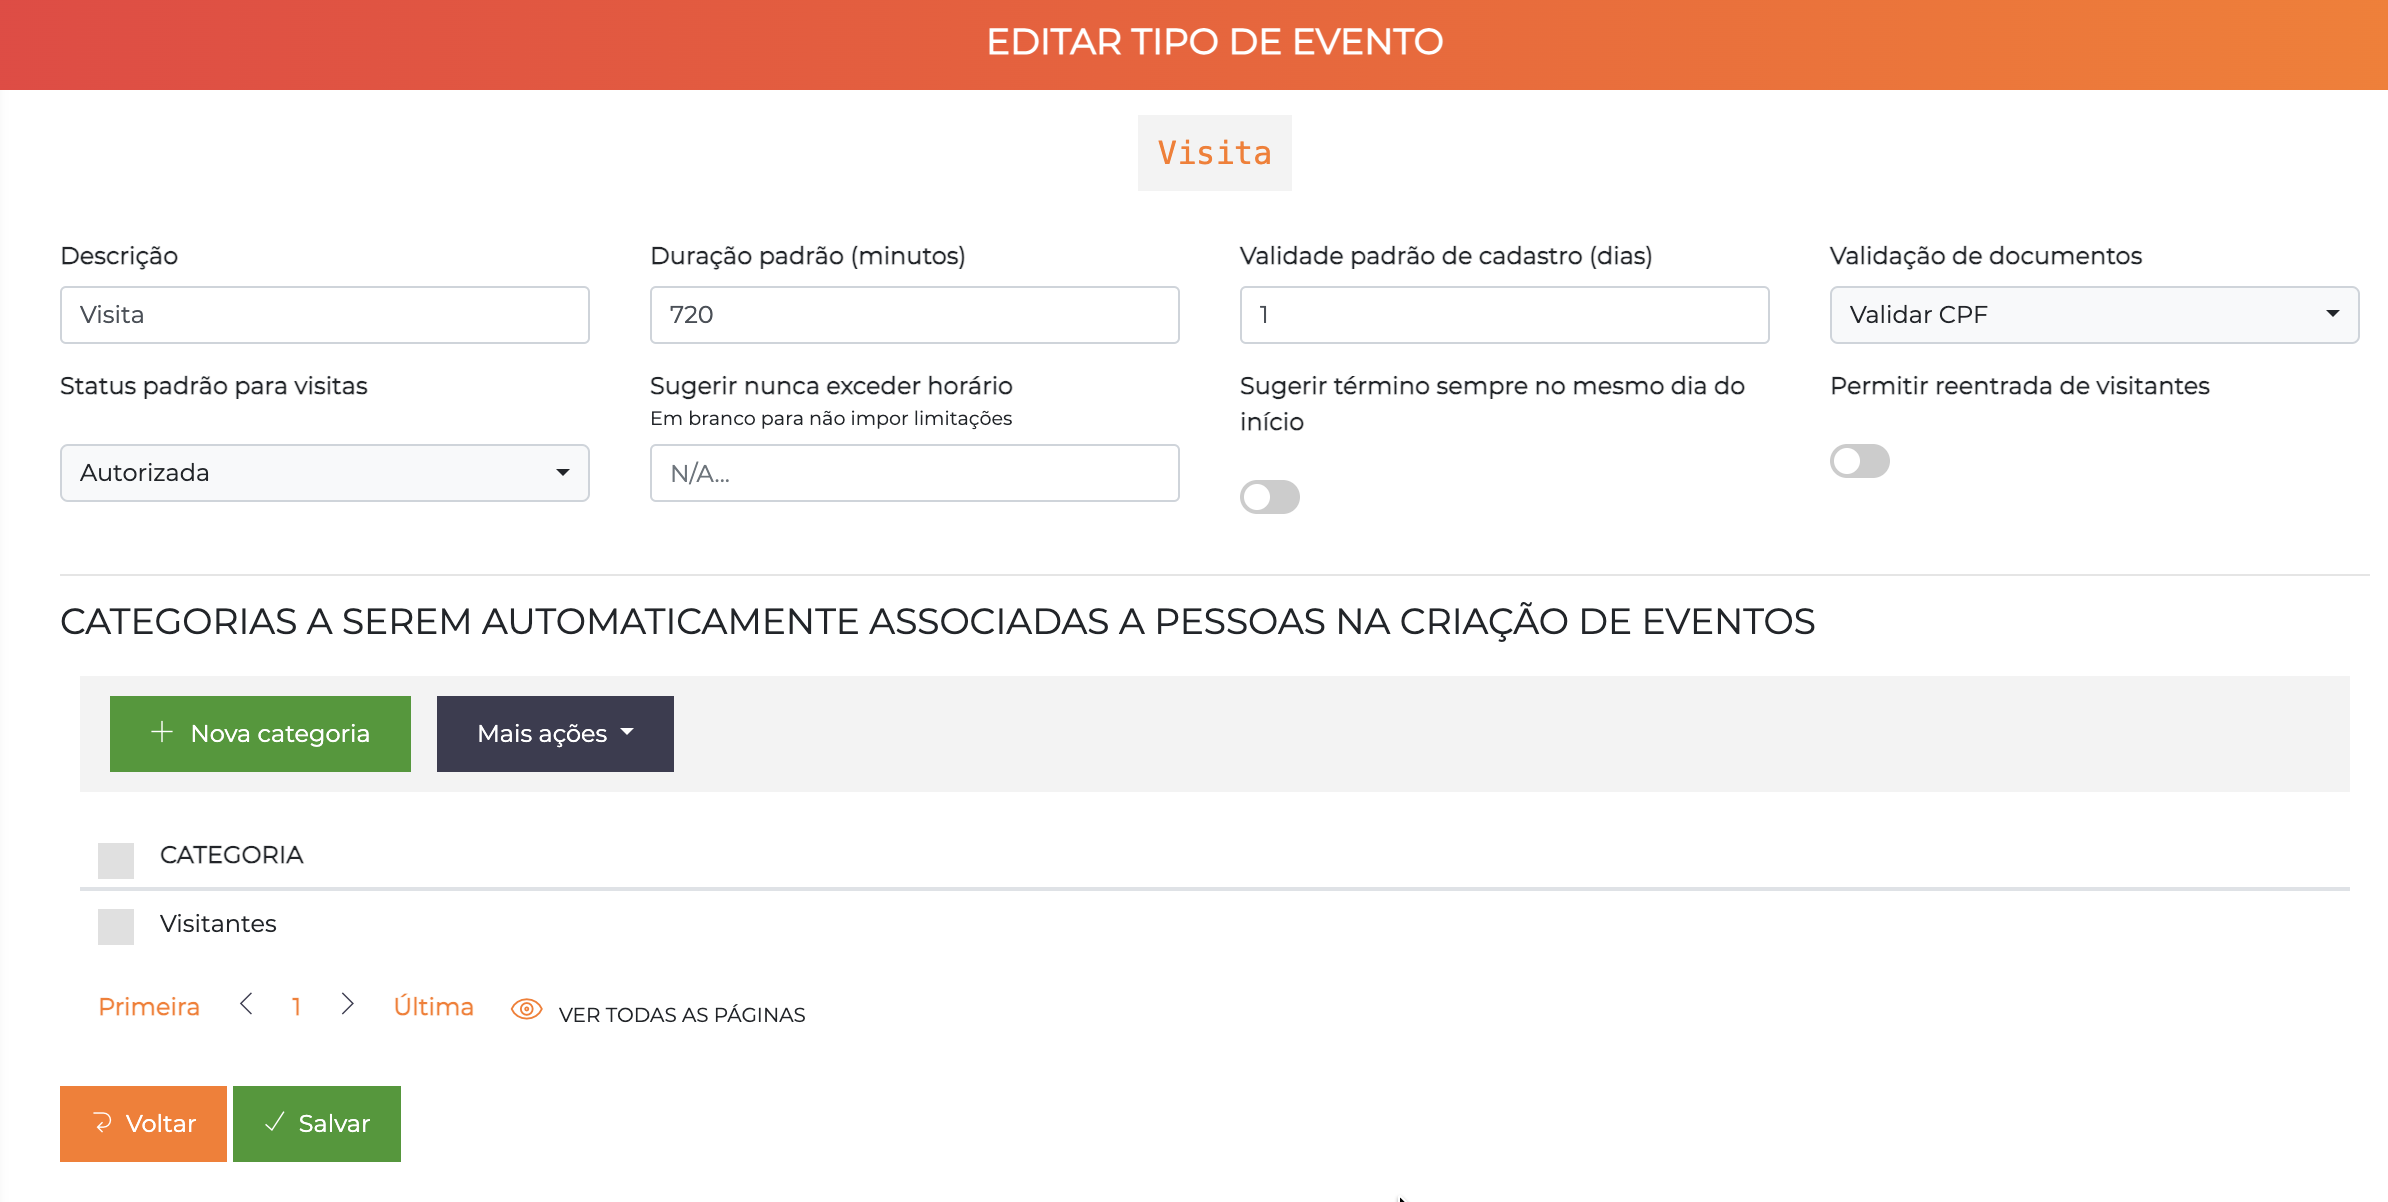
The form shows all the configuration fields. The Categories to be automatically associated section appears at the bottom.
| Field | Description |
|---|---|
| Description | Name of the event (e.g. "Social Visit", "Delivery", "Medical Appointment", "Meeting") |
| Default duration (minutes) | Expectation of the maximum duration of this event type (default value that can be changed manually for each visit). If the event does not end within this period, the system will generate events in the Incident Panel |
| Default record validity (days) | If the visitor's record is new in the system, this field defines the default validity of that person's record (people with an expired record have access denied). If the visitor already exists in the system, this field is ignored |
| Document validation | You can define that for this event type a specific document validation is required for the visitors |
| Default status for visits | What the default status should be for new visits created with this Event Type (including the Pre-registered option). This value can be changed manually by the operator, serving as a tool to speed up new registrations |
| Allow re-entry | Possibility to configure whether the event type allows visitor re-entry. When enabled, visitors can make new passages during the event period without the need for a new registration |
| Suggest never exceeding time | If a time is entered in this field, the suggestion for the end time of the visits created with this type will never exceed this time. For example, if the default duration of a visit is 120 minutes (two hours) and the visit is created at 16:00, but this field determines that visits can never exceed 17:30, the visit will automatically have its end validity "reduced" to 17:30 |
| Suggest ending always on the same day as the start | If this option is selected, the suggestion for the end time of the visits created with this event type will always be on the same day as the start date. This option is useful to be used together with the "never exceed time" setting to ensure that the suggested time for the visits is never "on the next day", which can occur in situations of visits with a long duration or created at the end of the day |
Auto-Associated Categories
The Categories to be automatically associated with people when creating events section defines which categories will be automatically associated with the visitors when they are registered in an event of this type.
Usage example:
Event type: Social Visit
Auto-associated categories: VISITORS, SOCIAL_AREAS_ACCESS
Default duration: 240 minutes (4 hours)

Result: When registering a social visit, the visitor
automatically receives the categories VISITORS and
SOCIAL_AREAS_ACCESS for the period of 4 hours.
Create event types that reflect the real operational scenarios of your environment. Examples: "Mail Delivery", "Service Provider", "Resident Visitor", "Medical Appointment", "Supplier", etc.
Step by Step: Create an Event Type
Well-defined event types allow you to separate the access of each visit profile. For example: a visitor can access only the external and internal areas, while a service provider also needs to access the machine room. This differentiation is made by the categories auto-associated with each event type.
-
Create the categories with the desired areas. In
Settings > Categories, include a category for each profile and, in the Areas tab of each one, select the allowed areas and time ranges. See Categories for details. -
Access the event types. Go to
Advanced > Event types. By default, the system already brings an event called Visit. -
Create the new type. Click include, enter the name of the event (e.g. "Service Provider") and confirm. The system opens the editing screen.
-
Parameterize the event. Define the default duration, the record validity and whether there will be document validation.
-
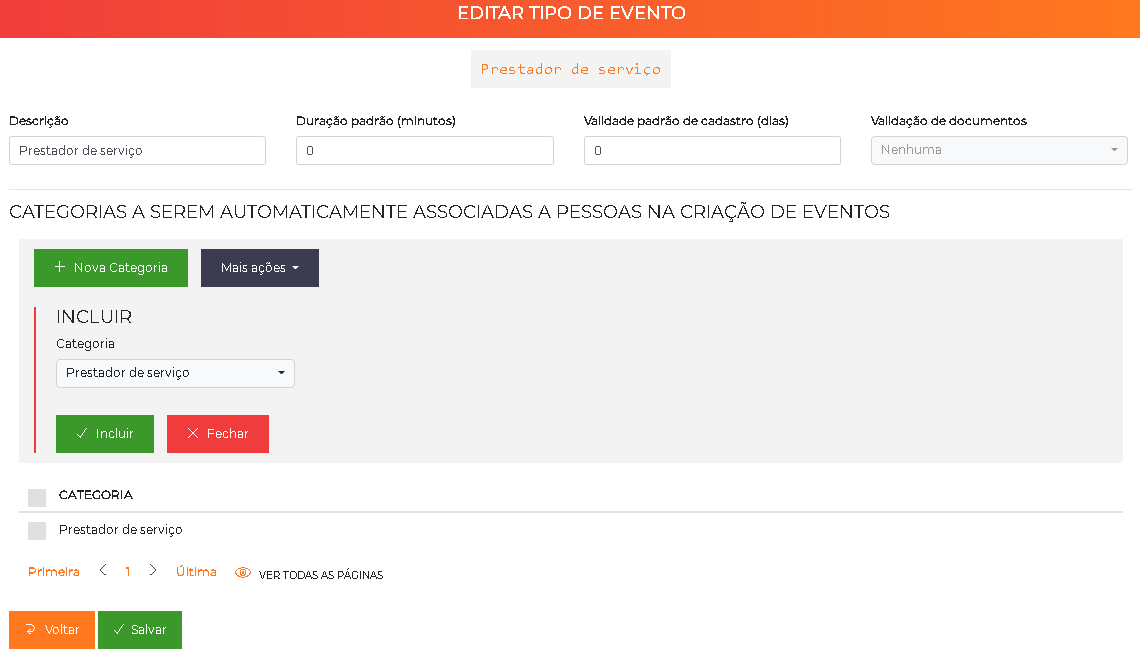
Associate the categories. In the section of categories to be automatically associated, select the category created in step 1 and confirm.
Once the creation is complete, just select this event type when doing the quick registration of a visit — all the configured parameters will be applied automatically as a rule.
Visitor / Event Registration
For convenience, ACCELERO has a button on the Home called Quick registration. This button starts the creation of a new event. A link to the same function is available in the side menu with the name Visitors.
Available accesses:
- Home > "Quick registration" button
- Side menu > "Visitors"
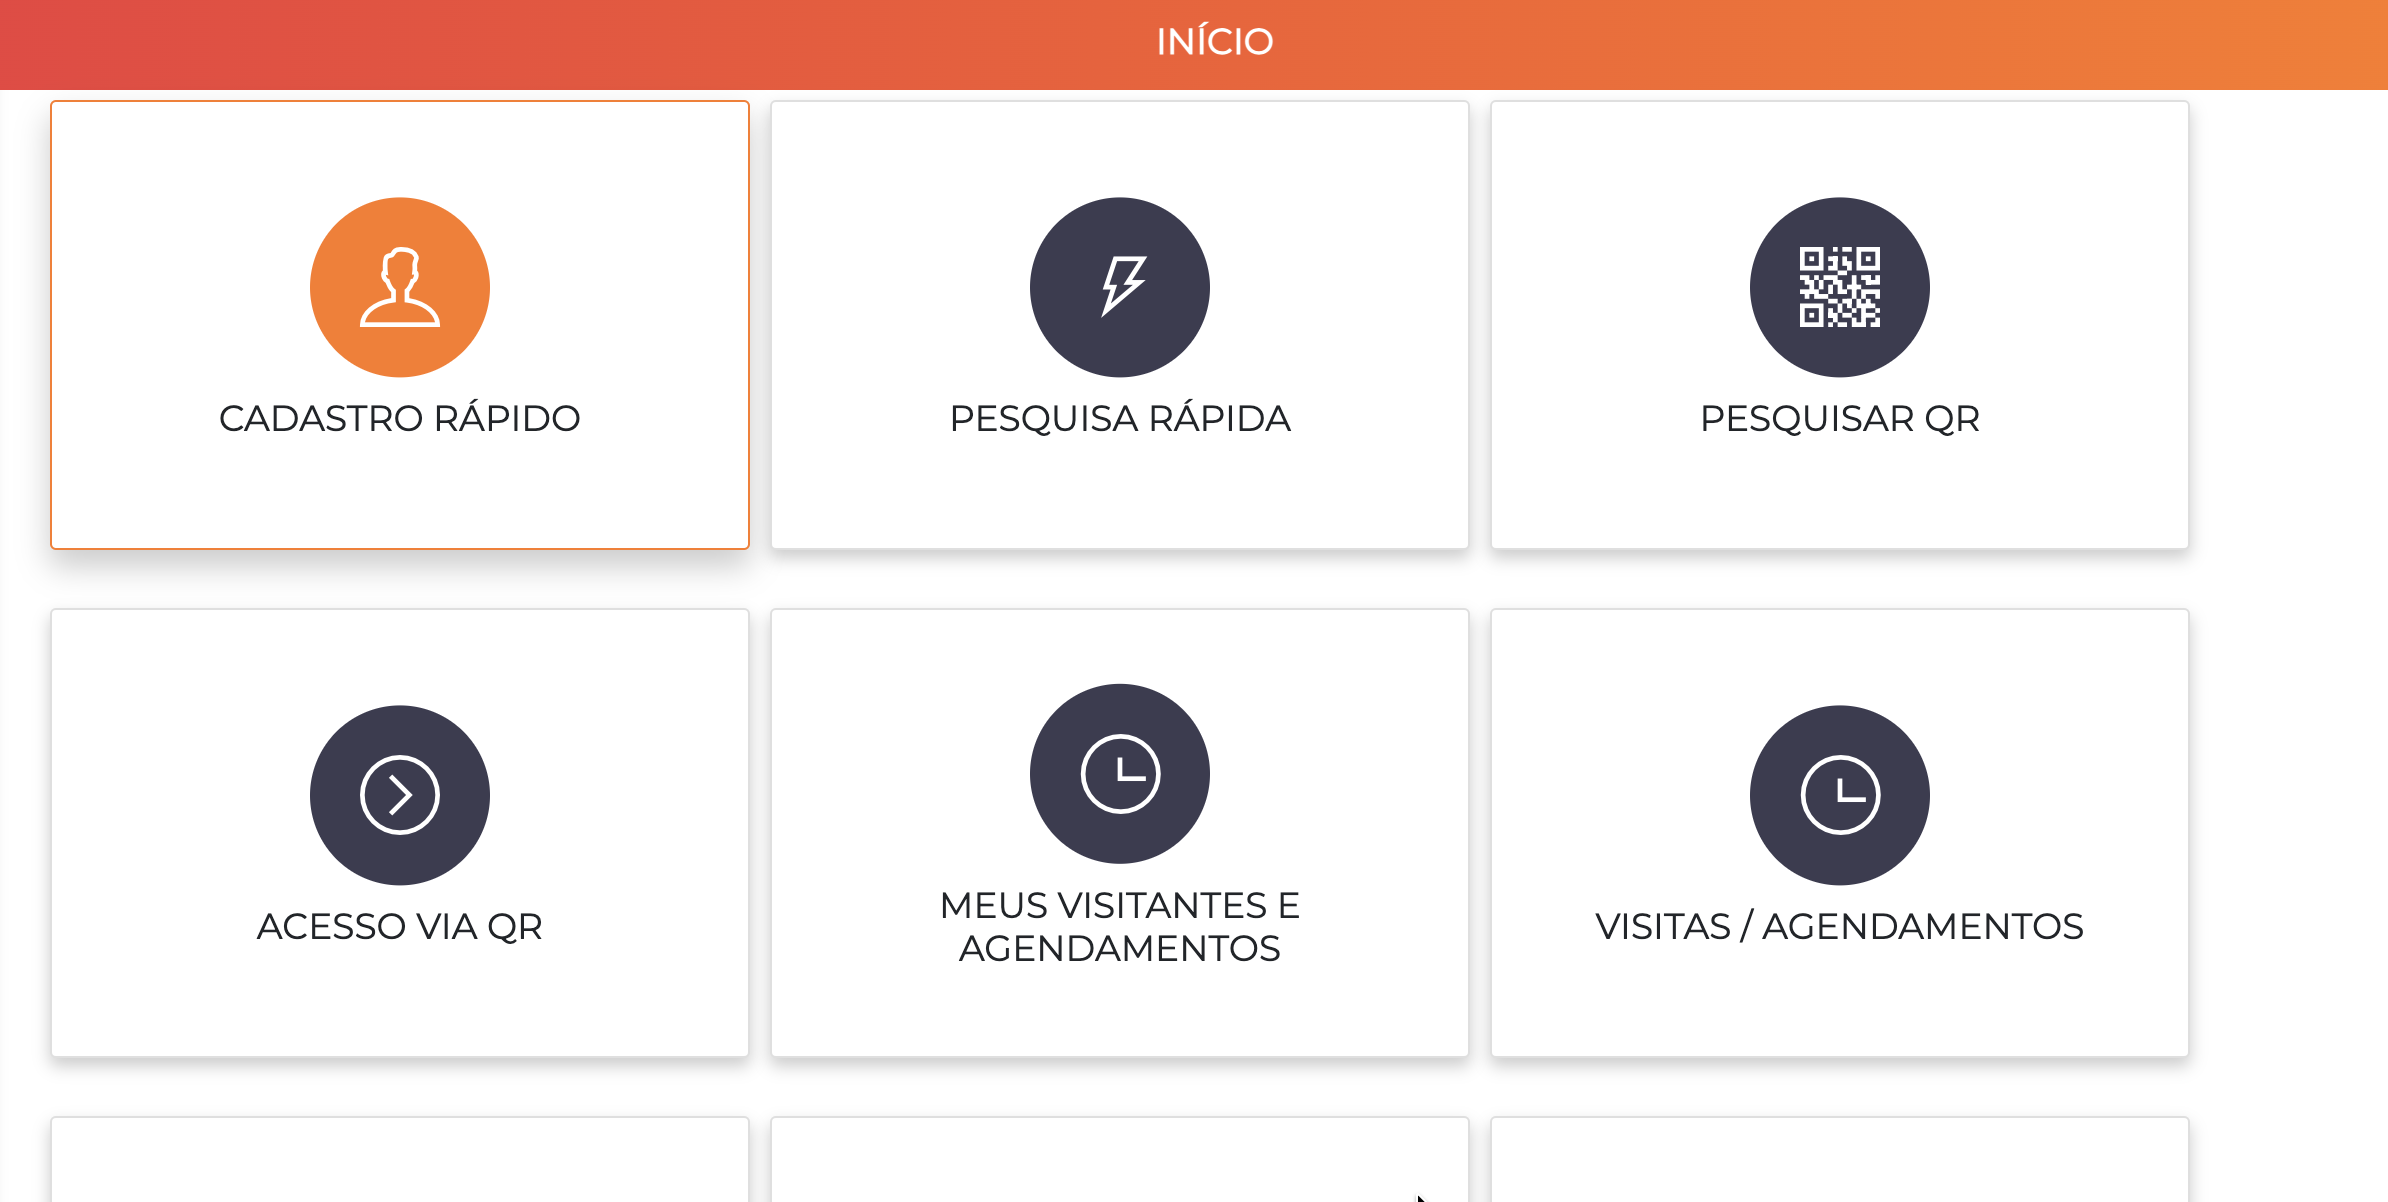
The Home screen shows the quick access buttons: Quick registration, My visitors and appointments and Visits / appointments, among others.
Registration Flow Step by Step
On a single screen the operator performs all the operation needed to include the visit.
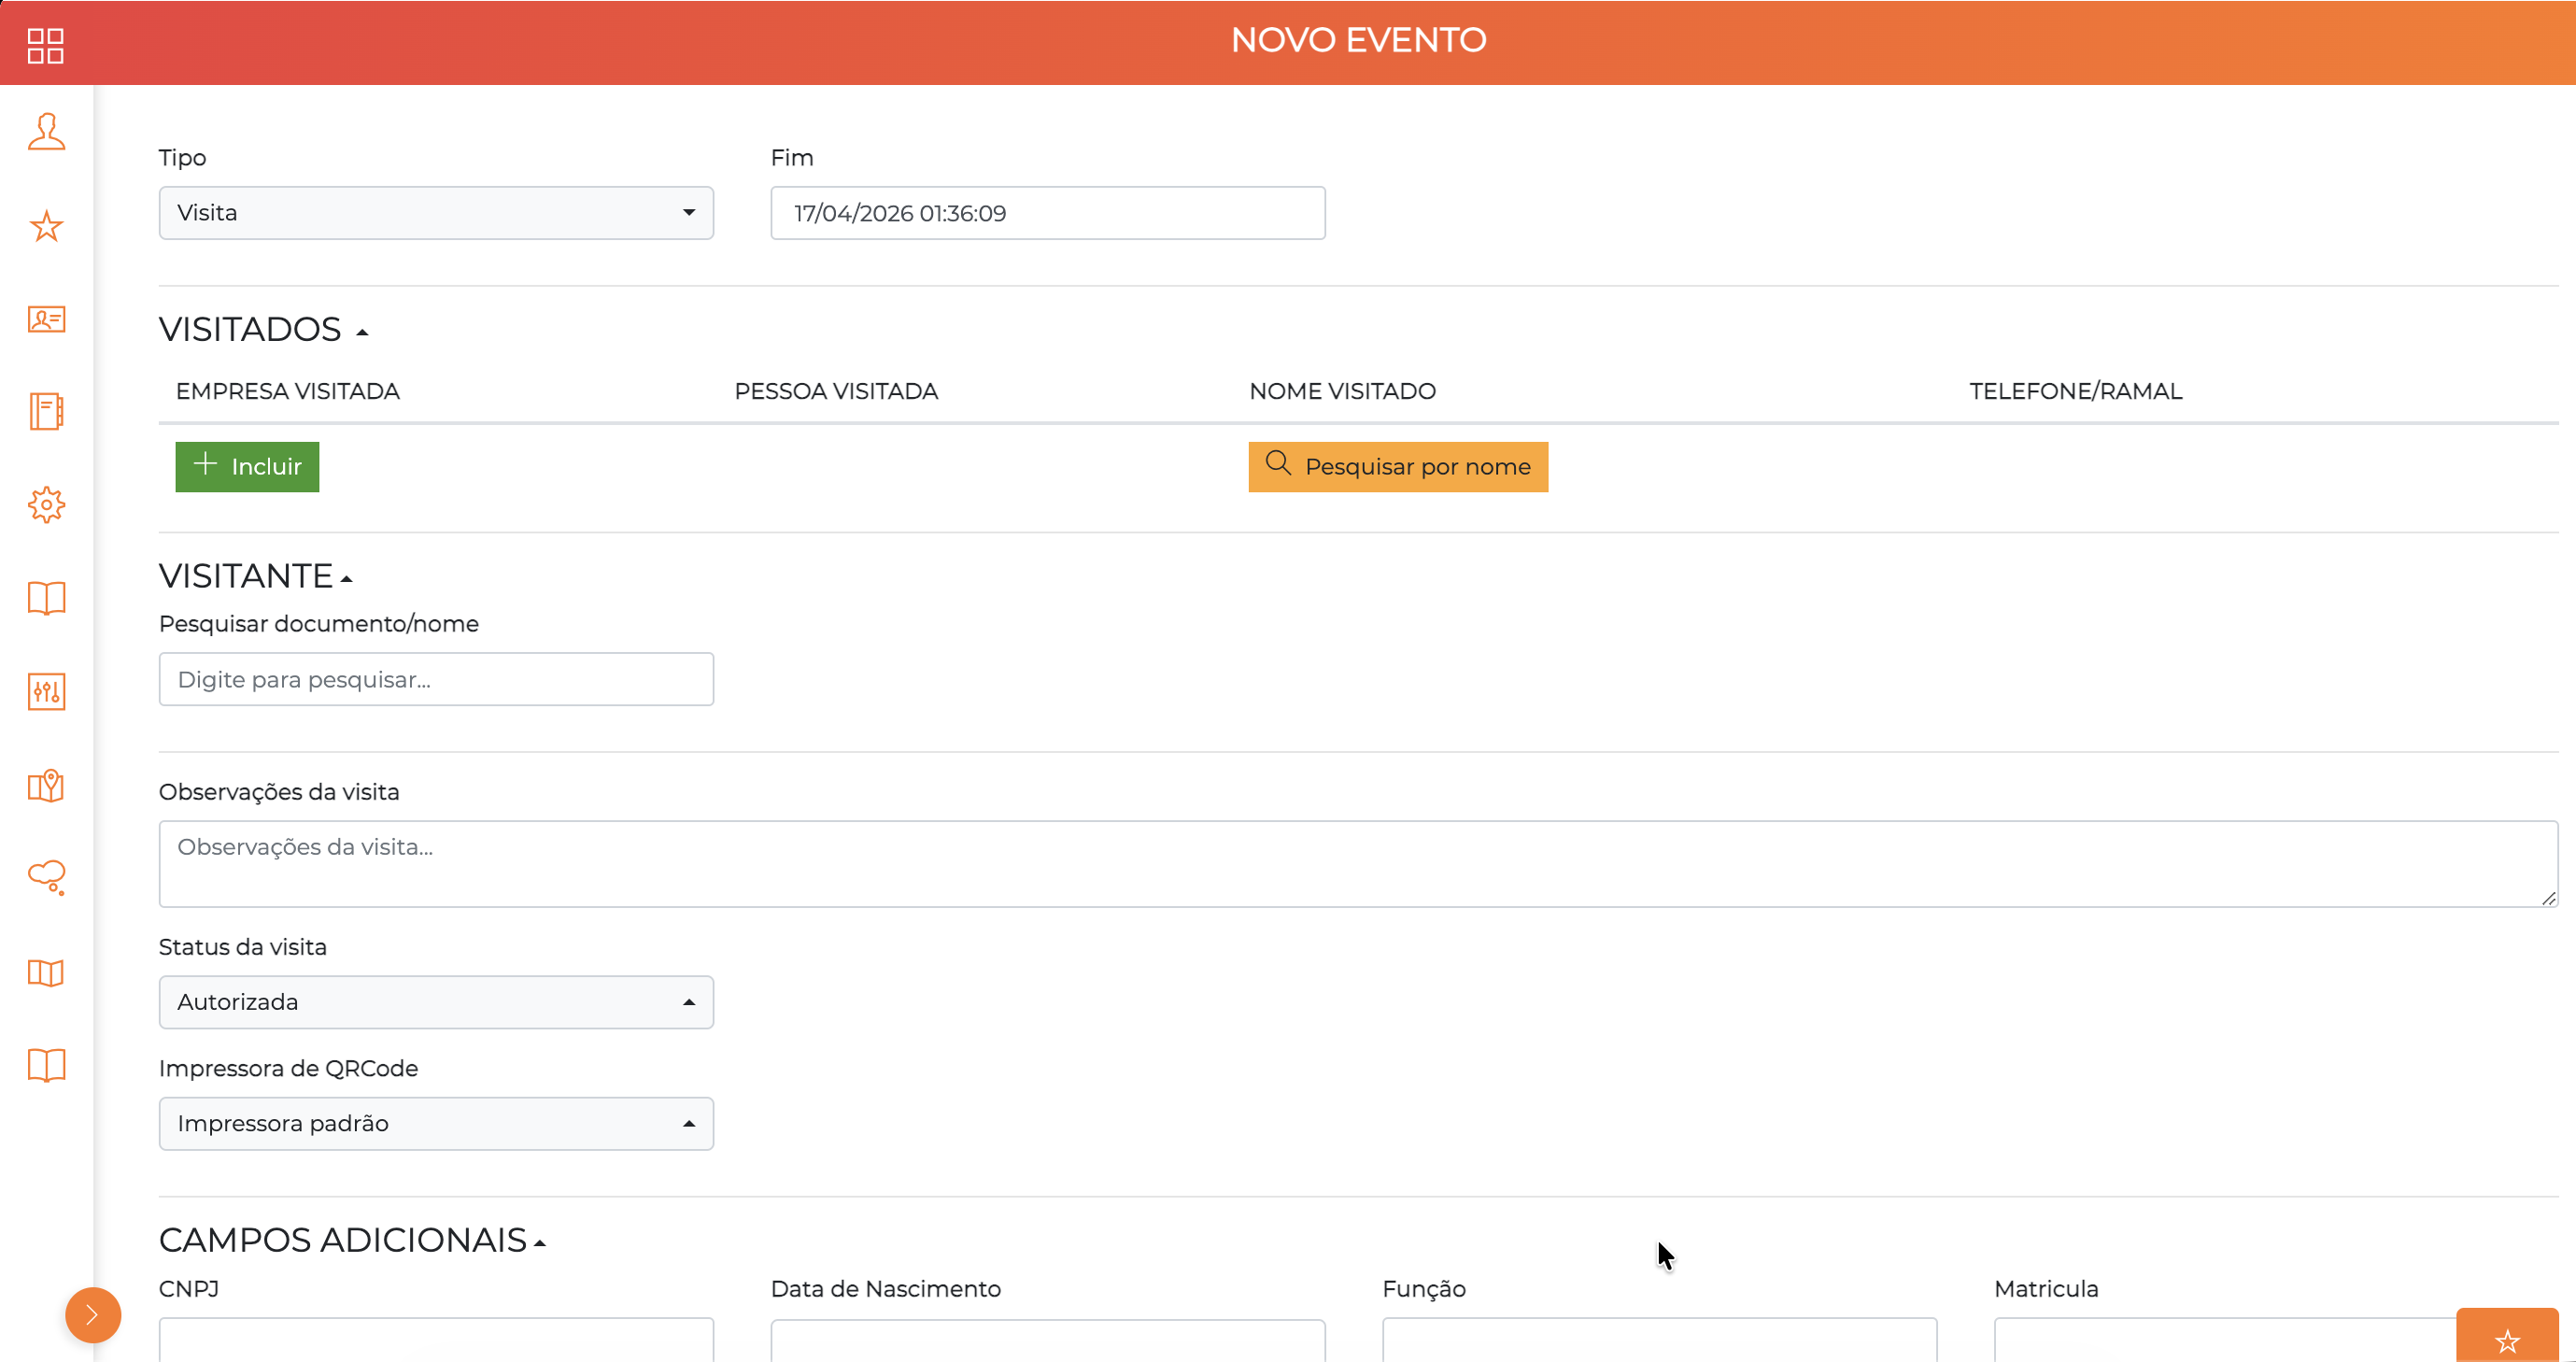
The New Event screen gathers on a single page the Type and End fields, the Visited and Visitor sections, in addition to notes, status and configurable additional fields.
Step 1: Select Event Type
The first thing the operator should do is select the event type:
- What is happening?
- Is it a social visit?
- Is it a delivery person?
- Is it a medical appointment?
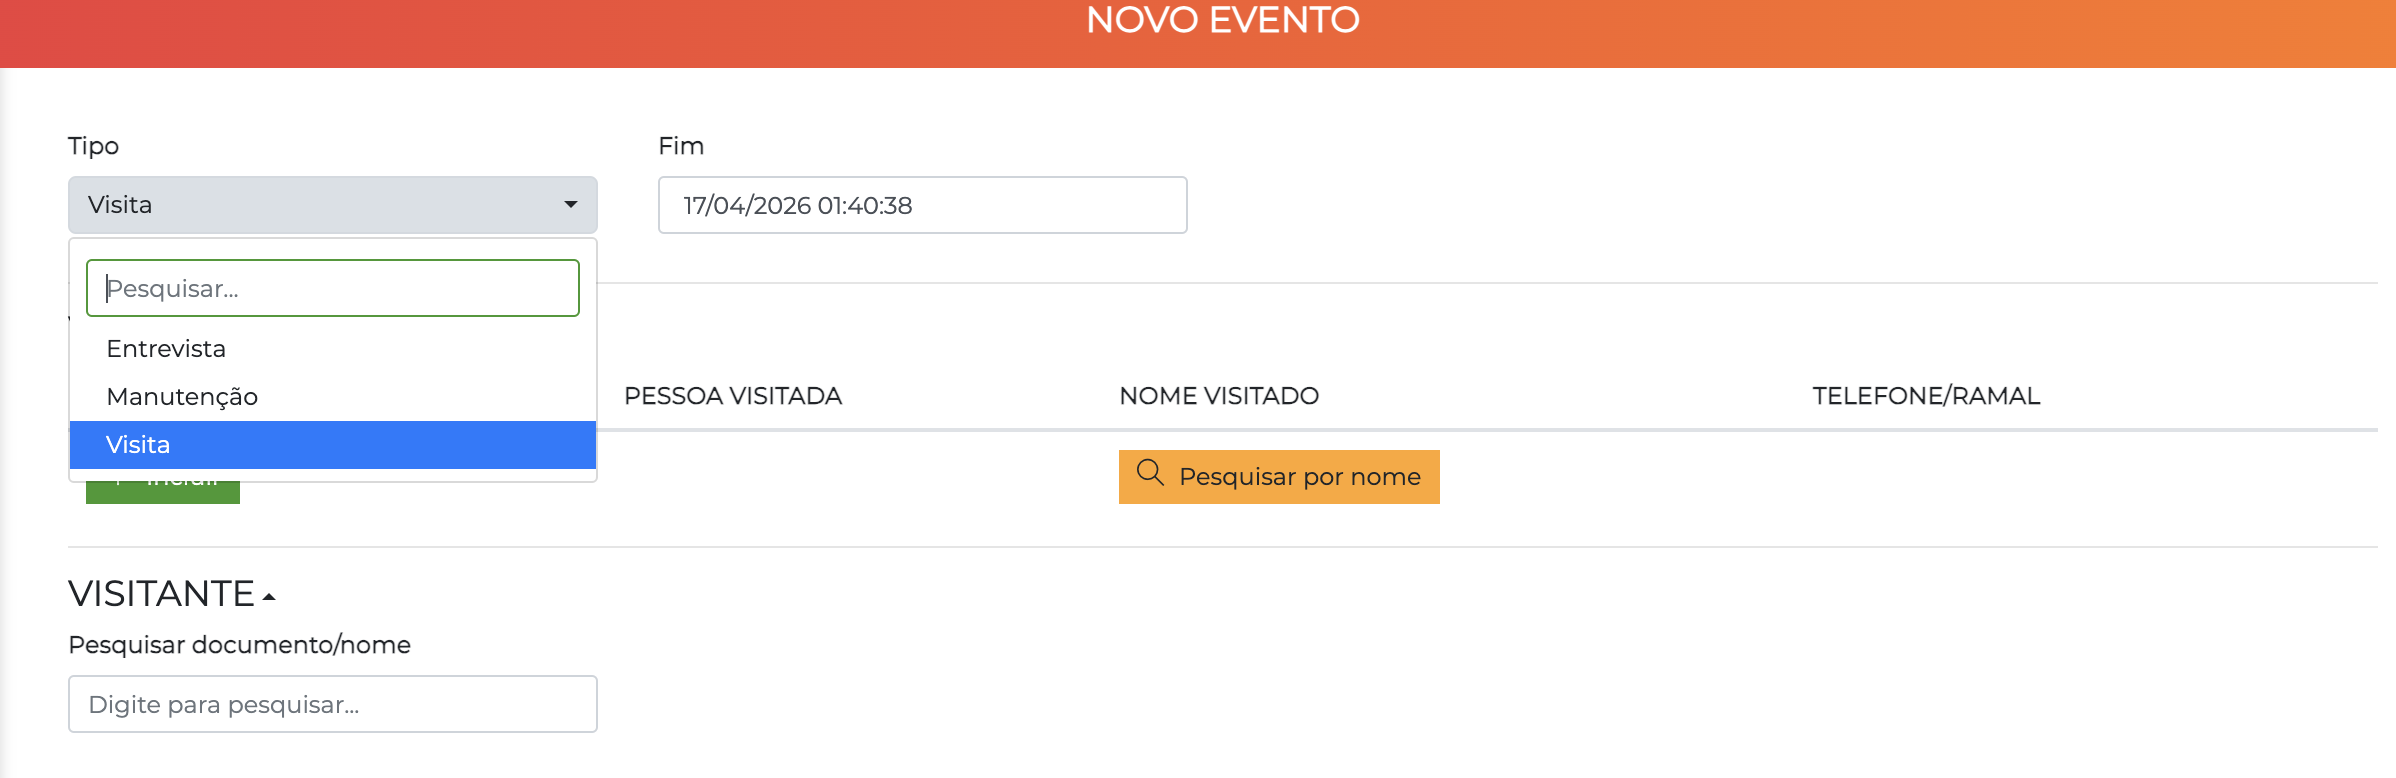
The Type dropdown lists the event types registered in the system.
Step 2: Set the Expected End Time
The expected end time of the visit should be checked:
- It should already be filled in with the default value for the selected event type
- It can be changed manually as needed
Step 3: Add Visited People
The next step is to specify who the people being visited are:
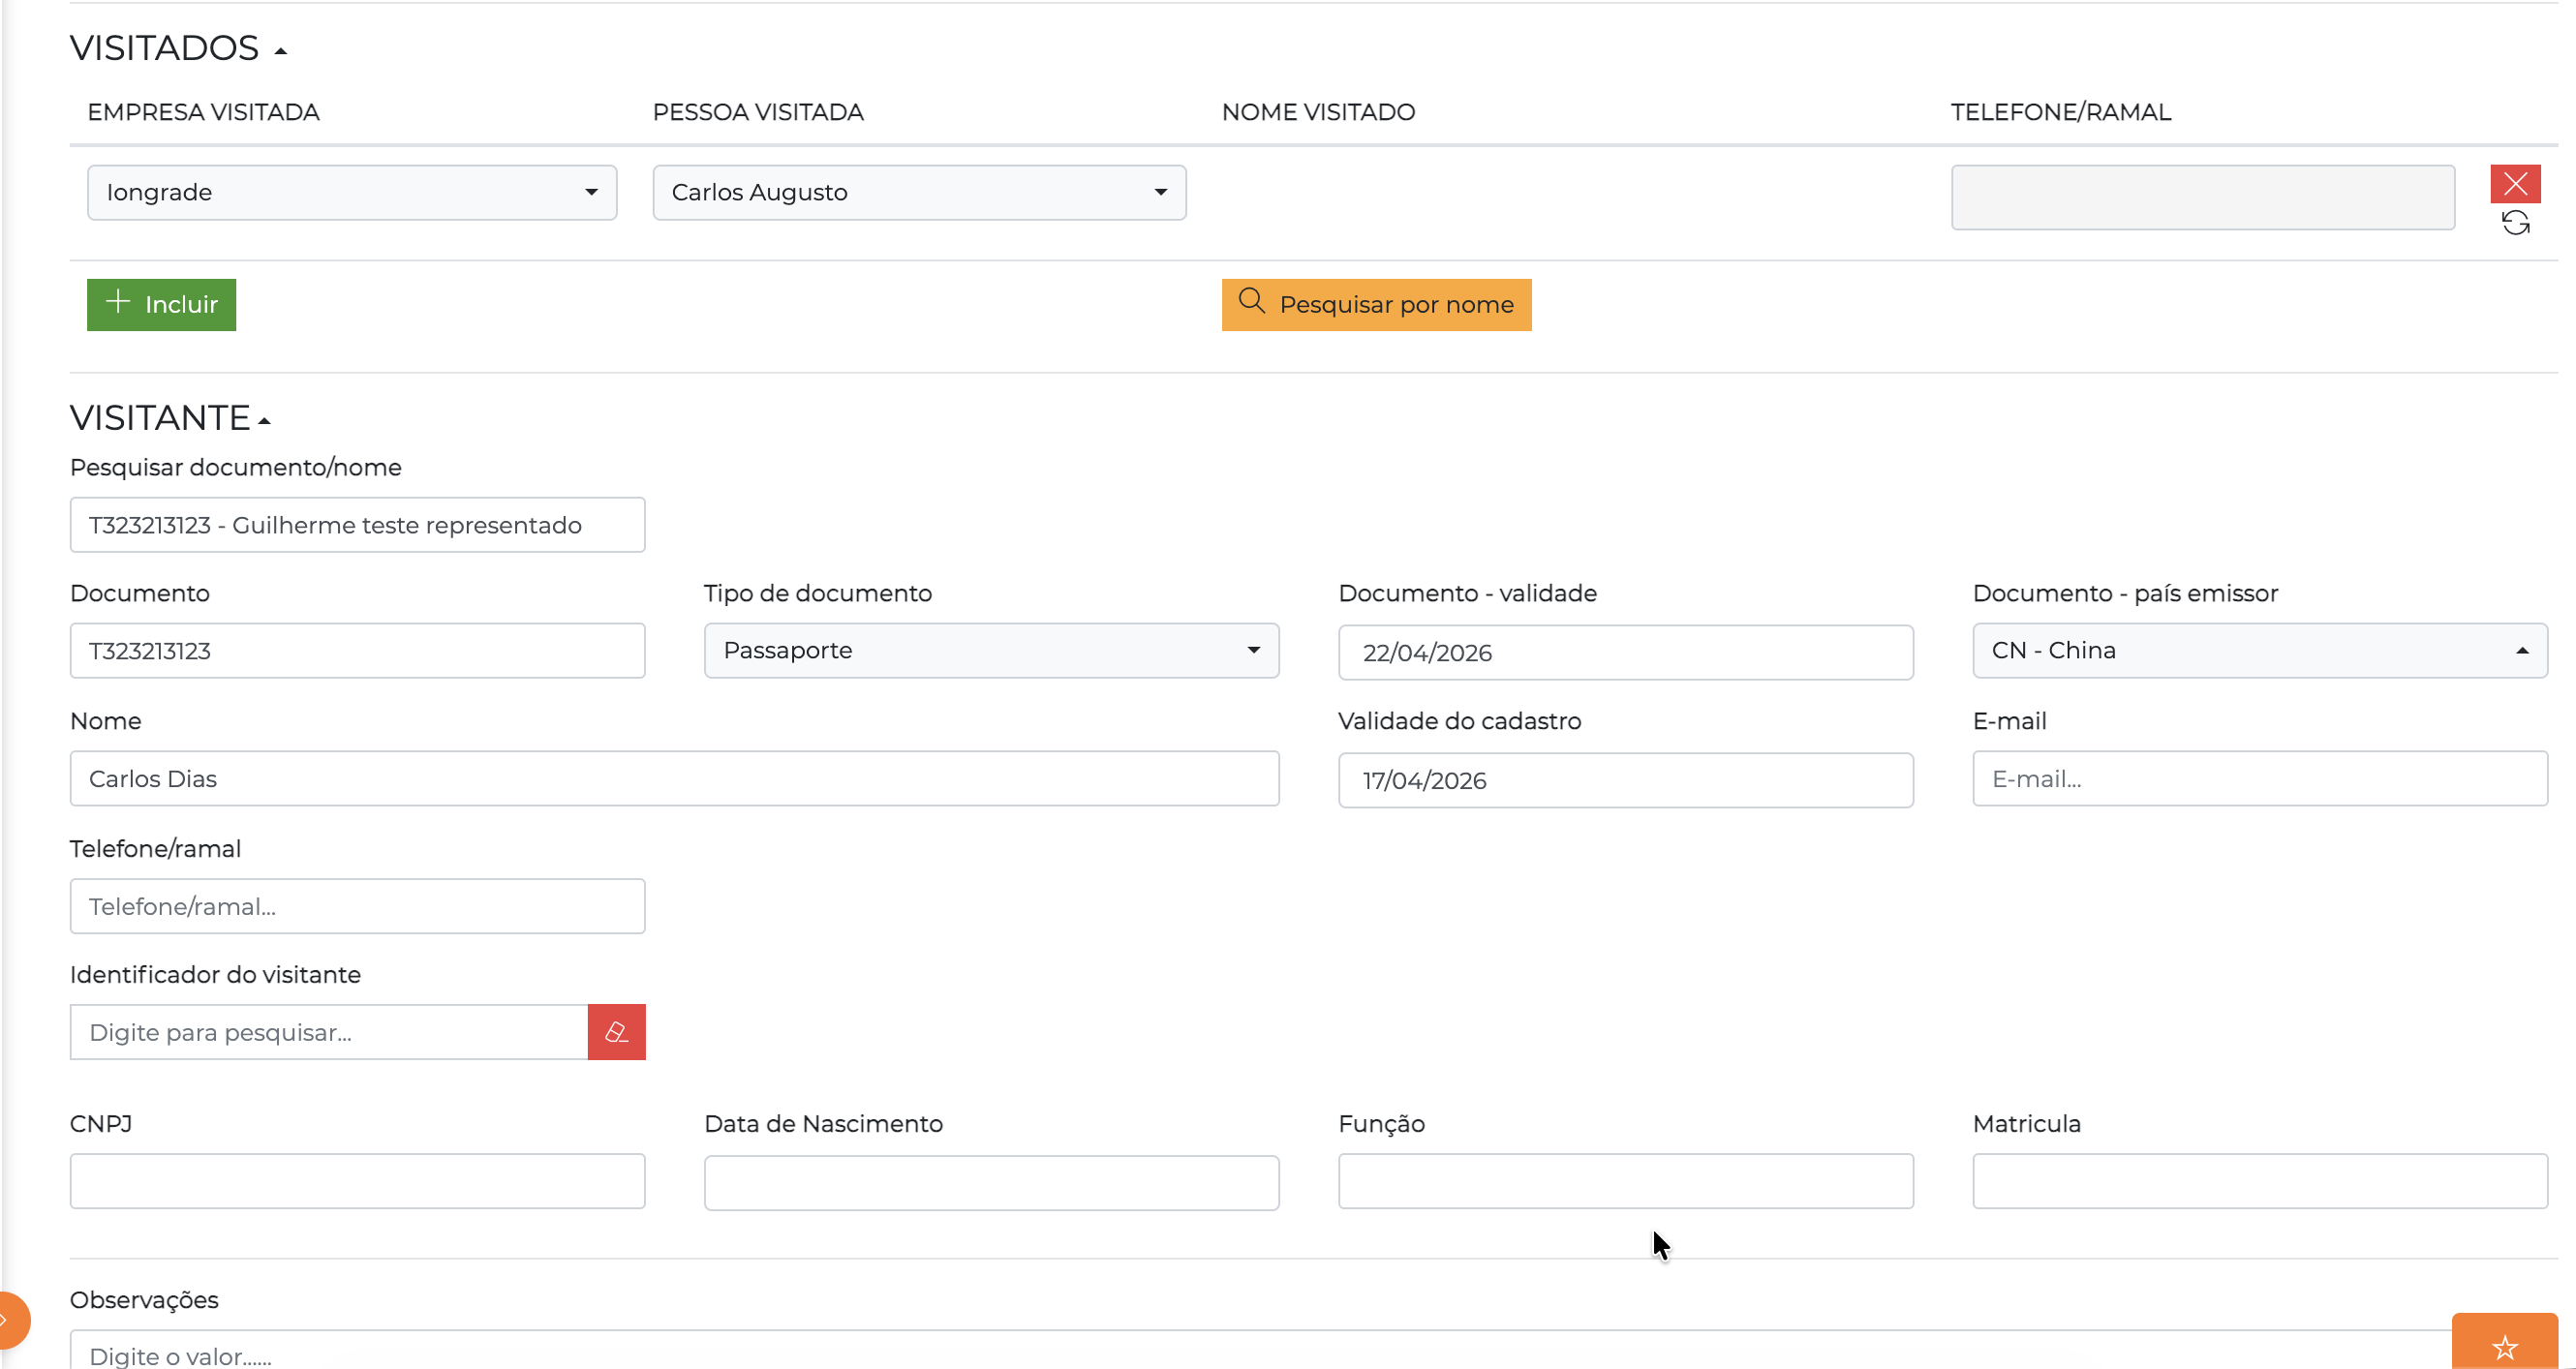
The Visited section shows the columns Visited company, Visited person, Visited name and Phone/extension for each included row.
- Click Include to add new rows (each row represents a person being visited)
- Select the company where the visit will take place
- The person selection box will be automatically populated with all the people associated with that company
- Some companies may allow the registration of people who are not listed, and others may require this control
Search by name:
- If the operator does not know the company/unit of the visited person, they can search for the visited by name
- Just click the Search by name button
- The system will open a popup that allows performing the search quickly and objectively
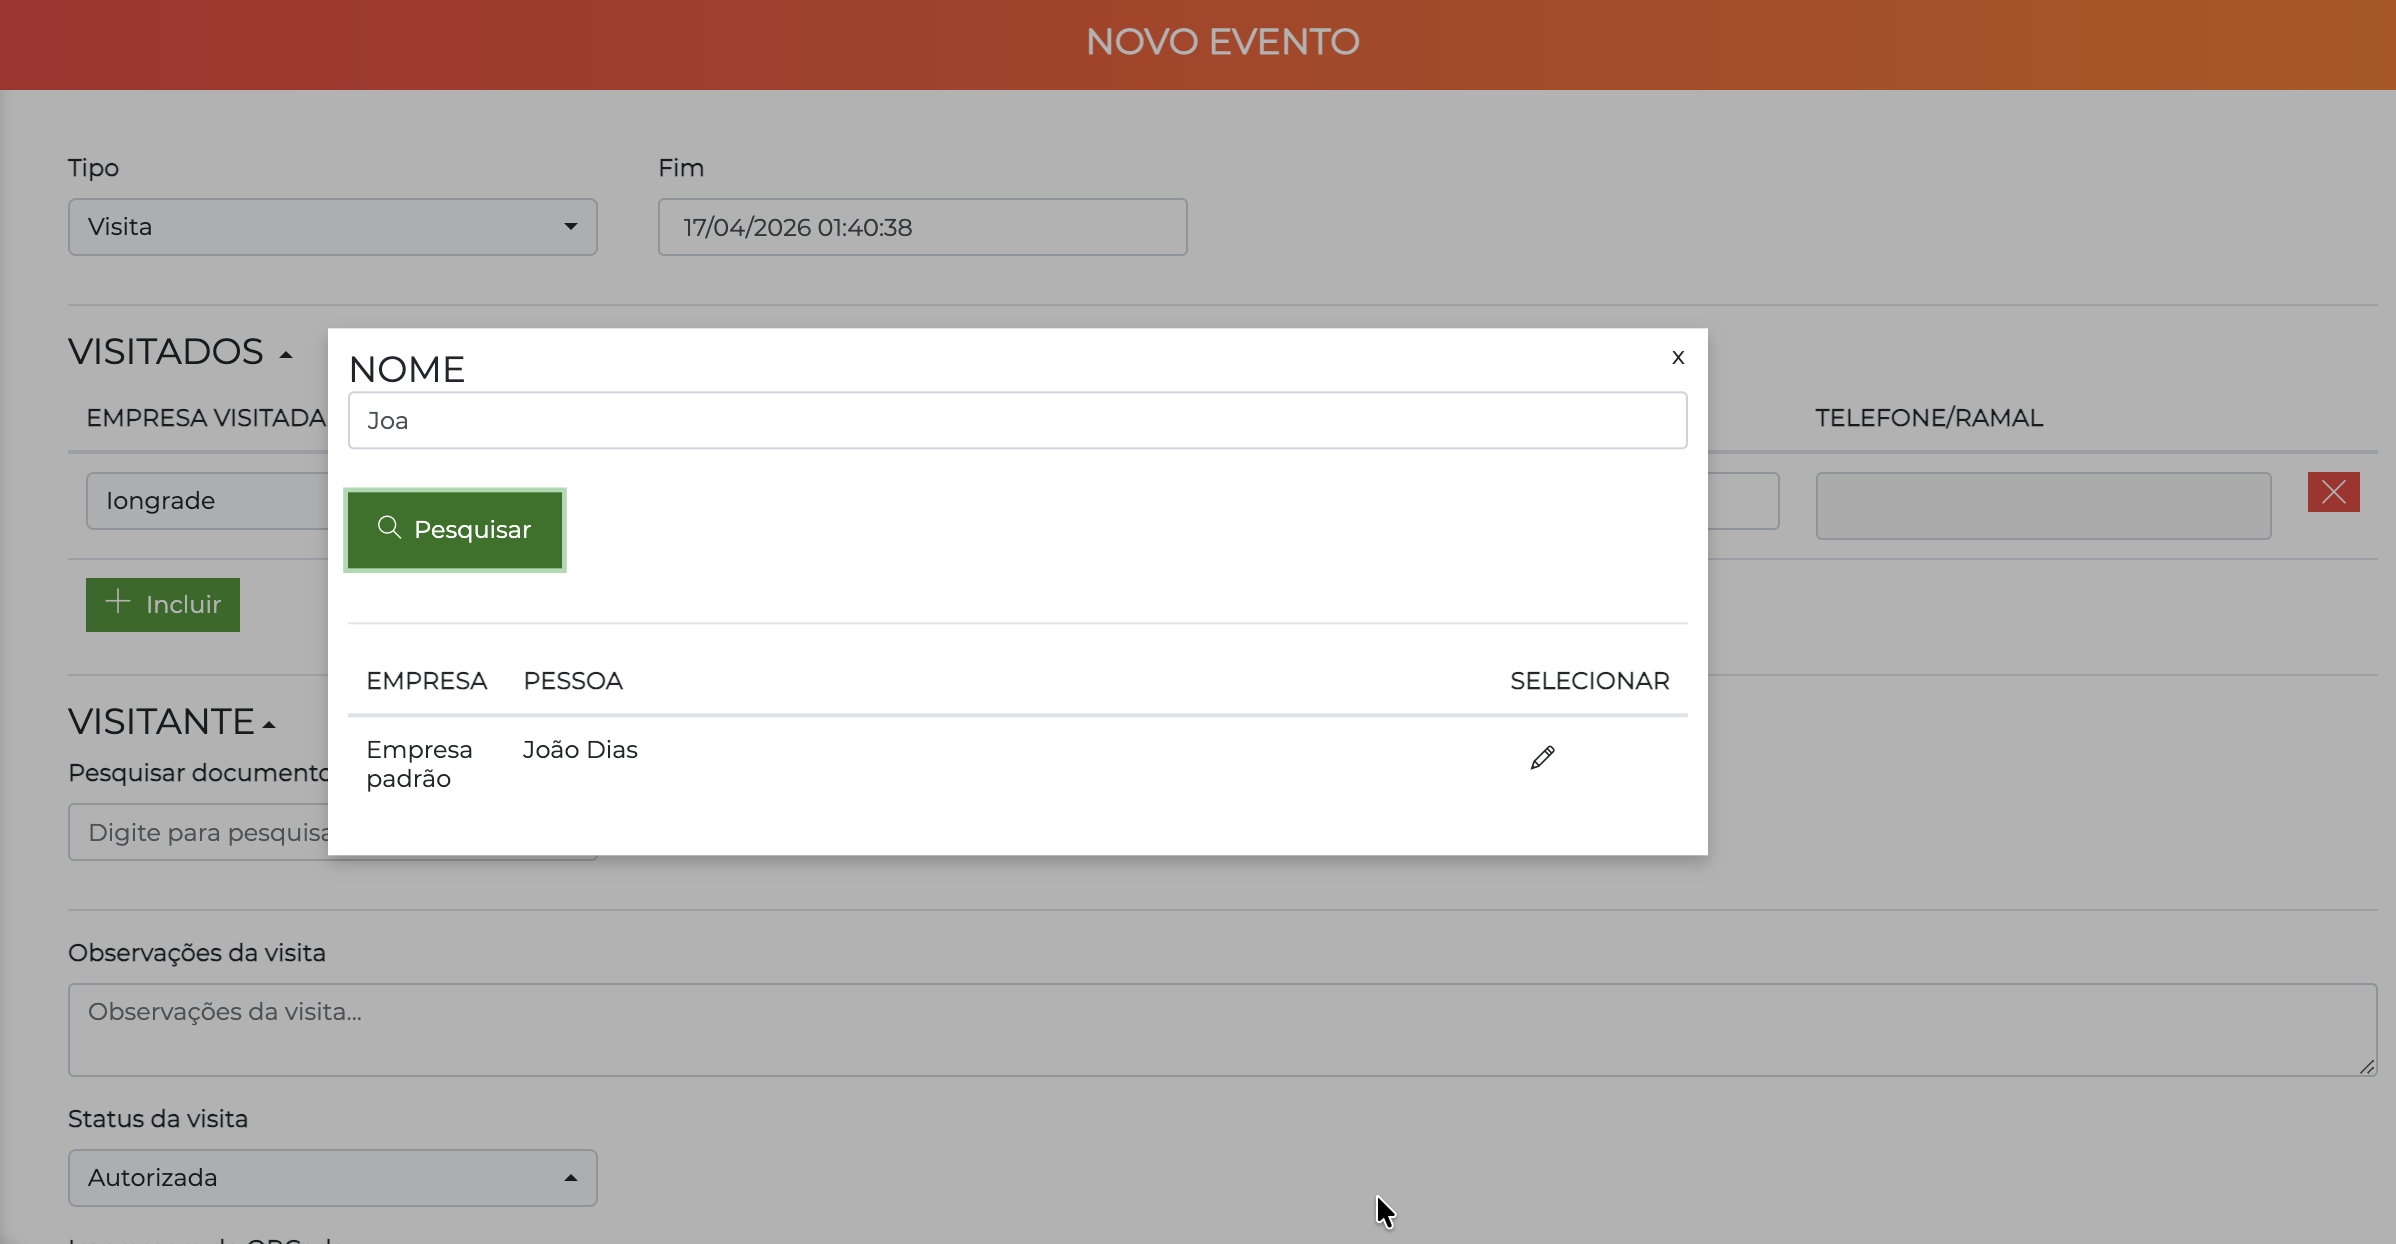
The popup shows a name search field and lists the results with Company and Person, allowing you to select the visited directly.
Step 4: Include Visitor Data
The next step is to include the visitor:
The Visitor section shows the document fields (number, type, validity, issuing country), name, record validity, email, phone, identifier and configurable additional fields.
- The system performs an automatic search by the person's document/name to retrieve historical information
- You can associate identifiers
- Capture biometric templates
- Update data
- Capture photos, if necessary
- Enter the Country and Validity of the visitor's document
- Depending on the event type, a valid document (CPF) may be required for each visitor
- You can add passes to the visitor directly during the quick event registration (requires a specific module)
Step 5: Save
Three saving options are available:
| Action | What happens |
|---|---|
| Save | A notice is issued that the operation was successful, and the screen is automatically "reset" to allow the inclusion of the next visit |
| Save and generate QRCode | The printing process of a QRCode is started. Standard operating system printers or on-board printers on controllers that have this feature available and enabled can be used. The printed QRCode can be given to the visitor for use as an identifier |
| Save and send QRCode by email | An email is sent to the registered visitor's address with a QRCode that can be used as an access credential |
For the QRCode to be accepted on a specific controller, the channel must be configured to accept QRCodes.
Abort Registration
If there is any problem during the visitor's registration and it is necessary to restart the operation, just click the Abort registration button to ensure that the process is restarted safely.
Visits / Appointments
ACCELERO has a button on its dashboard called Visits / appointments that allows you to view the events registered in the system.
This screen is intended for operators who have a global view of the system (security and gatehouse, usually).
Navigation path:
- Dashboard > "Visits / appointments" button
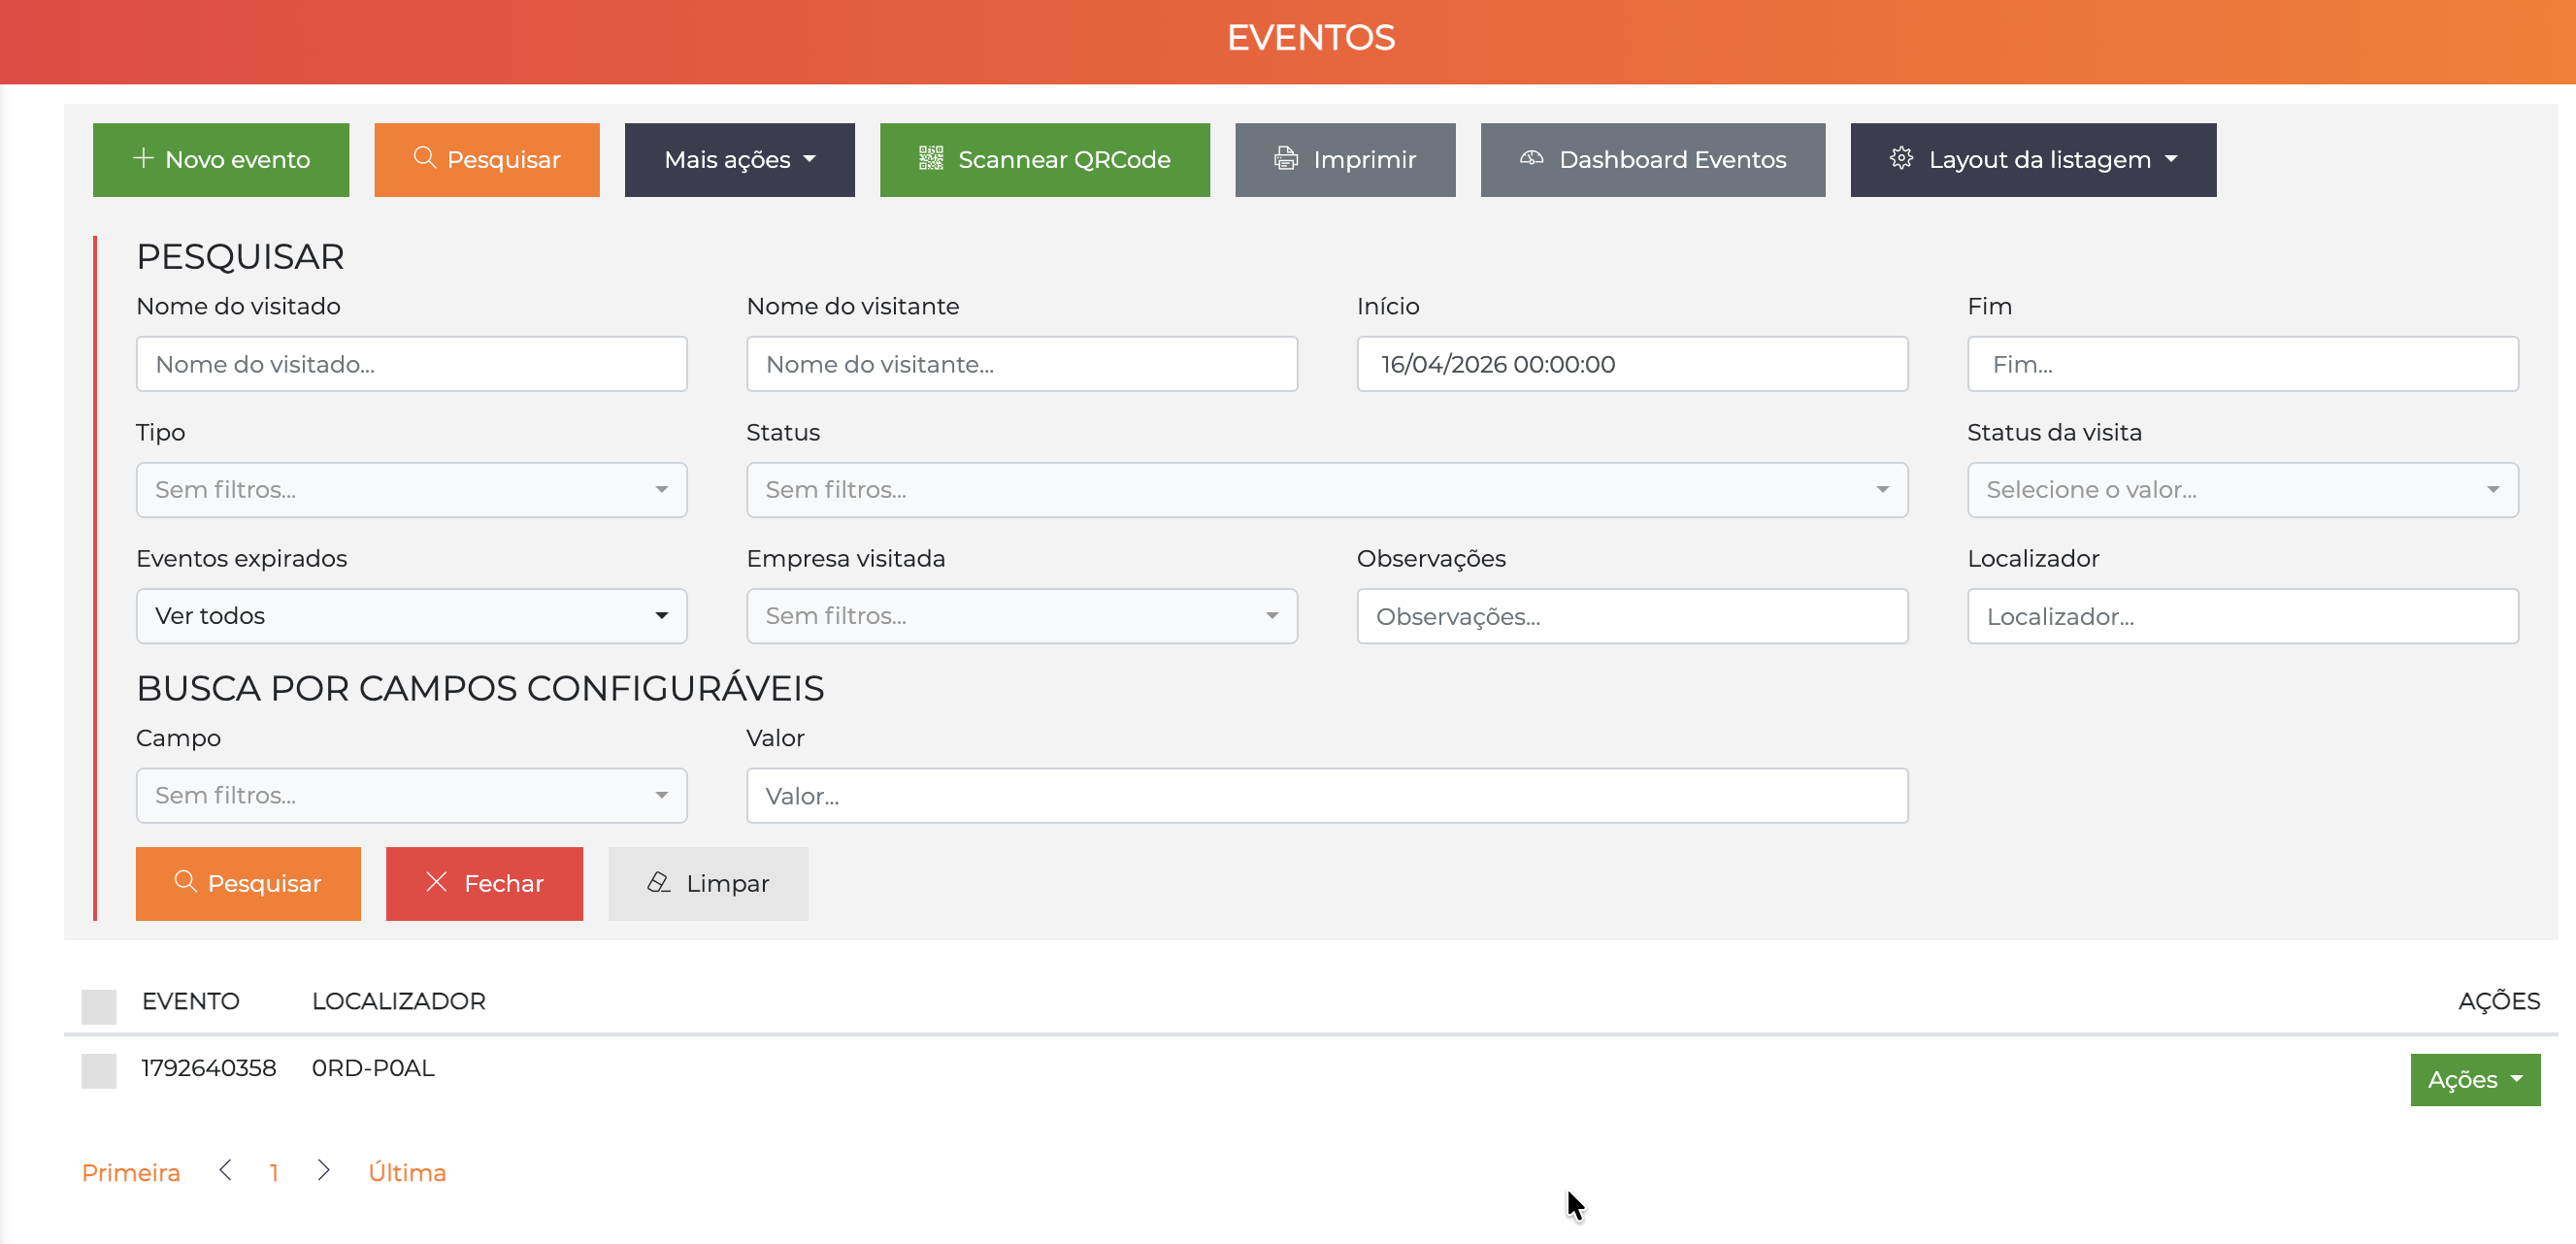
The Events screen shows search filters (visited, visitor, period, type, status, company) and the list of events. The top bar includes the buttons New event, Scan QRCode, Print, Events Dashboard and Listing layout.
Event Status
This screen allows you to observe the status of each event/visit:
| Status | Description |
|---|---|
| Registered | Person registered, but has not received access authorization |
| Check-in - pending authorization | Person registered and presence confirmed, but lacks access authorization from the visited person |
| Authorized | Person already authorized, but has not yet accessed |
| In progress | Person has already accessed, but the event has not yet ended |
| Closed | The event has already been concluded |
Available Actions
You can perform some actions for each event:
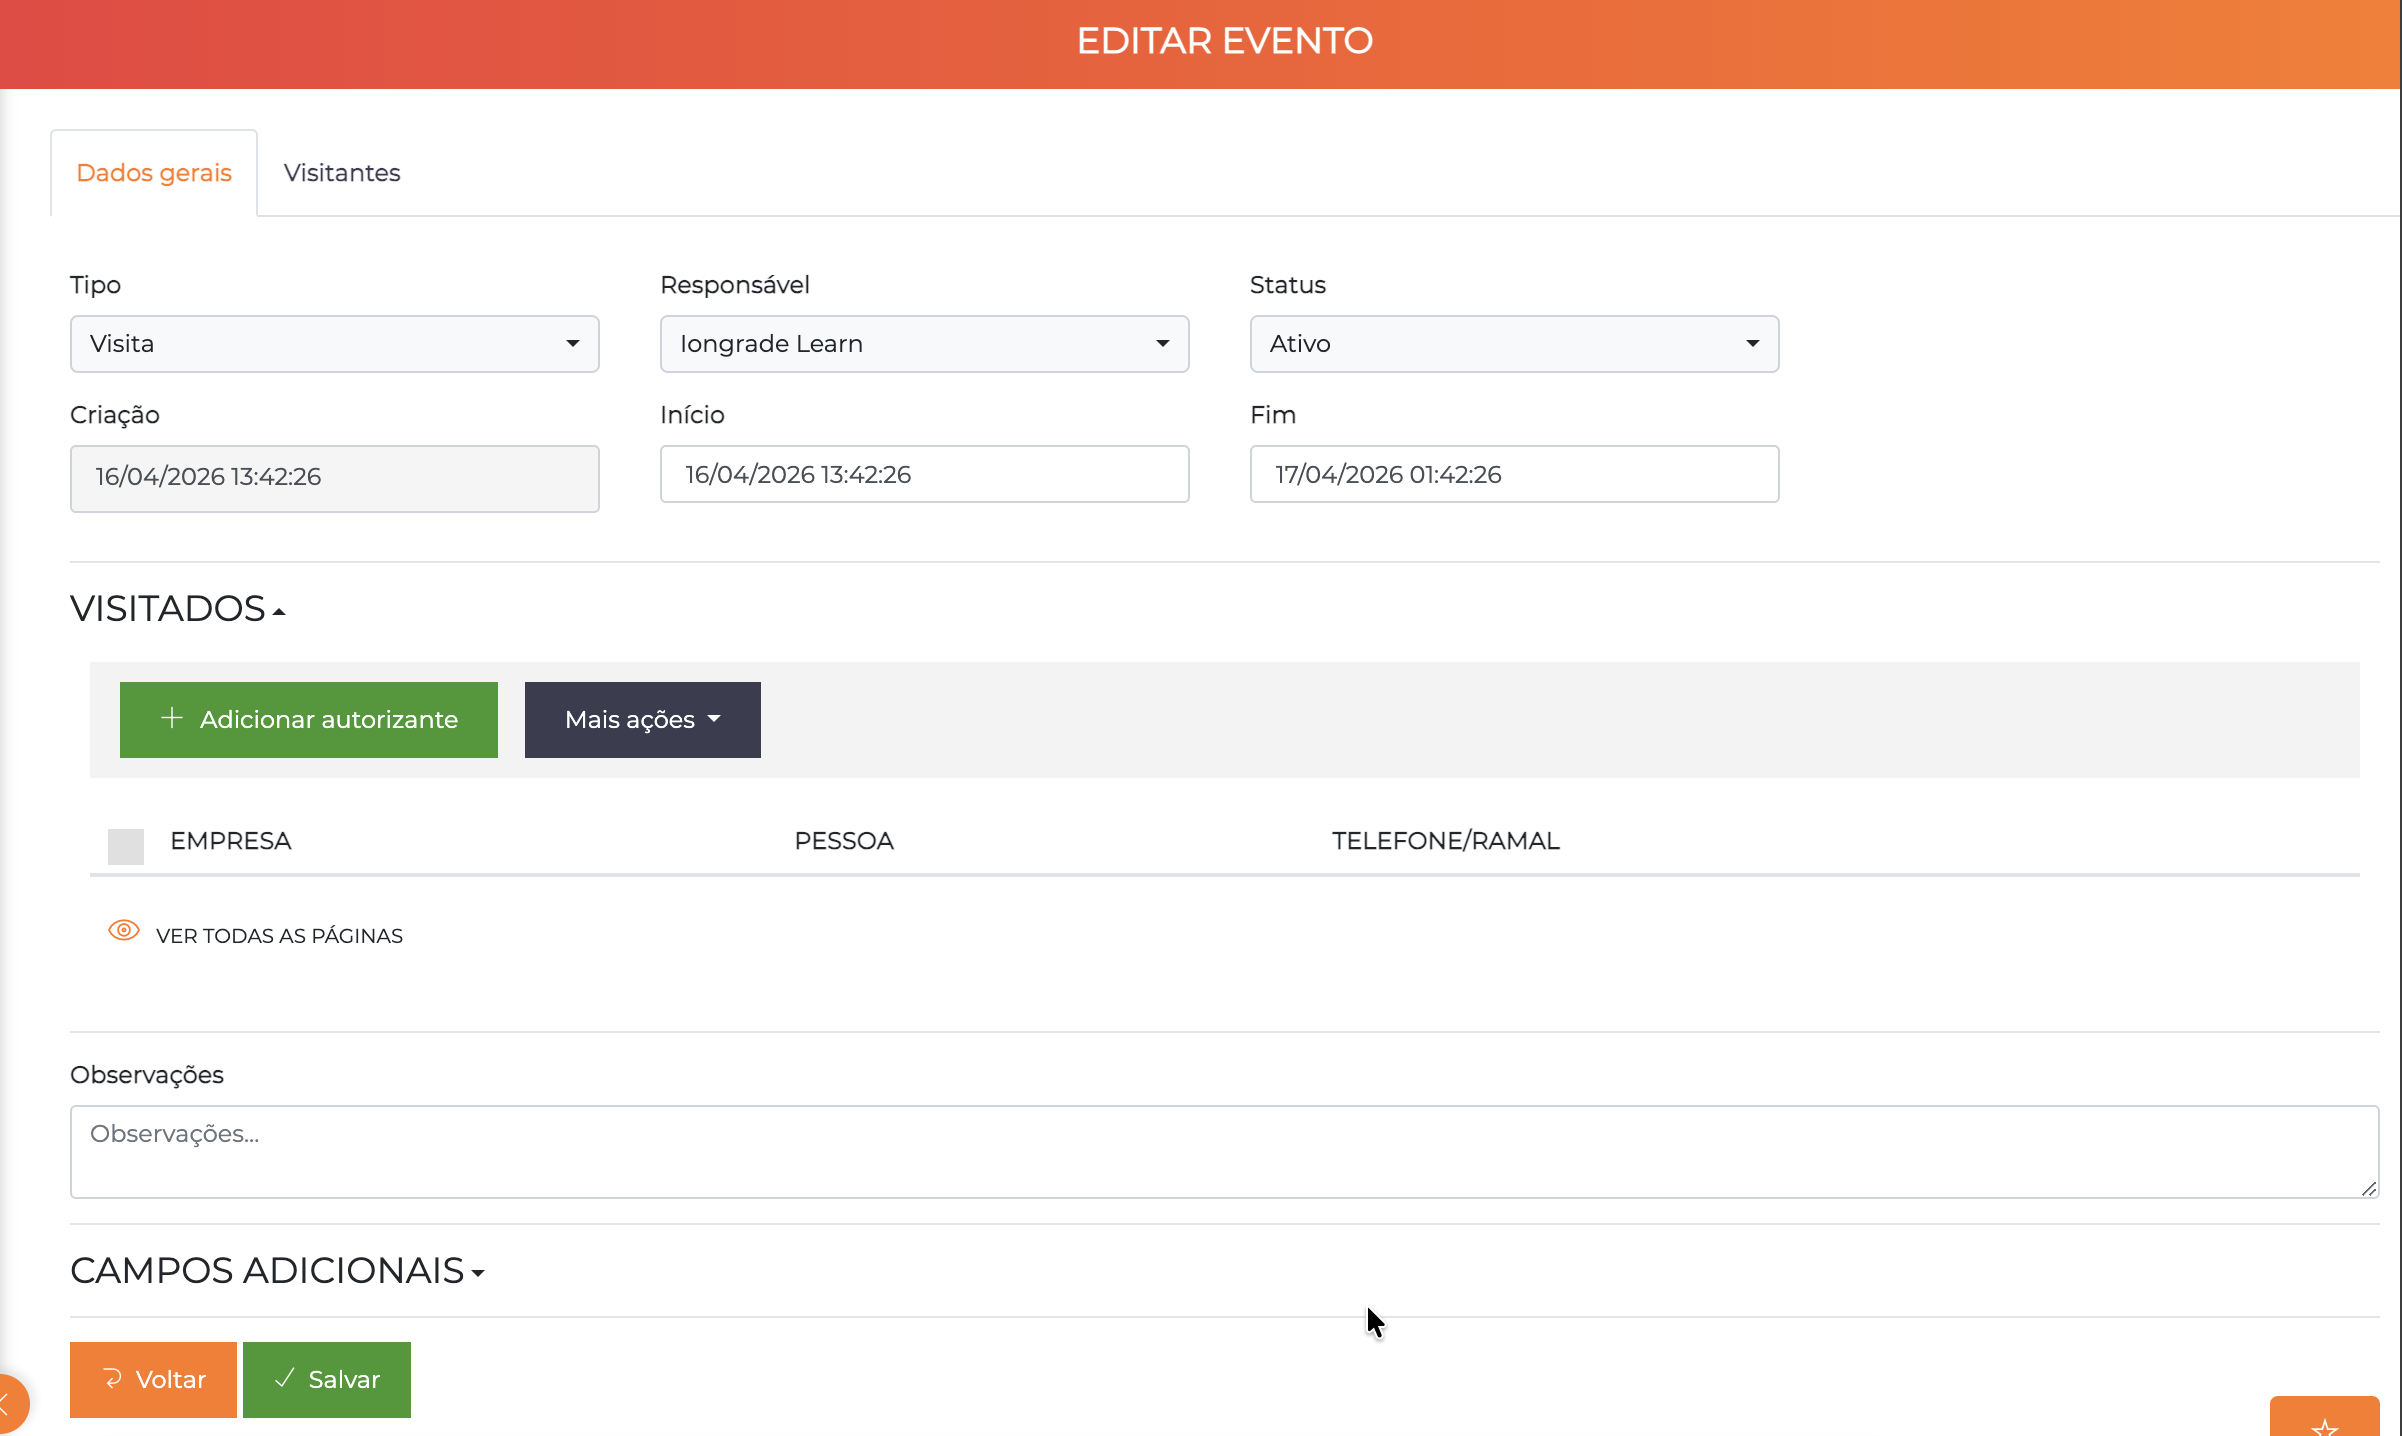
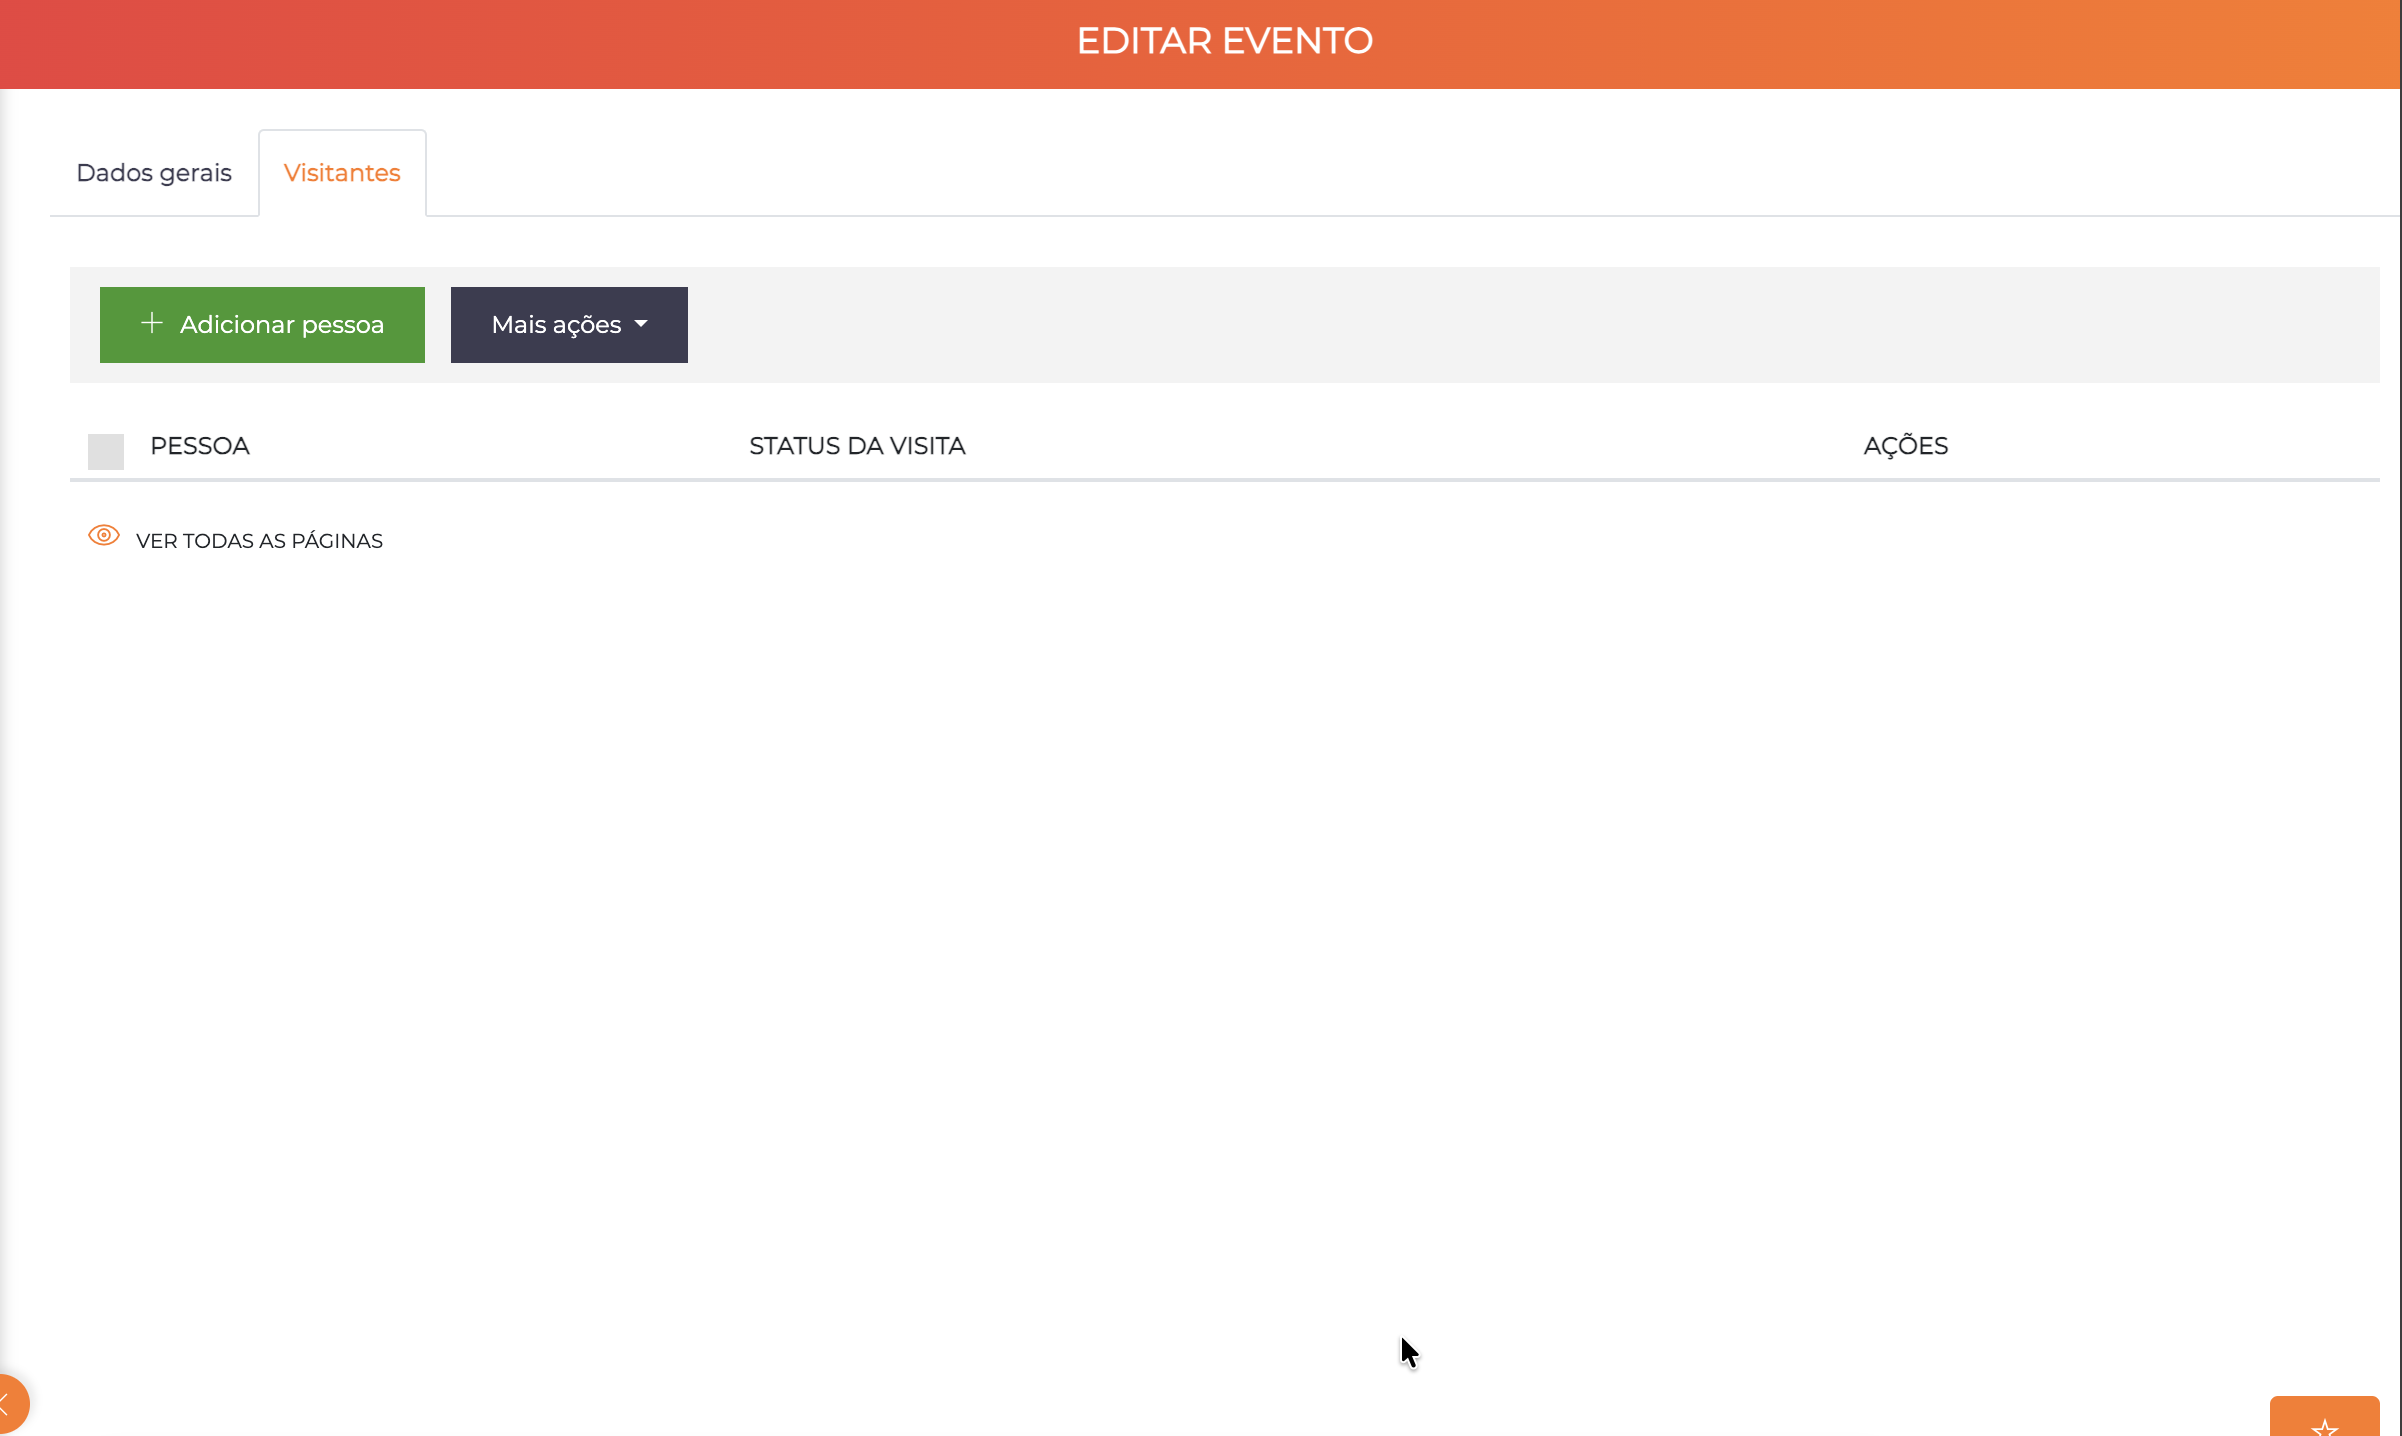
When editing an event, the screen presents two tabs: General data (type, responsible, status, dates, visited and additional fields) and Visitors (list of people with individual visit status for each one).
| Action | Description |
|---|---|
| Edit | View complete visit data |
| Check-in | Confirm the visitor's presence (person already authorized, but has not yet accessed) |
| Authorize access | Authorizes access for that visitor, changing the visit status to "Authorized" |
| Close | Manually closes that visit, changing the status to "Closed" |
My Appointments
For operators who have a limited view of the system because they are associated with specific companies, it is convenient that they have access to the My appointments function.
This function is available on the dashboard and shows only the visits of those specific companies to which the operator is associated.
Navigation path:
- Dashboard > "My appointments" button
Difference from "Visits / Appointments"
This function allows:
- Data viewing equivalent to that of the "Visits / appointments" function
- Access authorization of events that are in the check-in process
Workflow with Separation of Responsibilities
This allows a workflow in which:
- The gatehouse does the visitor's check-in without actually releasing their access
- The release is done by the visited person themselves (who has an active operator in the system)
This workflow allows tracking who actually authorized the access of a given person, ensuring greater operational security.
Practical example:
Scenario: Residential condominium

Step 1 - Gatehouse:
- Visitor arrives at the gatehouse
- Doorman does check-in in the system
- Status changes to "Check-in - pending authorization"

Step 2 - Resident:
- Resident receives notification of a waiting visitor
- Resident accesses "My appointments" via app/web
- Resident AUTHORIZES or DENIES the access
- If authorized, status changes to "Authorized"

Step 3 - Access Control:
- Visitor presents identifier at the turnstile
- System checks "Authorized" status
- Access granted
- Status changes to "In progress"
Configurable Fields in Events
ACCELERO allows the creation of configurable fields to customize the event registration.
The Additional fields section appears in the event form showing the configurable fields defined in Advanced > Configurable fields.
Configuration: Advanced > Configurable fields
Configurable fields can be:
- Text or numeric
- Required or optional
- With specific validations
- Applicable to events, visitors, recurring events, etc.
See the Configurable Fields section for more details.
Notifications and Alerts
The ACCELERO system sends automatic notifications at various moments of the life cycle of an event:
| Event | Notification |
|---|---|
| Expired visit | Alert in the Incident Panel when the expected duration is exceeded |
| Recurring event about to expire | Notification sent to the operator when a recurring event is close to the expiration date |
| Check-in performed | Notification to the visited informing the visitor's arrival |
| Access authorized | Confirmation of granted authorization |
| QRCode sent | Email with access QRCode for the visitor |
Operators can configure which notifications they want to receive through the Notifications tab in their operator record.
See Operators for more details.
QRCodes for Visitors
Sending QRCodes by email requires a specific module enabled in the license.
QRCodes can be generated for visitors in three ways:
- During registration: When saving the visitor, choose "Save and generate QRCode" or "Save and send QRCode by email"
- Through the person record: On the person registration screen, Identifiers section
- By integration: Via API or external applications (Livo, Podesubir, SigmaApp)
Available formats:
- Paper printing (standard printer or on-board on the controller)
- Email to the visitor
- Display on screen for capture by photo/screenshot
Visitor Check-in
Check-in is the process of confirming the physical presence of the visitor at the location.
Check-in Methods
1. Check-in Controllers
Controllers can be configured specifically to do check-in:
- Visitor presents identifier at the check-in controller
- System confirms presence and changes status to "Check-in - pending authorization" (if configured)
- Or releases access immediately (if the event was already authorized)
2. Manual Check-in
Operators can do manual check-in through the "Visits / appointments" screen:
- Locate the event in the list
- Click the "Check-in" button
- Status changed to "Check-in - pending authorization" or "In progress" depending on the configuration
Check-in Notifications
When a visitor does check-in, notifications can be sent:
To the visited (company):
- Configuration in: Company Record > Notifications tab
- Decides whether notifications should be sent
To the visited (person):
- Configuration in: Person Record > Companies tab > "Check-in notification" field
- Defines the notification method (email, push, etc.)
See Visitor Check-in for more details on the complete process.
Complete Status Workflow
Operational Scenarios
Scenario 1: Pre-Authorized Visit
Situation: Resident schedules a visit in advance and already authorizes it
1. Resident registers visitor (or asks the gatehouse to register)
2. Initial status: "Authorized" (event type configured this way)
3. Visitor arrives and presents QRCode at the turnstile
4. Access granted automatically
5. Status: "In progress"
6. On leaving or when time expires: "Closed"
Scenario 2: Visit with Check-in and Authorization
Situation: Unexpected visitor, needs the resident's authorization
1. Gatehouse registers visitor quickly
2. Initial status: "Registered"
3. Visitor does check-in at the controller (or gatehouse does it manually)
4. Status: "Check-in - pending authorization"
5. Resident receives notification
6. Resident authorizes via app
7. Status: "Authorized"
8. Visitor presents identifier
9. Access granted
10. Status: "In progress"
Scenario 3: Recurring Events
Situation: Service provider with a fixed schedule (gardener on Tuesdays and Thursdays)
1. Register person as visitor
2. Go to the "Recurring events" tab
3. Configure: Tuesdays and Thursdays, 14:00-18:00
4. System automatically creates events on the specified days
5. Provider does not need to check-in each time
6. Direct access in the configured time ranges
Best Practices
-
Well-defined event types: Create types that reflect the operational reality, not overly generic categories
-
Realistic durations: Configure expected durations consistent with each type (delivery: 15min, social visit: 2h, meeting: 4h)
-
Auto-associated categories: Use them to automate permissions and reduce manual work
-
Appropriate default status: Configure the default status according to the workflow ("Authorized" for appointments, "Registered" for later check-in)
-
Configured notifications: Make sure the visited receive check-in notifications when applicable
-
Clear workflow: Train the team on when to do check-in, when to authorize, when to close
-
Expiration alerts: Configure durations that generate useful alerts in the Incident Panel
-
QRCodes when possible: Send QRCodes by email to facilitate access and reduce queues
Next Steps
- People - Register people and configure recurring events
- Categories - Configure categories for auto-association in events
- Companies - Configure check-in notifications per company
- Operators - Configure event notifications for operators
- Configurable Fields - Add custom fields to events