Passes
Passes link a person's access to the validity of a document or authorization. You create a pass type with the name of the item you need to control — occupational health certificate, safety onboarding, passport, medical exam — and associate it to the person with a validity period (start date and end date). While the pass is valid, access is allowed; when it expires, the person stops accessing the areas that require that pass.
Passes is a licensed module (grants). The Pass types and Passes screens, and the validation in access control, are only available when the module is enabled in the license. See Licensing.
What it is for
In controlled environments, knowing who the person is is not enough: often you need to ensure that they have a documentation requirement in order before releasing access. Without a dedicated feature, this control becomes a manual and error-prone routine — someone has to remember to review expired documents and disable people in the system.
The Passes module automates this: access release itself starts to depend on the pass validity. If the document expires, the block is automatic, without operator intervention.
Use cases
- Safety onboarding / training: an industry requires onboarding valid for 1 year for all employees. Whoever has expired onboarding does not enter the production area until they renew it.
- Occupational health certificate (ASO): access to the plant depends on an up-to-date ASO.
- Documents with expiration: passport, licenses, certifications and NR training.
- Exam or authorization per area: in a condominium, the pool area requires a valid medical exam.
A company creates the ASO pass and associates it to each employee with the validity date of the respective certificate. From then on, control is automatic: on the day an employee's ASO expires, they are blocked in the areas that require this pass, until a new ASO is registered.
How it works
Each pass assigned to a person gathers:
| Field | Description |
|---|---|
| Type | The controlled pass type (e.g. ASO, Onboarding). Required |
| Start validity | Date from which the pass becomes valid. Required |
| End validity | Date until which the pass is valid. Required |
| Notes | Free text for notes (optional) |
| Active | Indicates whether the pass is active. Only active passes are considered in access control |
| Issued by | Operator who registered the pass (filled in automatically) |
Characteristics of the control:
- The pass is only considered valid when it is active and today's date is within the interval between the start and end validity.
- The block is specific to the areas that require the pass — it does not necessarily affect the person's access to other areas.
- The validity is defined per person, which differentiates the pass from a category-based control: each individual can have their own expiration date for the same pass type.
Pass types: positive and inverse logic
Each pass type has a Positive logic option, shown as a switch in the type listing. It defines the direction of the control:
| Positive logic | Behavior | Typical use |
|---|---|---|
| On (default) | Positive pass: the person must have the valid pass to access the area that requires it | ASO, onboarding, certifications |
| Off | Inverse pass: the person is blocked while they have the valid pass; outside the period, access returns to normal | Vacation, leaves of absence, suspensions |
An inverse Vacation pass blocks the employee's access during the date interval of the vacation. Outside that period, access returns to being allowed normally — without the need to disable and re-enable the person manually.
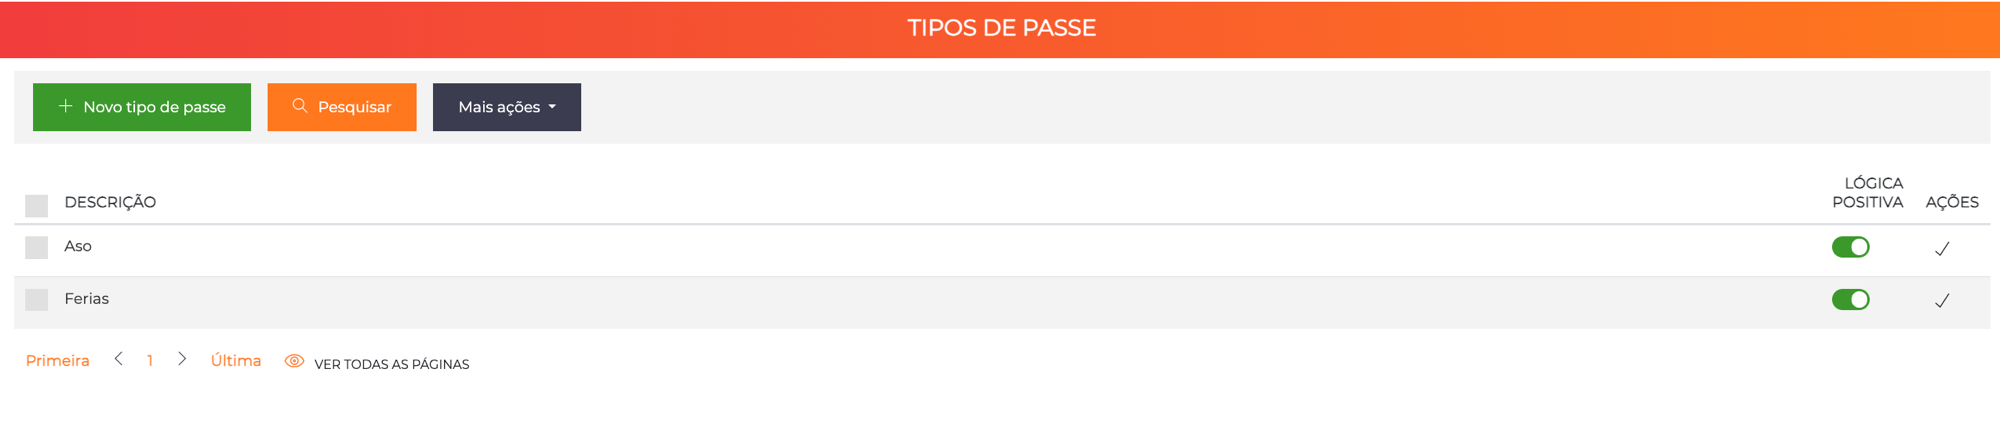
The inverse pass uses the same structure as passes (type, start/end validity, person); only the logic of the type is inverted.
Activation
Step 1: Enable pass validation
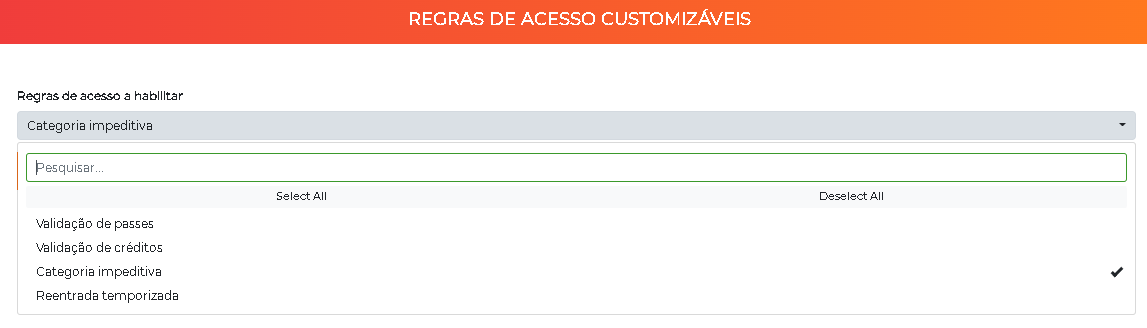
Go to Advanced > Systems, locate Customization - Customizable access rules and edit. Select Pass validation and save.
Step 2: Create the pass type
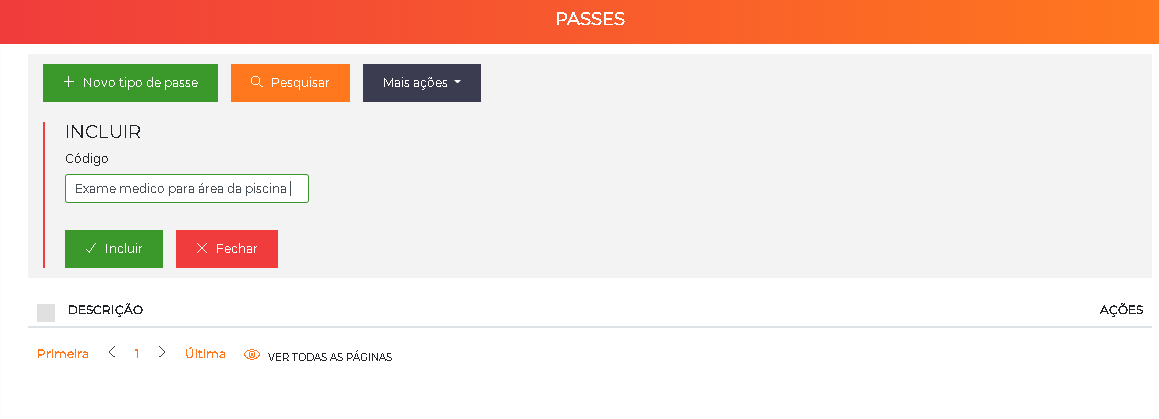
Go to Advanced > Pass types, click New pass type and enter the description — the name of the item to control, for example ASO or Onboarding (from 3 to 50 characters). Include.
Leave Positive logic on for a common pass (requires having a valid one) or turn it off for an inverse pass (blocks while valid).
Step 3: Require the pass in the area
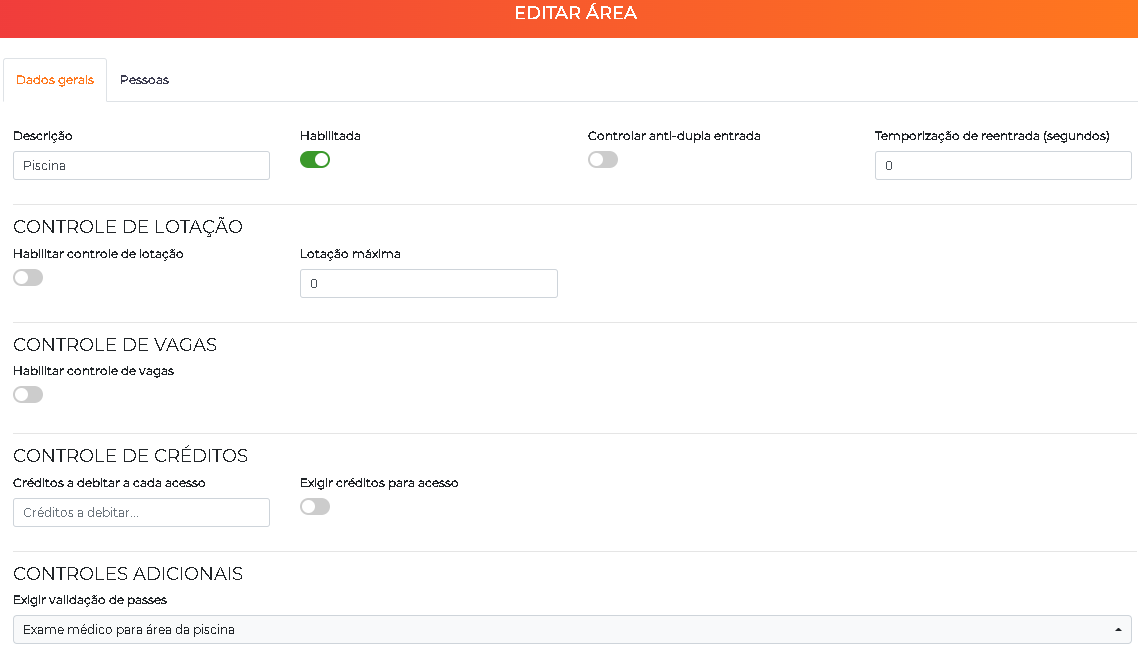
Go to Settings > Areas, edit the area that will require the pass and, in Additional controls, select the pass in Require pass validation.
Step 4: Assign the pass to the person
Assign the pass to whoever has already met the requirement. Go to People > All, edit the person, go to the Passes submenu and click New pass. Select the type, set the start validity and the end validity, enter notes (if necessary) and include.
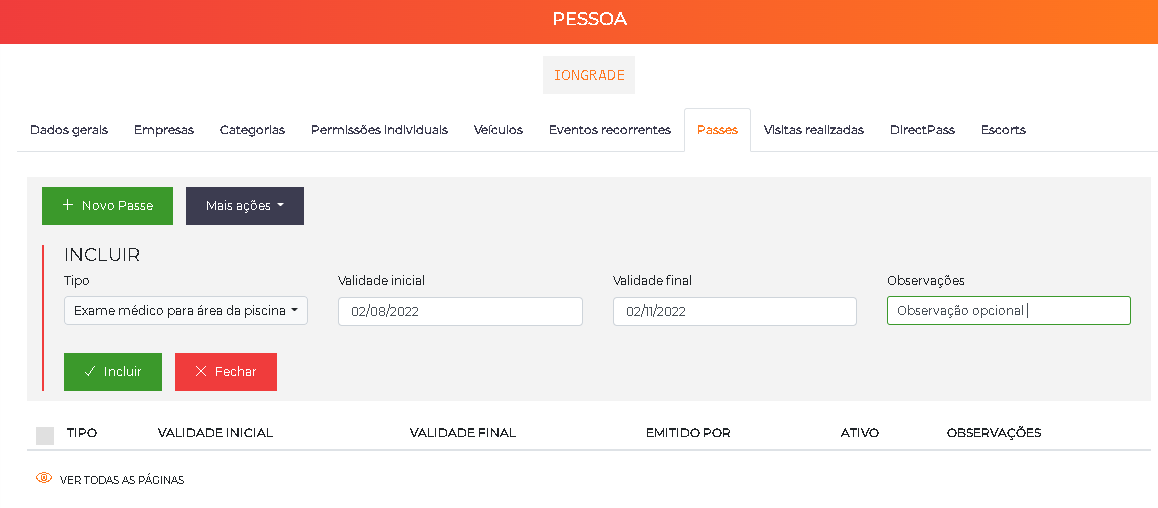
Once the assignment is complete, only people with a valid pass access the area (or, in the case of an inverse pass, only those who are not within the pass period).
How access control decides
When Pass validation is active and the destination area requires one or more passes, at each access attempt the system evaluates:
- Required positive passes — the person must have all of them valid (active and within the period). If any is missing, access is denied.
- Required inverse passes — if the person has any of them valid at the moment, access is denied.
- Once both conditions are met, access is authorized by this rule.
The check only occurs when Pass validation is turned on (Step 1) and the area lists the required passes (Step 3). Areas without required passes are transparent to this rule.
Listing and management of passes
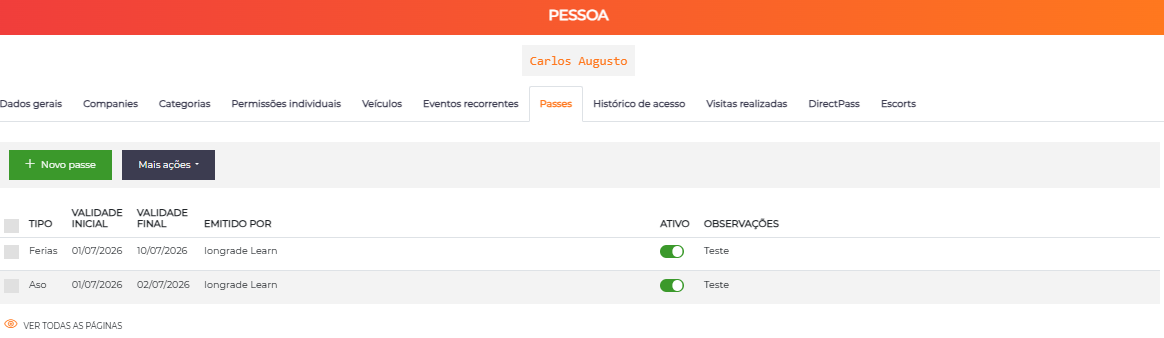
The Passes submenu within each person gathers all the passes of that individual, with the New pass action and batch deletion. The columns shown are Type, Start validity, End validity, Issued by, Active and Notes.
Next Steps
- Areas — require the pass in the desired areas
- People — assign and follow each person's passes
- Access Policy — understand how the access rules combine