First Login and Overview
Every ACCELERO installation is delivered with a master operator already registered. This operator has access to all system functions and is responsible for creating new operators.
The master operator is created automatically during installation and has full system permissions.
1. Login Process
The process is simple and secure: you receive your access email from the administrator, request a temporary password (sent by automatic email), log in, and create your permanent password.
Step 1: Receive Access Email
The system administrator will create your operator and register your email in Accelero. They will provide you with:
- Your access email registered in the system
- Access link to Accelero
- Instructions for first login
The administrator is responsible for creating operators and providing the registered emails. The system does not send an automatic email at this stage.
Write down the access email the administrator provided — you will need it!
Step 2: Access the Login Screen
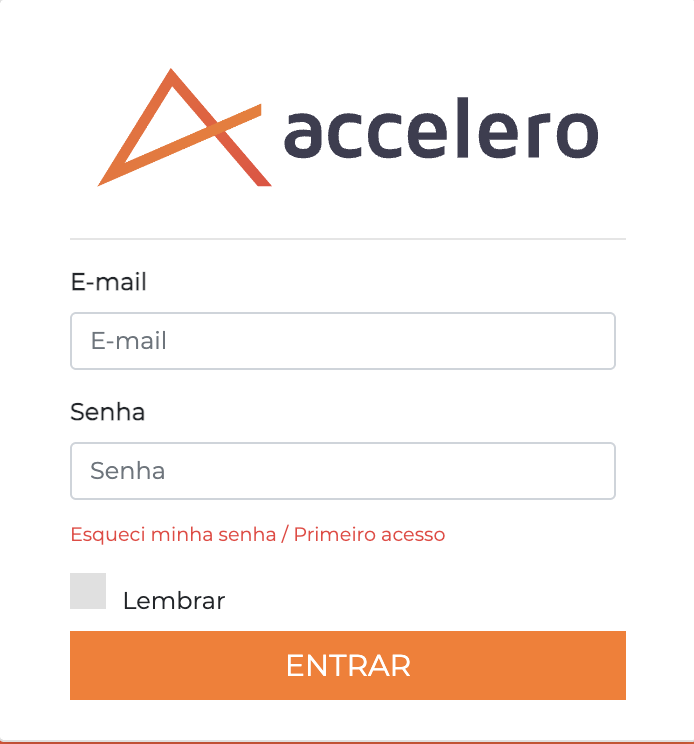
Click the "Forgot my password / First access" link located below the Sign In button.
Step 3: Request a Temporary Password
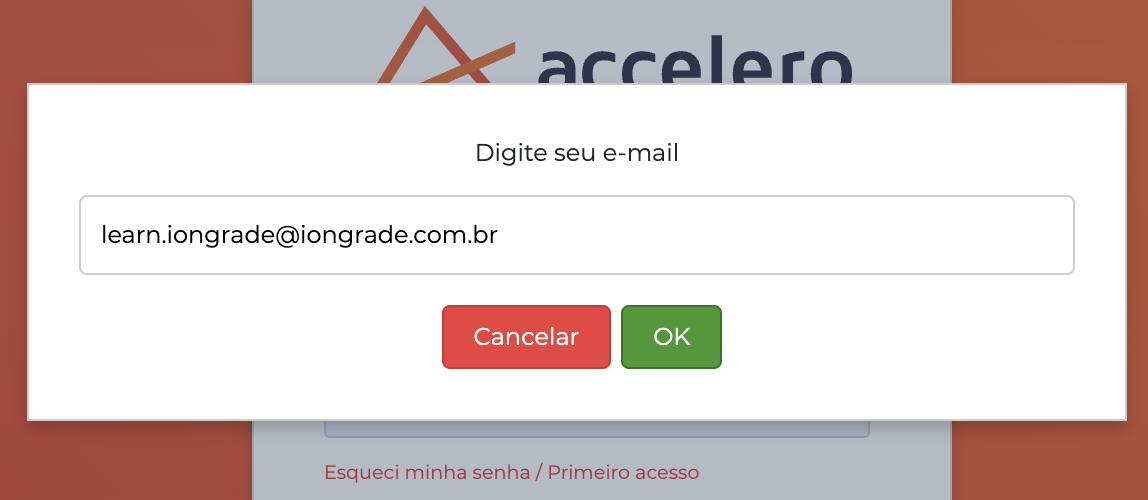
- Enter the email you received from the IONGRADE team
- Click "Send"
- A temporary password will be sent to your email
Step 4: Receive the Temporary Password
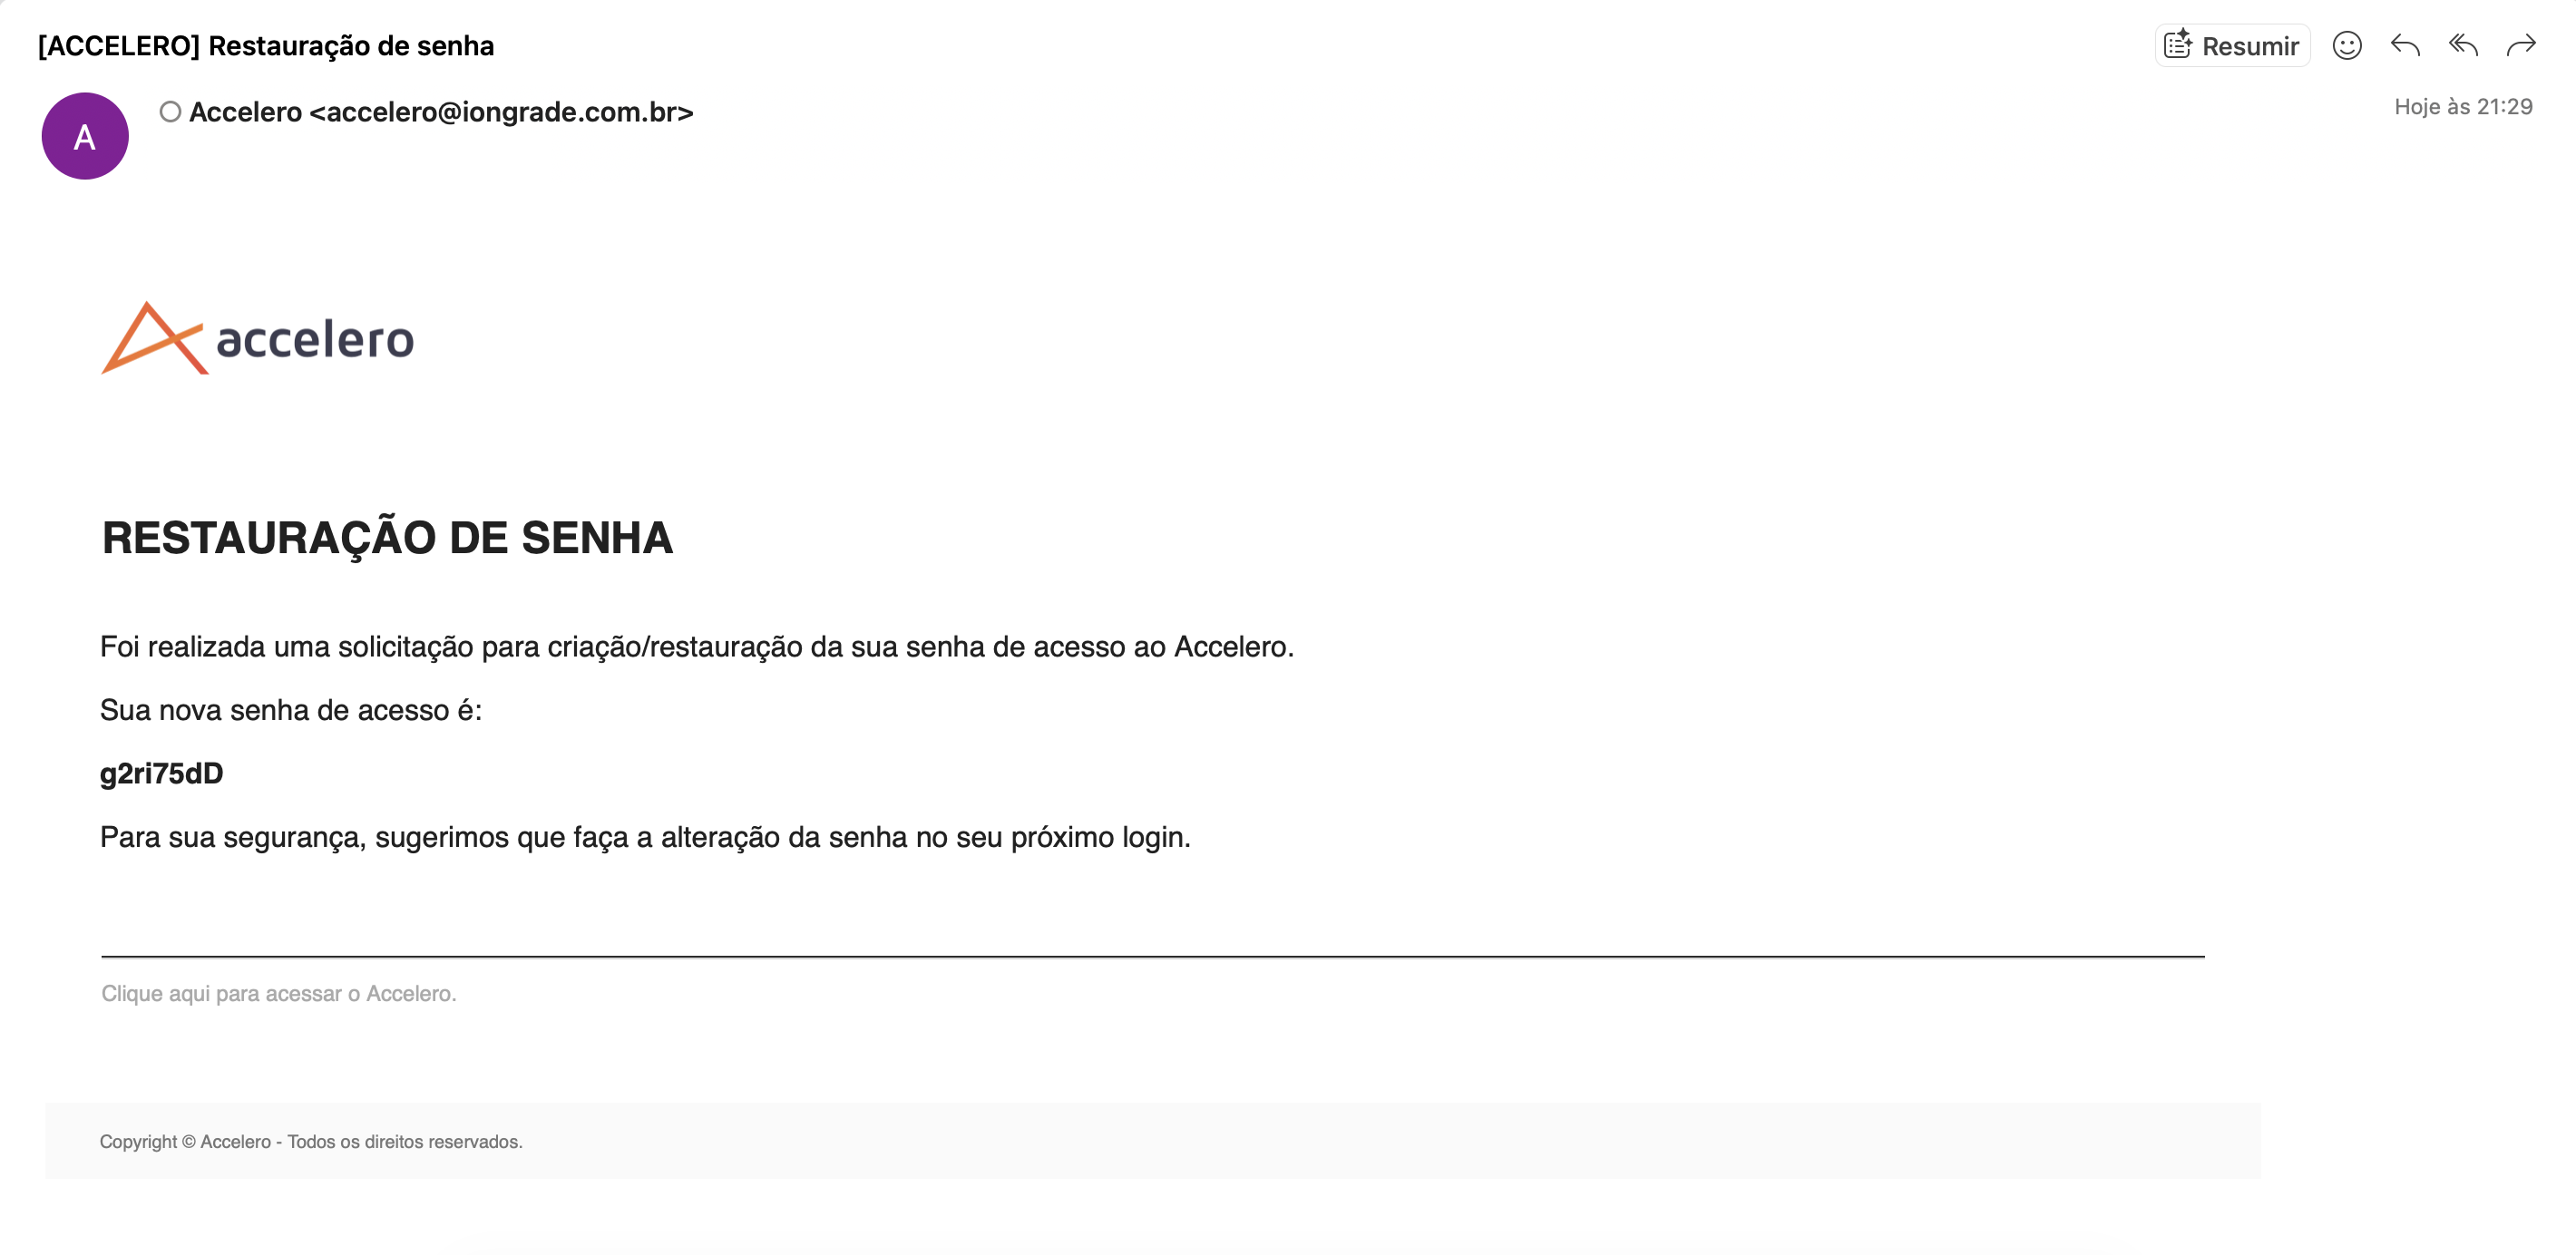
You will receive an email with:
- Temporary password (copy or write it down)
- Security instructions
- Password validity (usually 24 hours)
Copy the temporary password to make it easier. It contains letters, numbers, and special characters.
Step 5: Log In with the Temporary Password
Go back to the login screen and sign in with:
- Email: Your access email
- Password: The temporary password received by email
Click "Sign In".
Step 6: Create Your Permanent Password
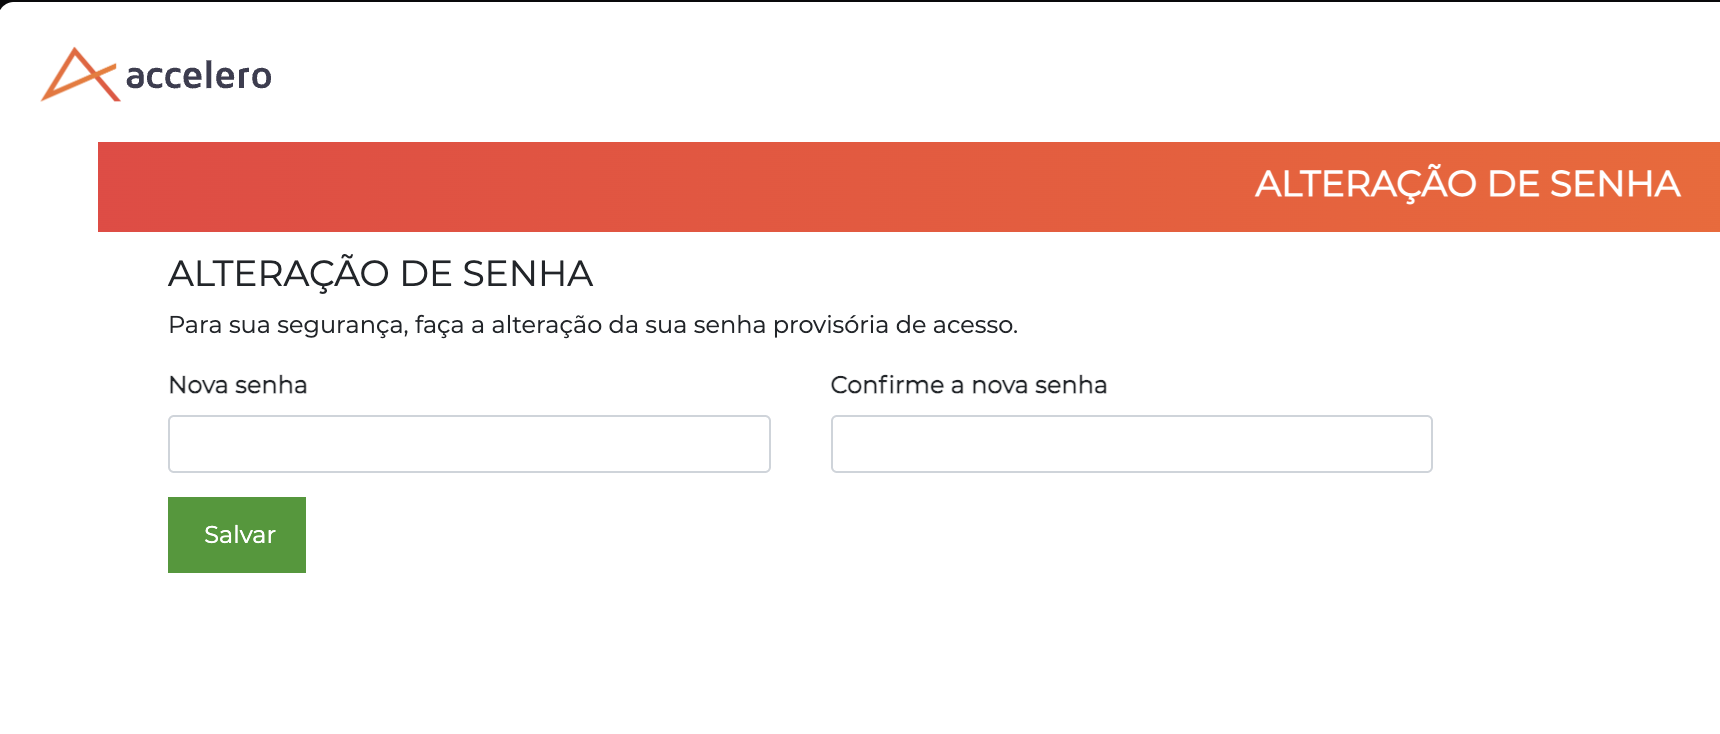
The system will automatically redirect you to the password creation page.
Fill in the fields:
- Current password: Enter the temporary password again
- New password: Create your permanent password
- Confirm new password: Enter it again to confirm
Use a strong password:
- ✅ Minimum 8 characters
- ✅ Uppercase and lowercase letters
- ✅ Numbers
- ✅ Special characters (!@#$%&*)
Click "Save" or "Change Password".
2. Changing Password and Account Information
Once the initial login is successful, it is important to update the operator's information for security reasons.
How to access
- Click the top right corner of the screen
- Select the "My data" option
The "My data" option is available to all operators, not just the master.
Editable fields
| Field | Description |
|---|---|
| Email address used to log in to the system | |
| Password | Access password (a strong password is recommended) |
| Name | Operator's full name |
We recommend changing at least the email and access password right after the first login. Use strong passwords combining uppercase and lowercase letters, numbers, and special characters.
3. Main Interface
Homepage - Quick Access Center

Customizable homepage with quick access buttons to system functions
The Homepage is your customizable home screen:
- Quick access buttons - Shortcuts to your most used functions
- Customization - Choose which buttons to display and reorganize them as you prefer
- Customizable icons - Personalize the appearance of the shortcuts
- Notifications - Important alerts at the top
- Quick search - Quickly locate People, Vehicles, and Companies
You can configure which buttons appear on the homepage, changing icons and organizing them to match your workflow!
Main Menu - Navigation
The left side menu organizes all the features:
| Section | What you'll find |
|---|---|
| Dashboard | Interactive dashboard with system access information |
| People | Registration and management of people |
| Incident log | Creation of incidents to record events in the system |
| Reports | Generation of reports (accesses, identifiers, etc.) |
| Settings | Areas, Categories, Controllers, Time ranges |
| Advanced | Profiles, Operators, maintenance, system |
The menu automatically adapts to your permissions! Operators with limited profiles will see only the authorized menus.
4. Logoff
The recommended way to end a session is to click the top right corner of the screen and select the "Logoff" option. This way, the logoff happens immediately and securely.
Single Session per Browser
A single user can only be logged in to one browser at a time.
- If the same user tries to log in from another browser, the older session will be terminated immediately
- This mechanism ensures security and access control to the system
5. General System Information
After the first login, we recommend that the master operator review the general system information.
Navigation path: Advanced > System > System - General Information
Facility ID
One of the most important pieces of information about the system is the Facility ID of the installation.
Characteristics:
- A unique and permanent value across all ACCELERO installations
- Allows validation of all data and communication with physical devices
- Cannot be changed after the system is created
The Facility ID is the unique identifier of your installation. Save this value for future reference, especially when contacting technical support.
System Version
Displays the version currently running in the system.
- Any available updates are formally communicated by the IONGRADE technical support team
- The installation of updates is always scheduled in advance
- The version cannot be changed manually
Operation Start
Date when the system started its operation. This information is recorded automatically during the installation activation.
MQTT Port
Communication port of the MQTT broker.
This information is available only to the master operator.
The MQTT broker is responsible for the communication between the ACCELERO server and the physical devices (controllers, readers, cameras, etc.).
Next Steps
After the first login and review of the general information, we recommend:
- Initial system setup - See Initial Setup
- Check licensing - See Licensing
- Create additional operators - See Operators
- Configure access profiles - See Profiles
Technical Support
If you experience any difficulties during the first access, contact the IONGRADE technical support team.