Onboarding a new company
Overview
Flow for starting up a new customer that will use the app integrated with Access Control. It is the day-to-day work of the support team when receiving a new company: register the company in the Panel (generating the keys), take those keys to the integration in Access Control, define what to synchronize, save and only then synchronize.
In the final step, first Save the selection and only then Synchronize — synchronizing without saving does not send what was selected. And check that the keys match between the company registration and the Integration: mismatched keys are the number 1 cause of "the integration does not work".
It spans two systems: the Panel (Accelero APP) and Access Control (Accelero).
Prerequisites
- Access to the Panel with permission to create companies and users (see Users).
- Access to Integrations - AcceleroApp in Access Control.
- Customer data (name, units, spaces) and the access operator used (e.g.: APP).
Step by step
1. Register the company (Panel) — generates the keys
In Companies / Condominiums, register the company with all the data: Access type, Name, Code, Facility ID, and generate/record Token, Private token and Endpoint. Set the reverse QR code, the image and leave it Active. Save. → This is where the keys consumed by the integration are born.
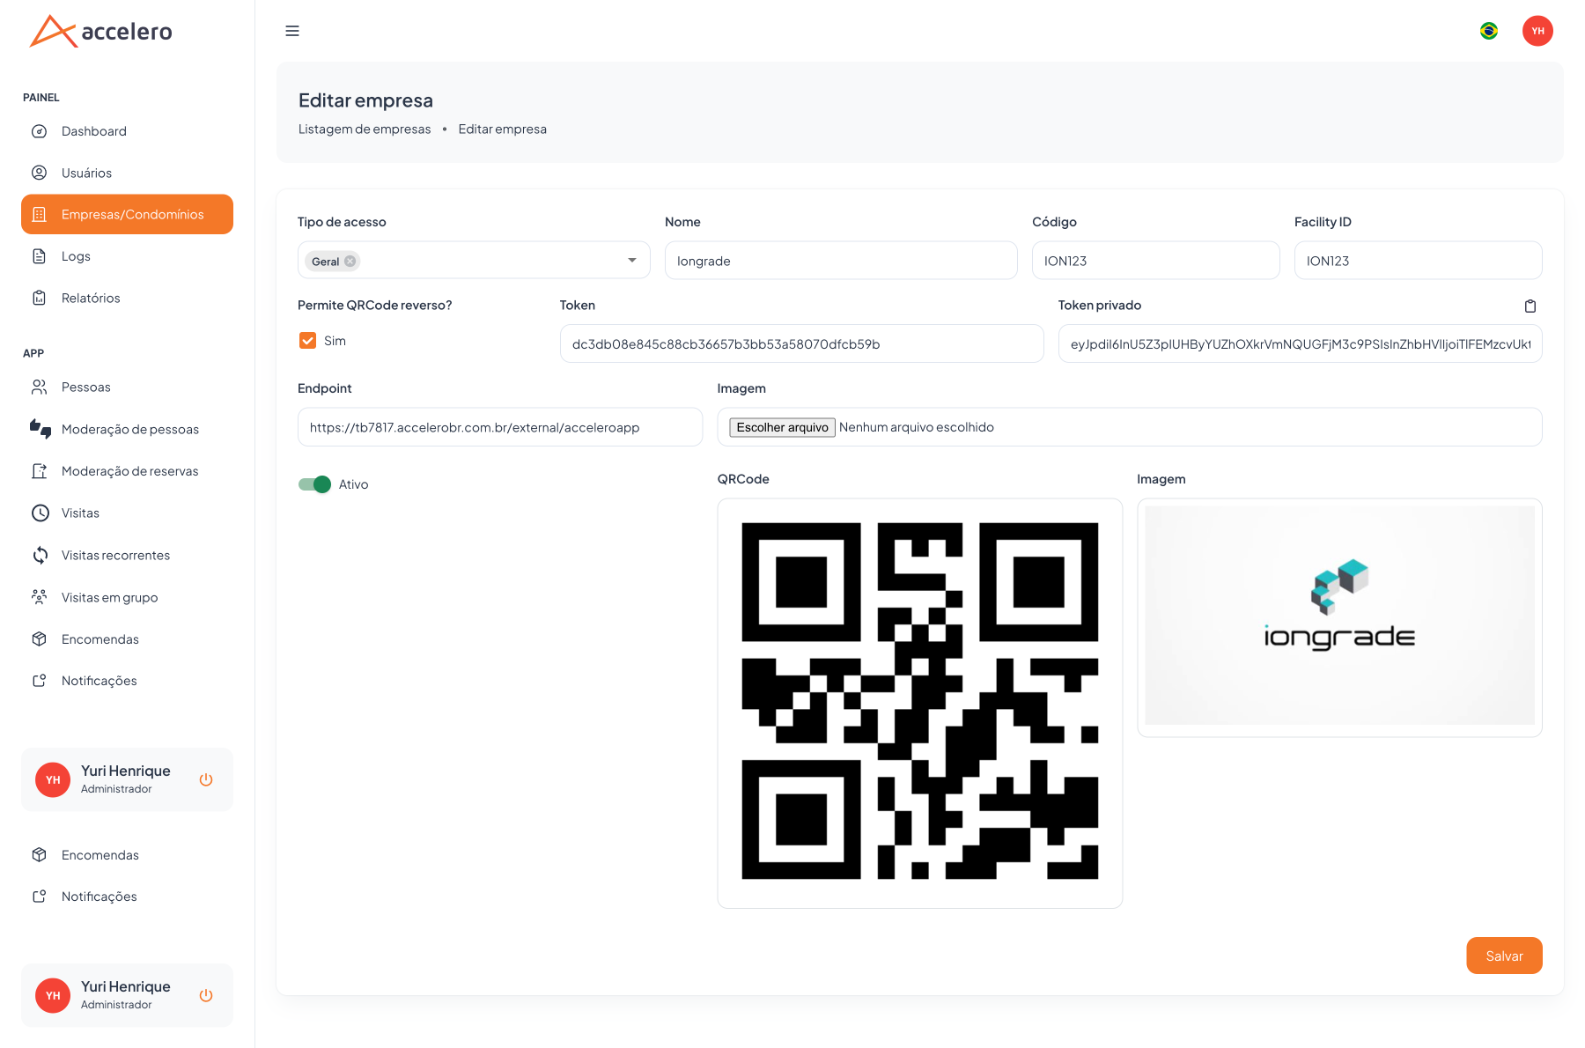
Use the company actions menu to register Units, Spaces / Common areas, Visit types and FAQ, and to import the resident base in People import.
2. Configure the integration — General tab (Access Control)
In Integration — General, select the Operator, paste the two tokens (APP→Accelero and Accelero→APP) and the AcceleroApp URL, and set Default category, Association of new residents and Default event type. Adjust Overwrite data of existing people as needed. Save. → Use exactly the keys from step 1.
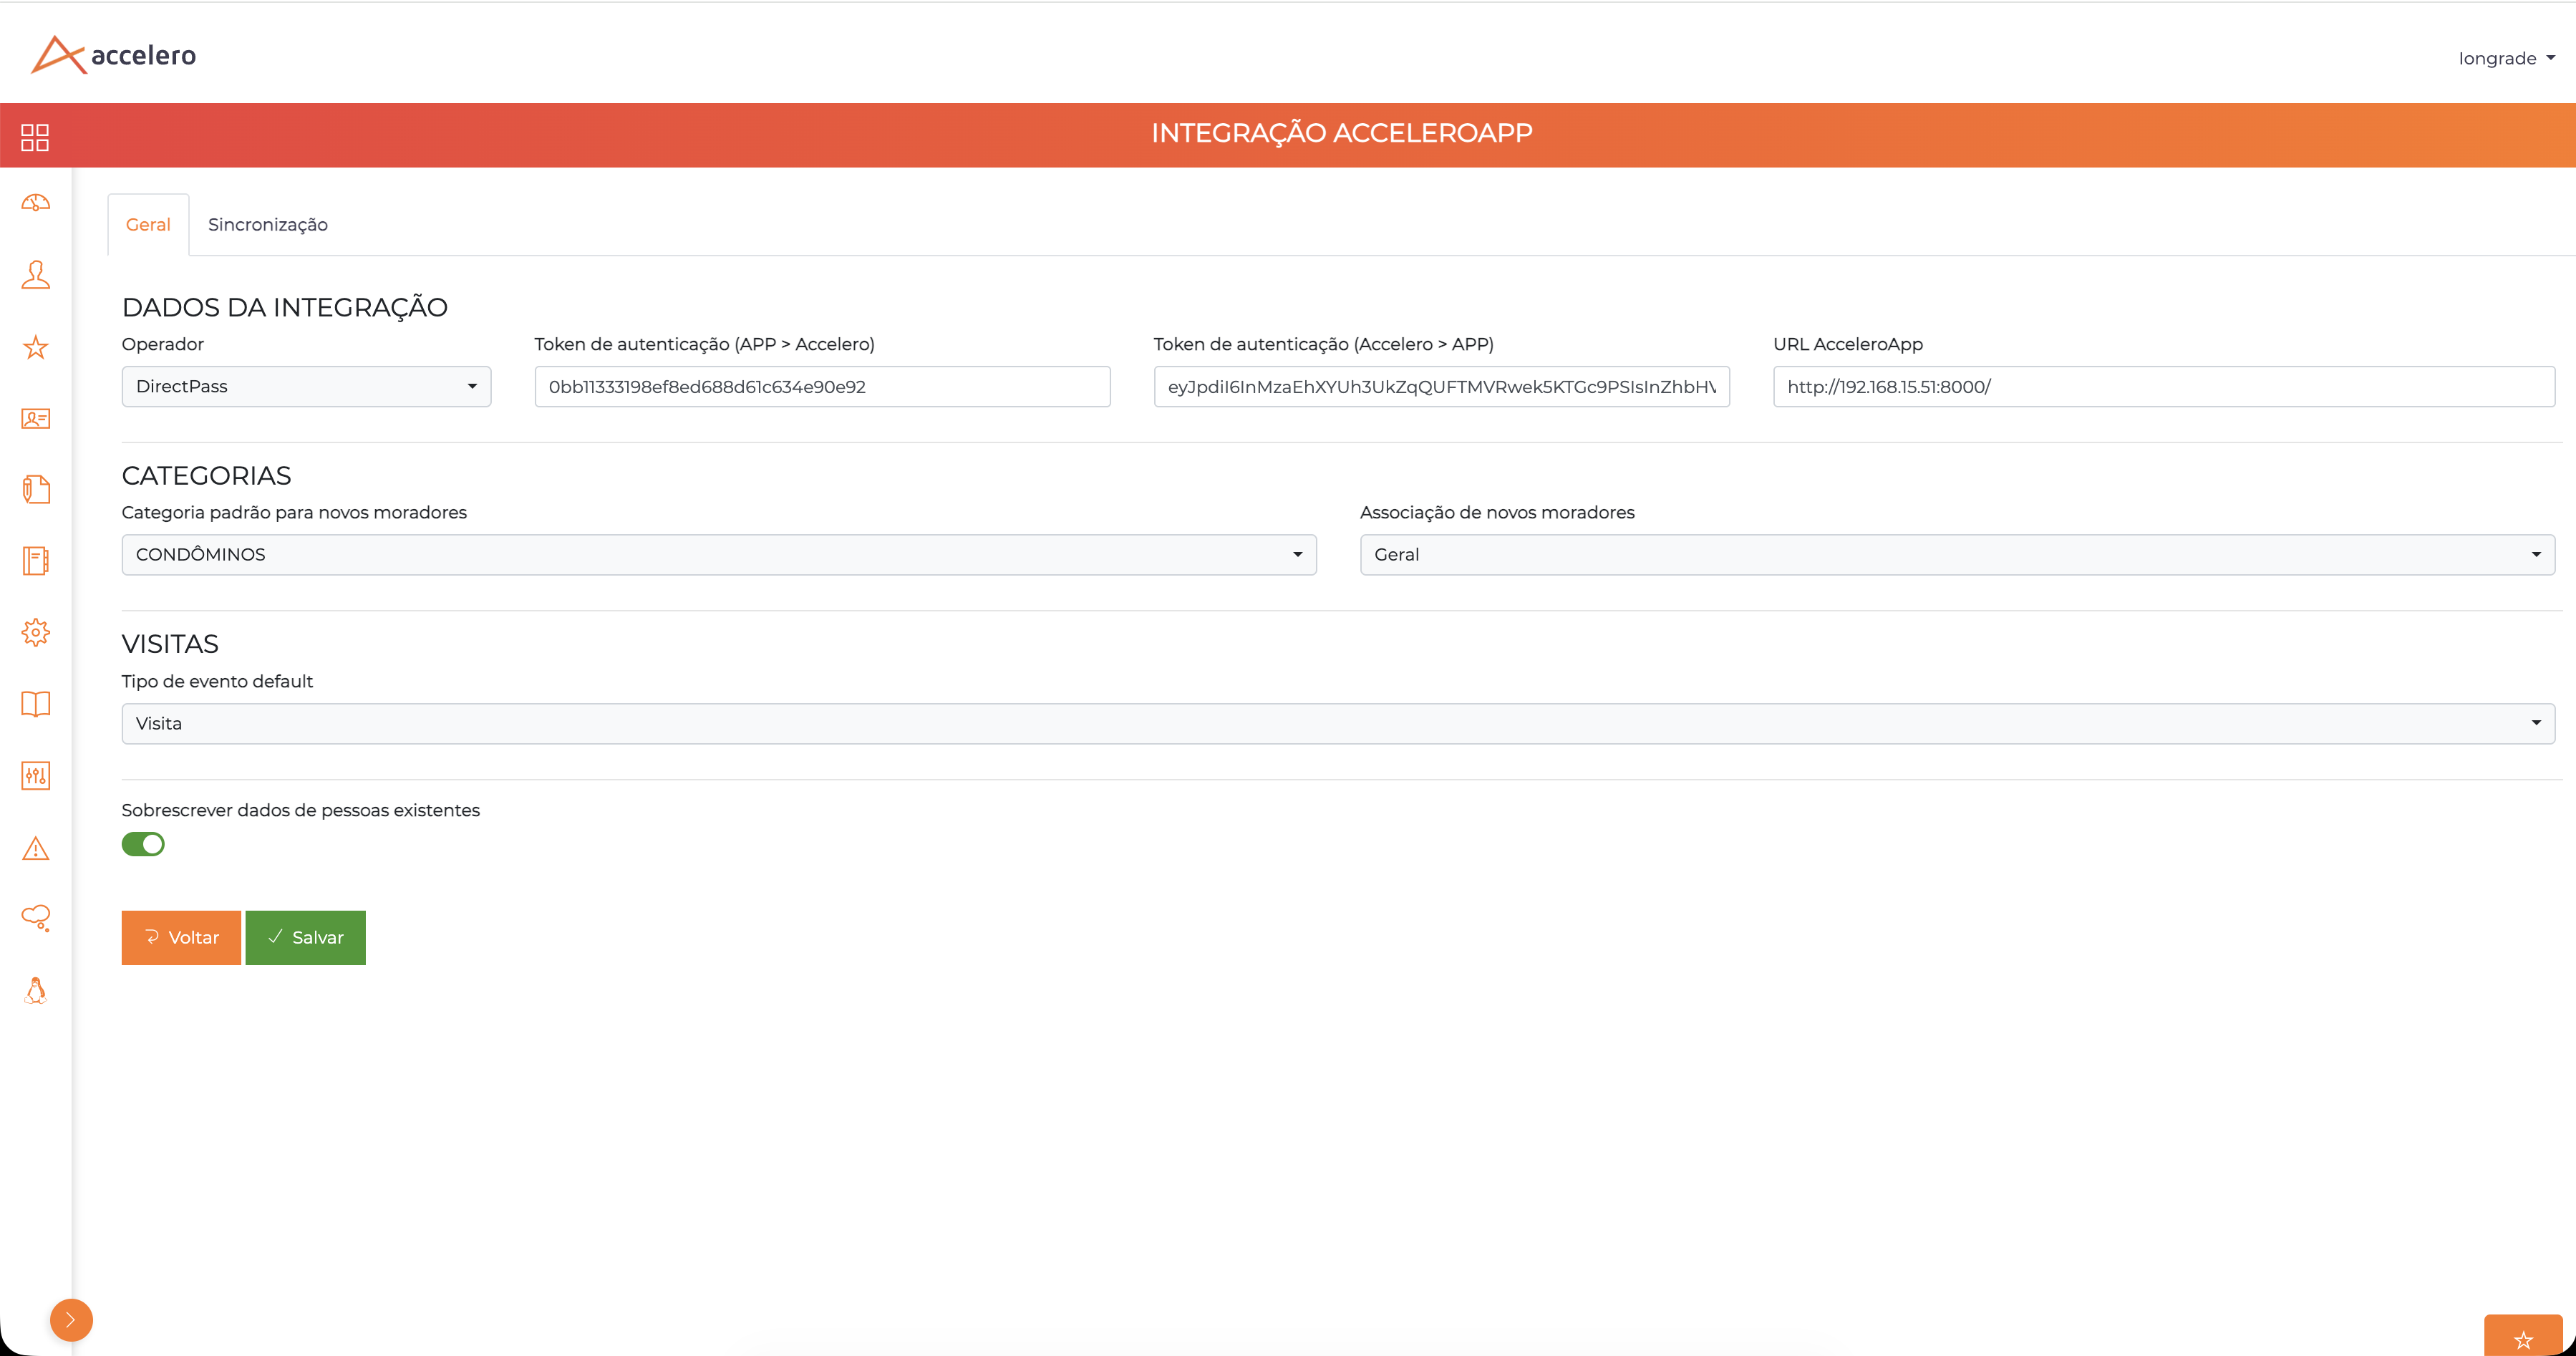
3. Make sure every setting is done
Review: company Active, units/spaces/visit types registered, people base imported and the General tab saved with the correct tokens. This check prevents synchronizing with an incomplete configuration.
4. Define what to synchronize — Synchronization tab
In Integration — Synchronization, select the Event types and the People categories that the customer wants to synchronize. Save — the selection must be saved before synchronizing.
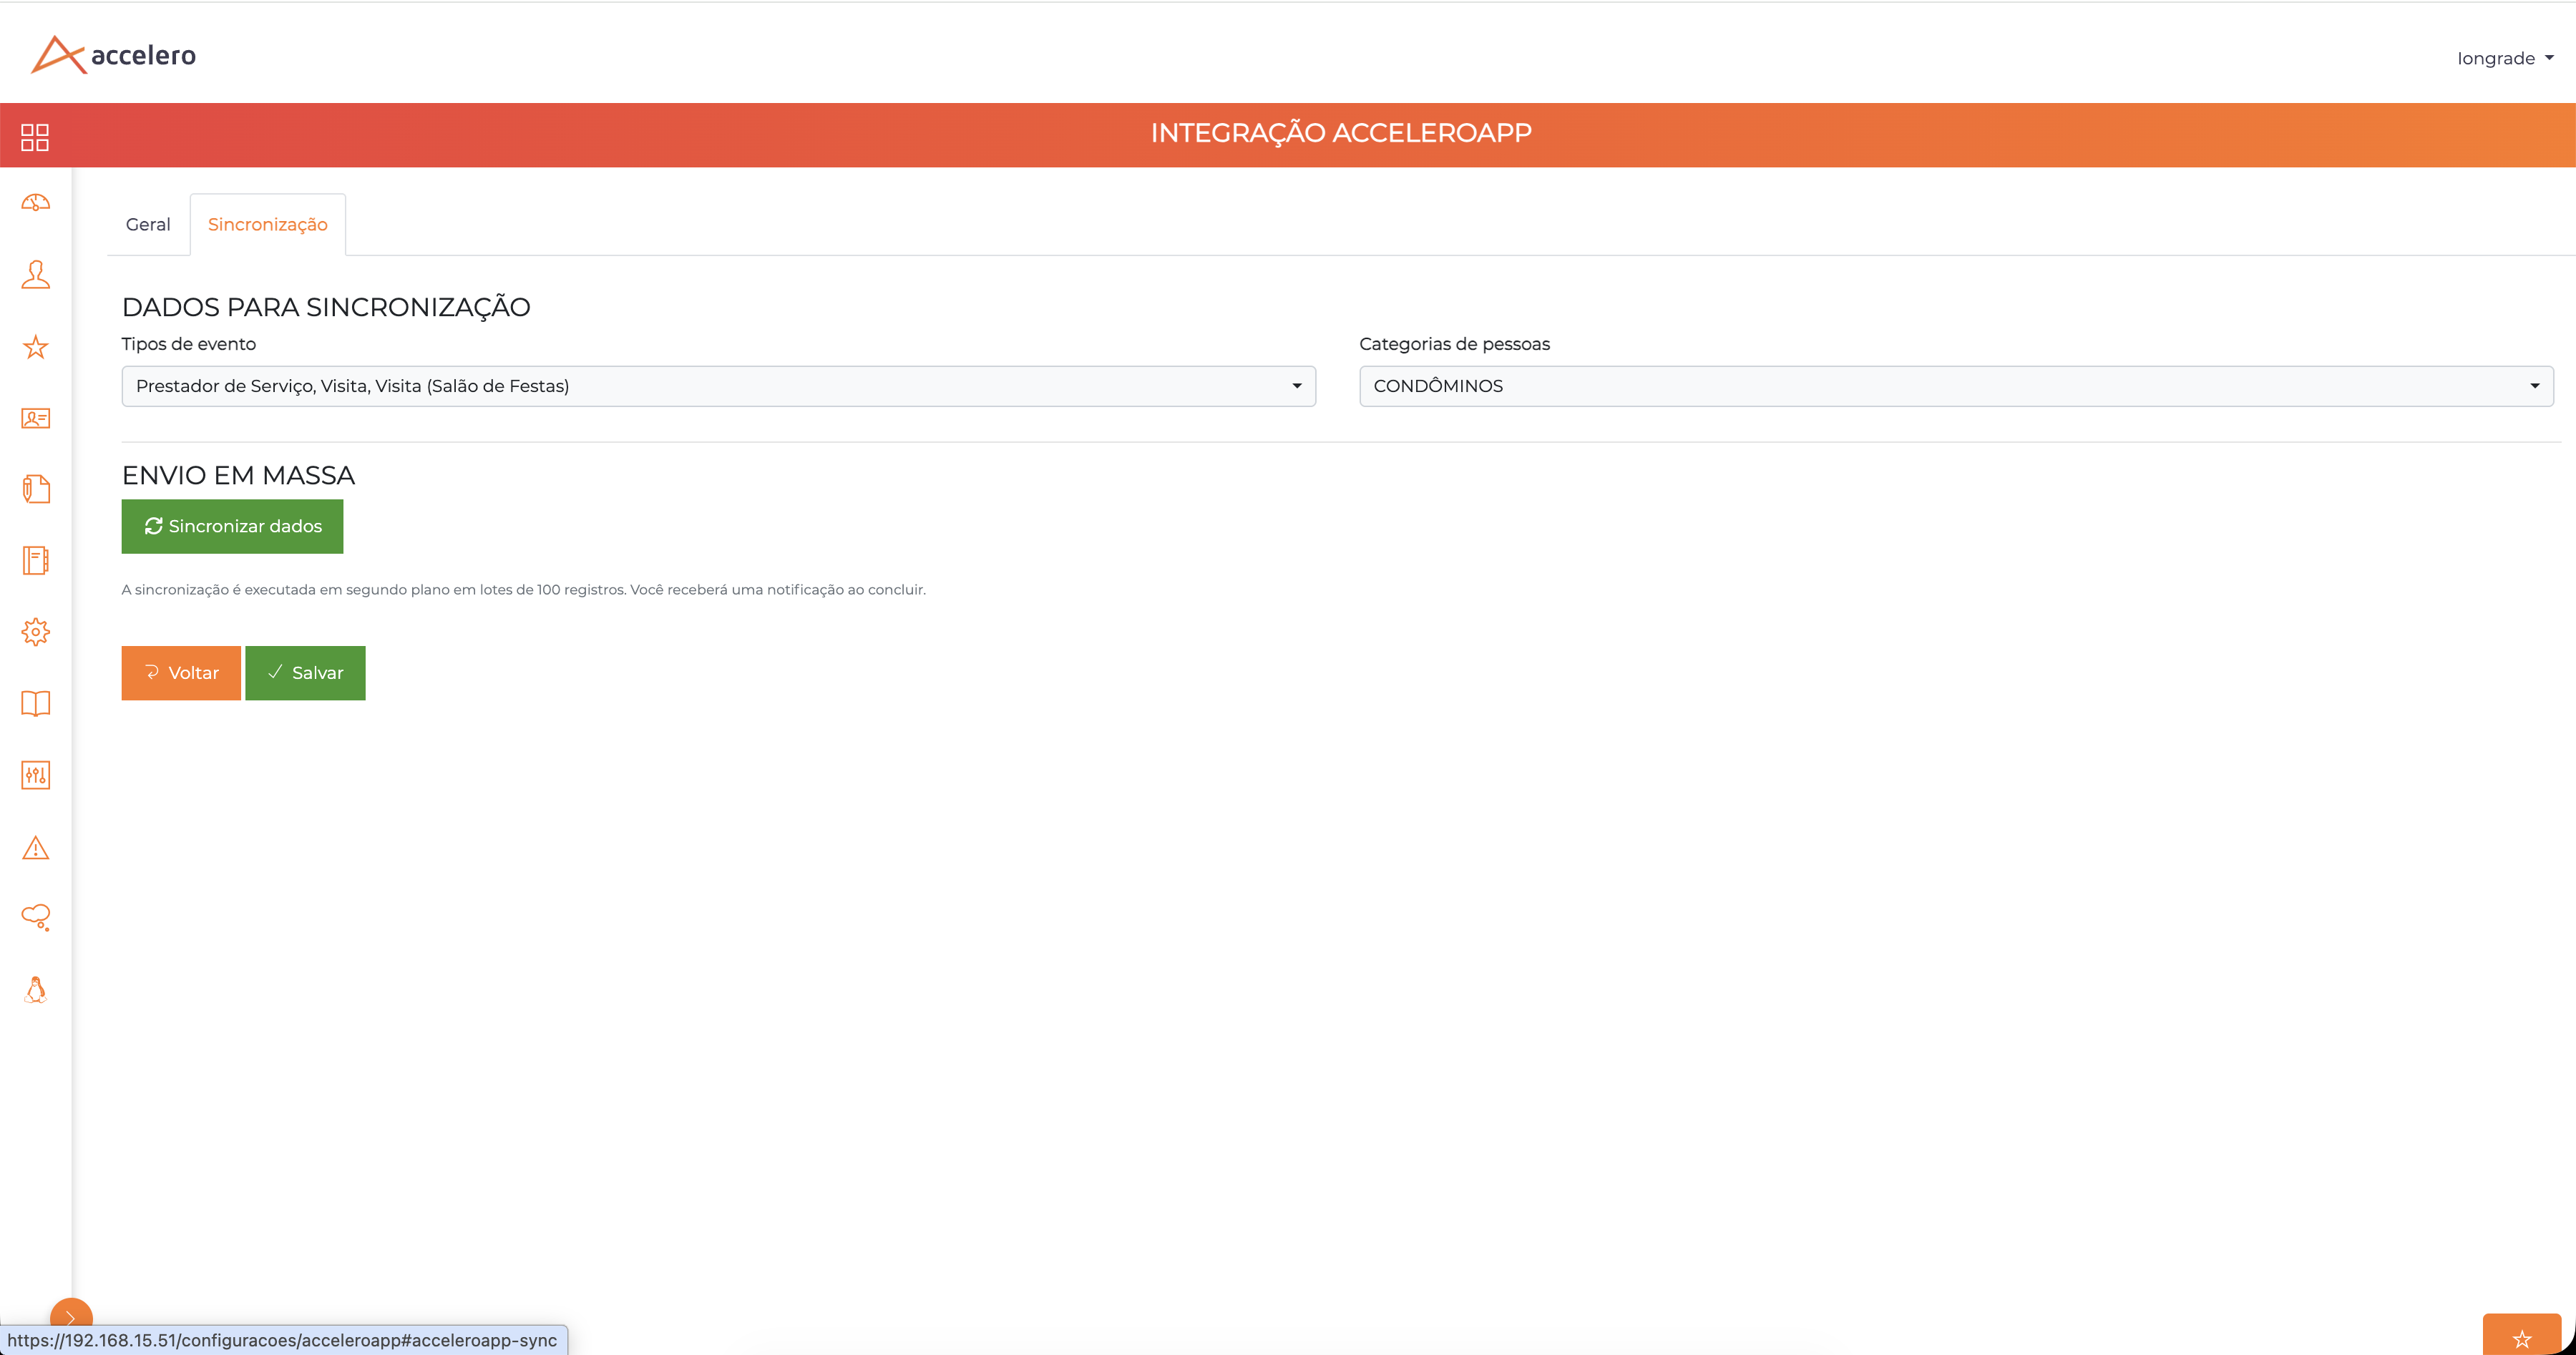
5. Synchronize
Only after saving, click Synchronize data. The process runs in the background, in batches of 100 records, and issues a notification when it finishes.
Business rules and common pitfalls
- Strict order in the final step: first Save the selection, then Synchronize. Synchronizing without saving does not send what was selected.
- Mismatched keys between Companies / Condominiums and Integration — General are the number 1 cause of "the integration does not work".
- Synchronization is asynchronous; wait for the completion notification before concluding that something failed.
- Validate the result through the Dashboard (People card) and through People/Visits.
Related
- Companies / Condominiums → Integration — General → Integration — Synchronization
- People import, Units, Spaces / Common areas, Visit types
- Logs — to diagnose failures.
Steps 2, 4 and 5 are the heart of the integration — tokens (opposite directions), scope (event types + categories) and the asynchronous bulk send.