Detailed Configuration
This document covers all the configuration options of the Cold Room module. For the minimum setup path, see the Getting Started.
Setup Page
Navigation path: Cold Room > Setup
The Setup page is the central configuration point. It displays three areas:
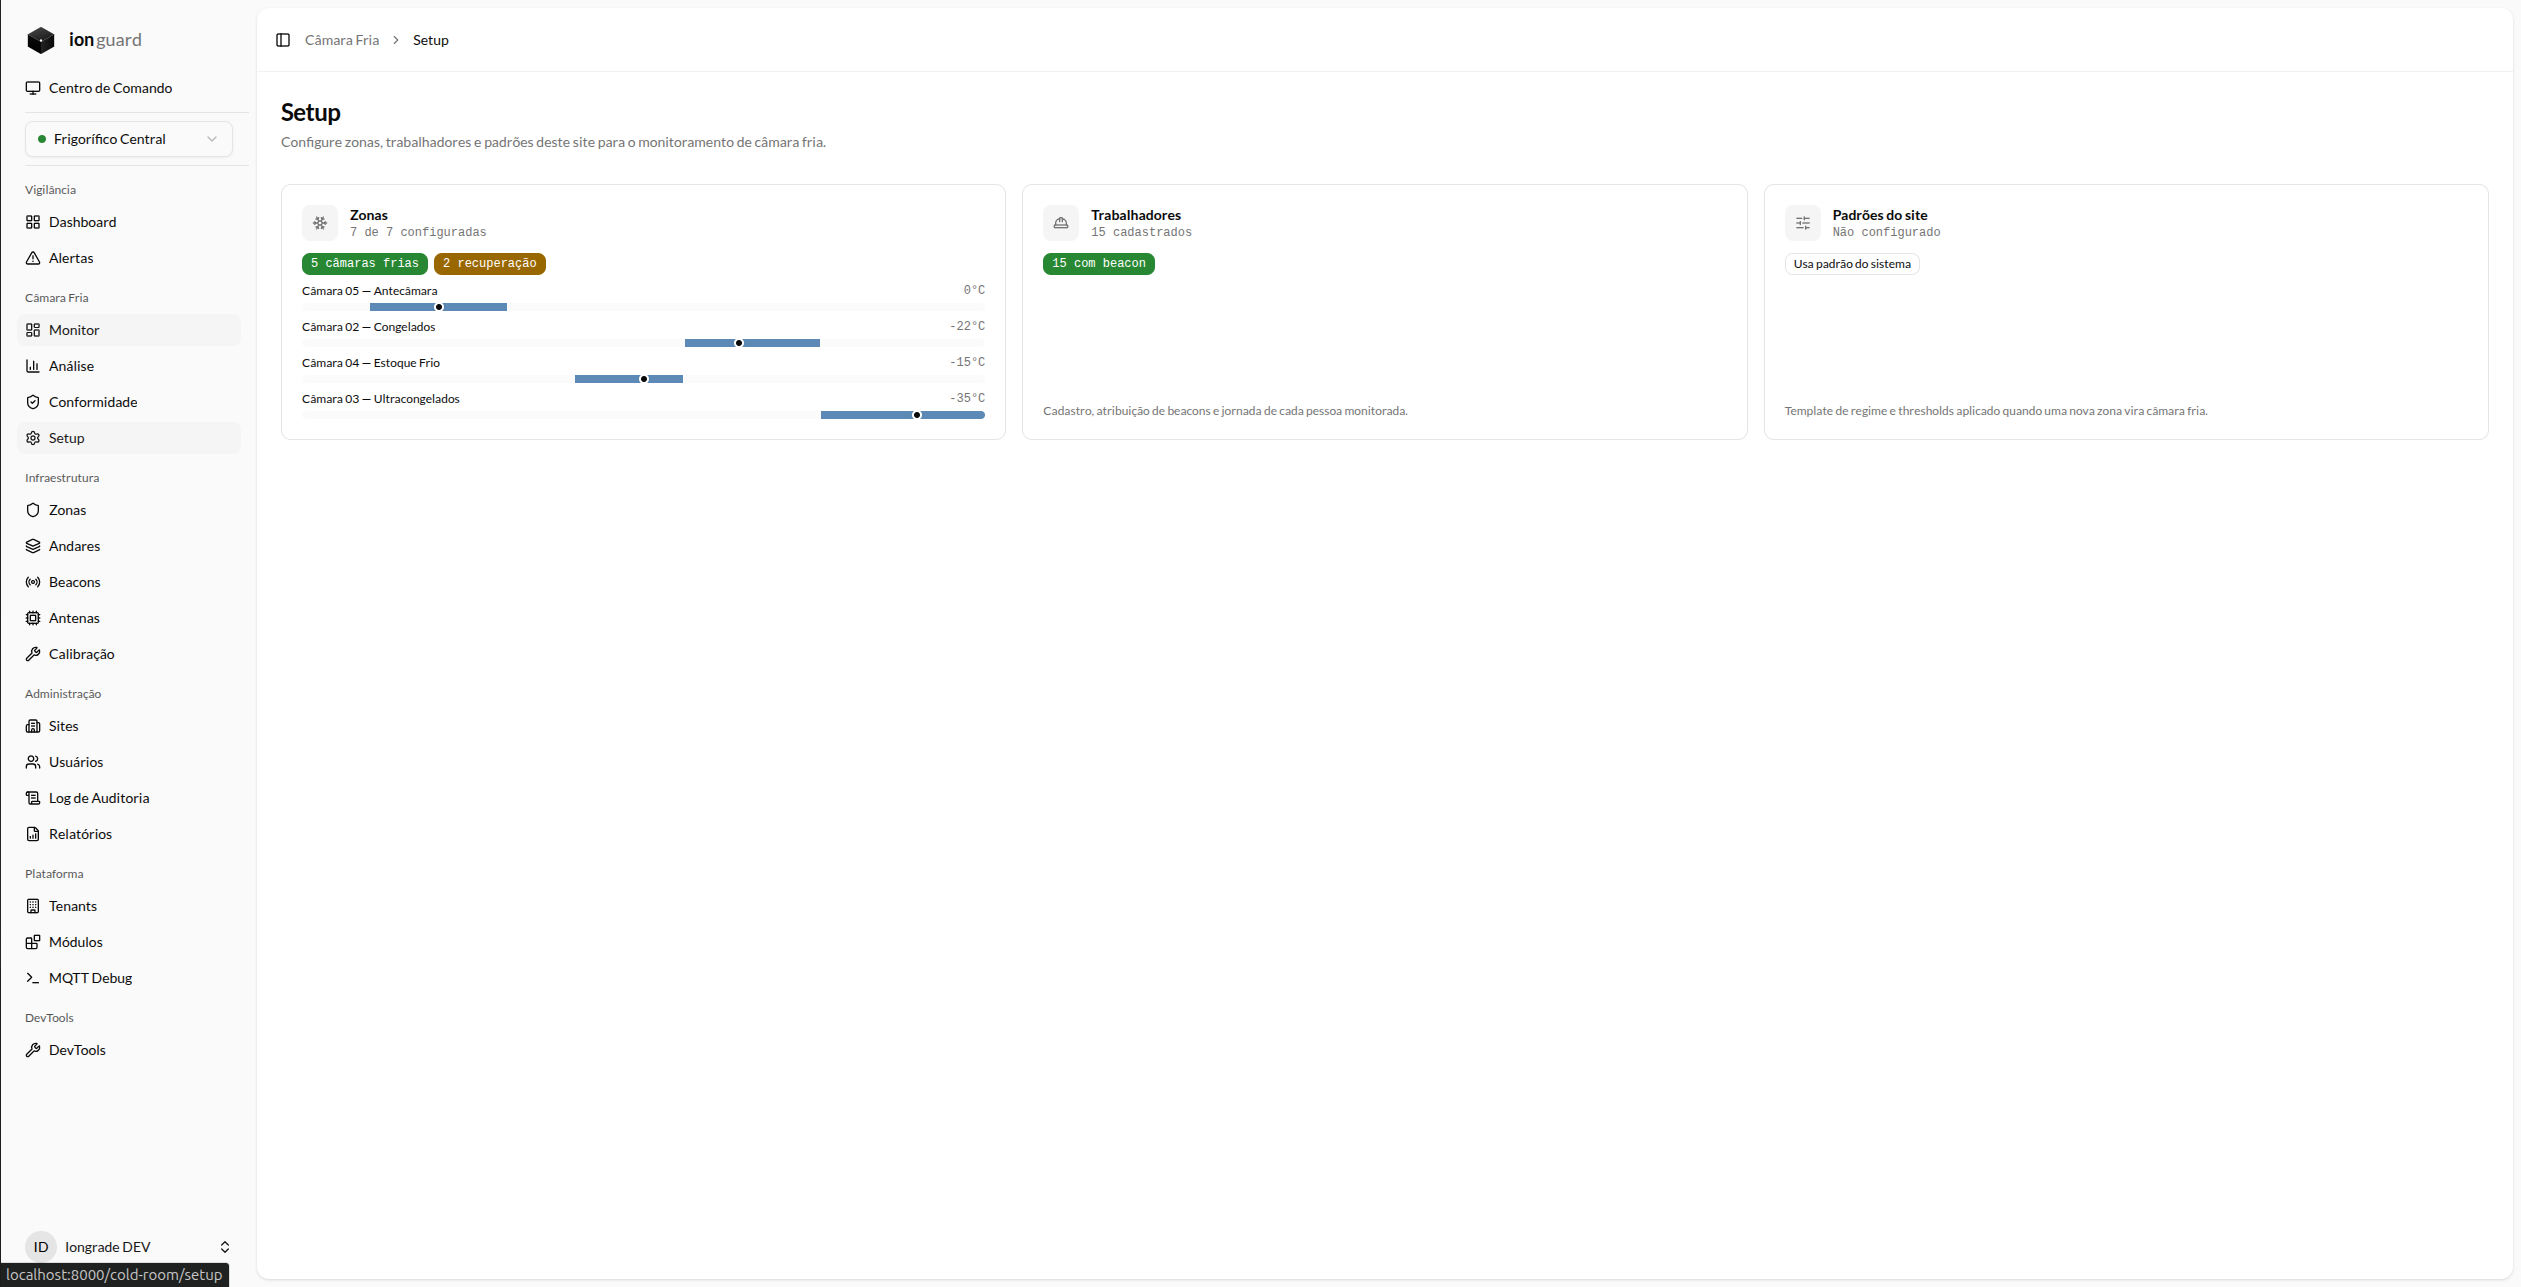
| Area | Description |
|---|---|
| Zones | Cold rooms and recovery areas with their temperature regimes |
| Workers | Employee registration with work schedule and beacon assignment |
| Site defaults | Regime template applied automatically to new zones |
Zone Configuration
Zone types
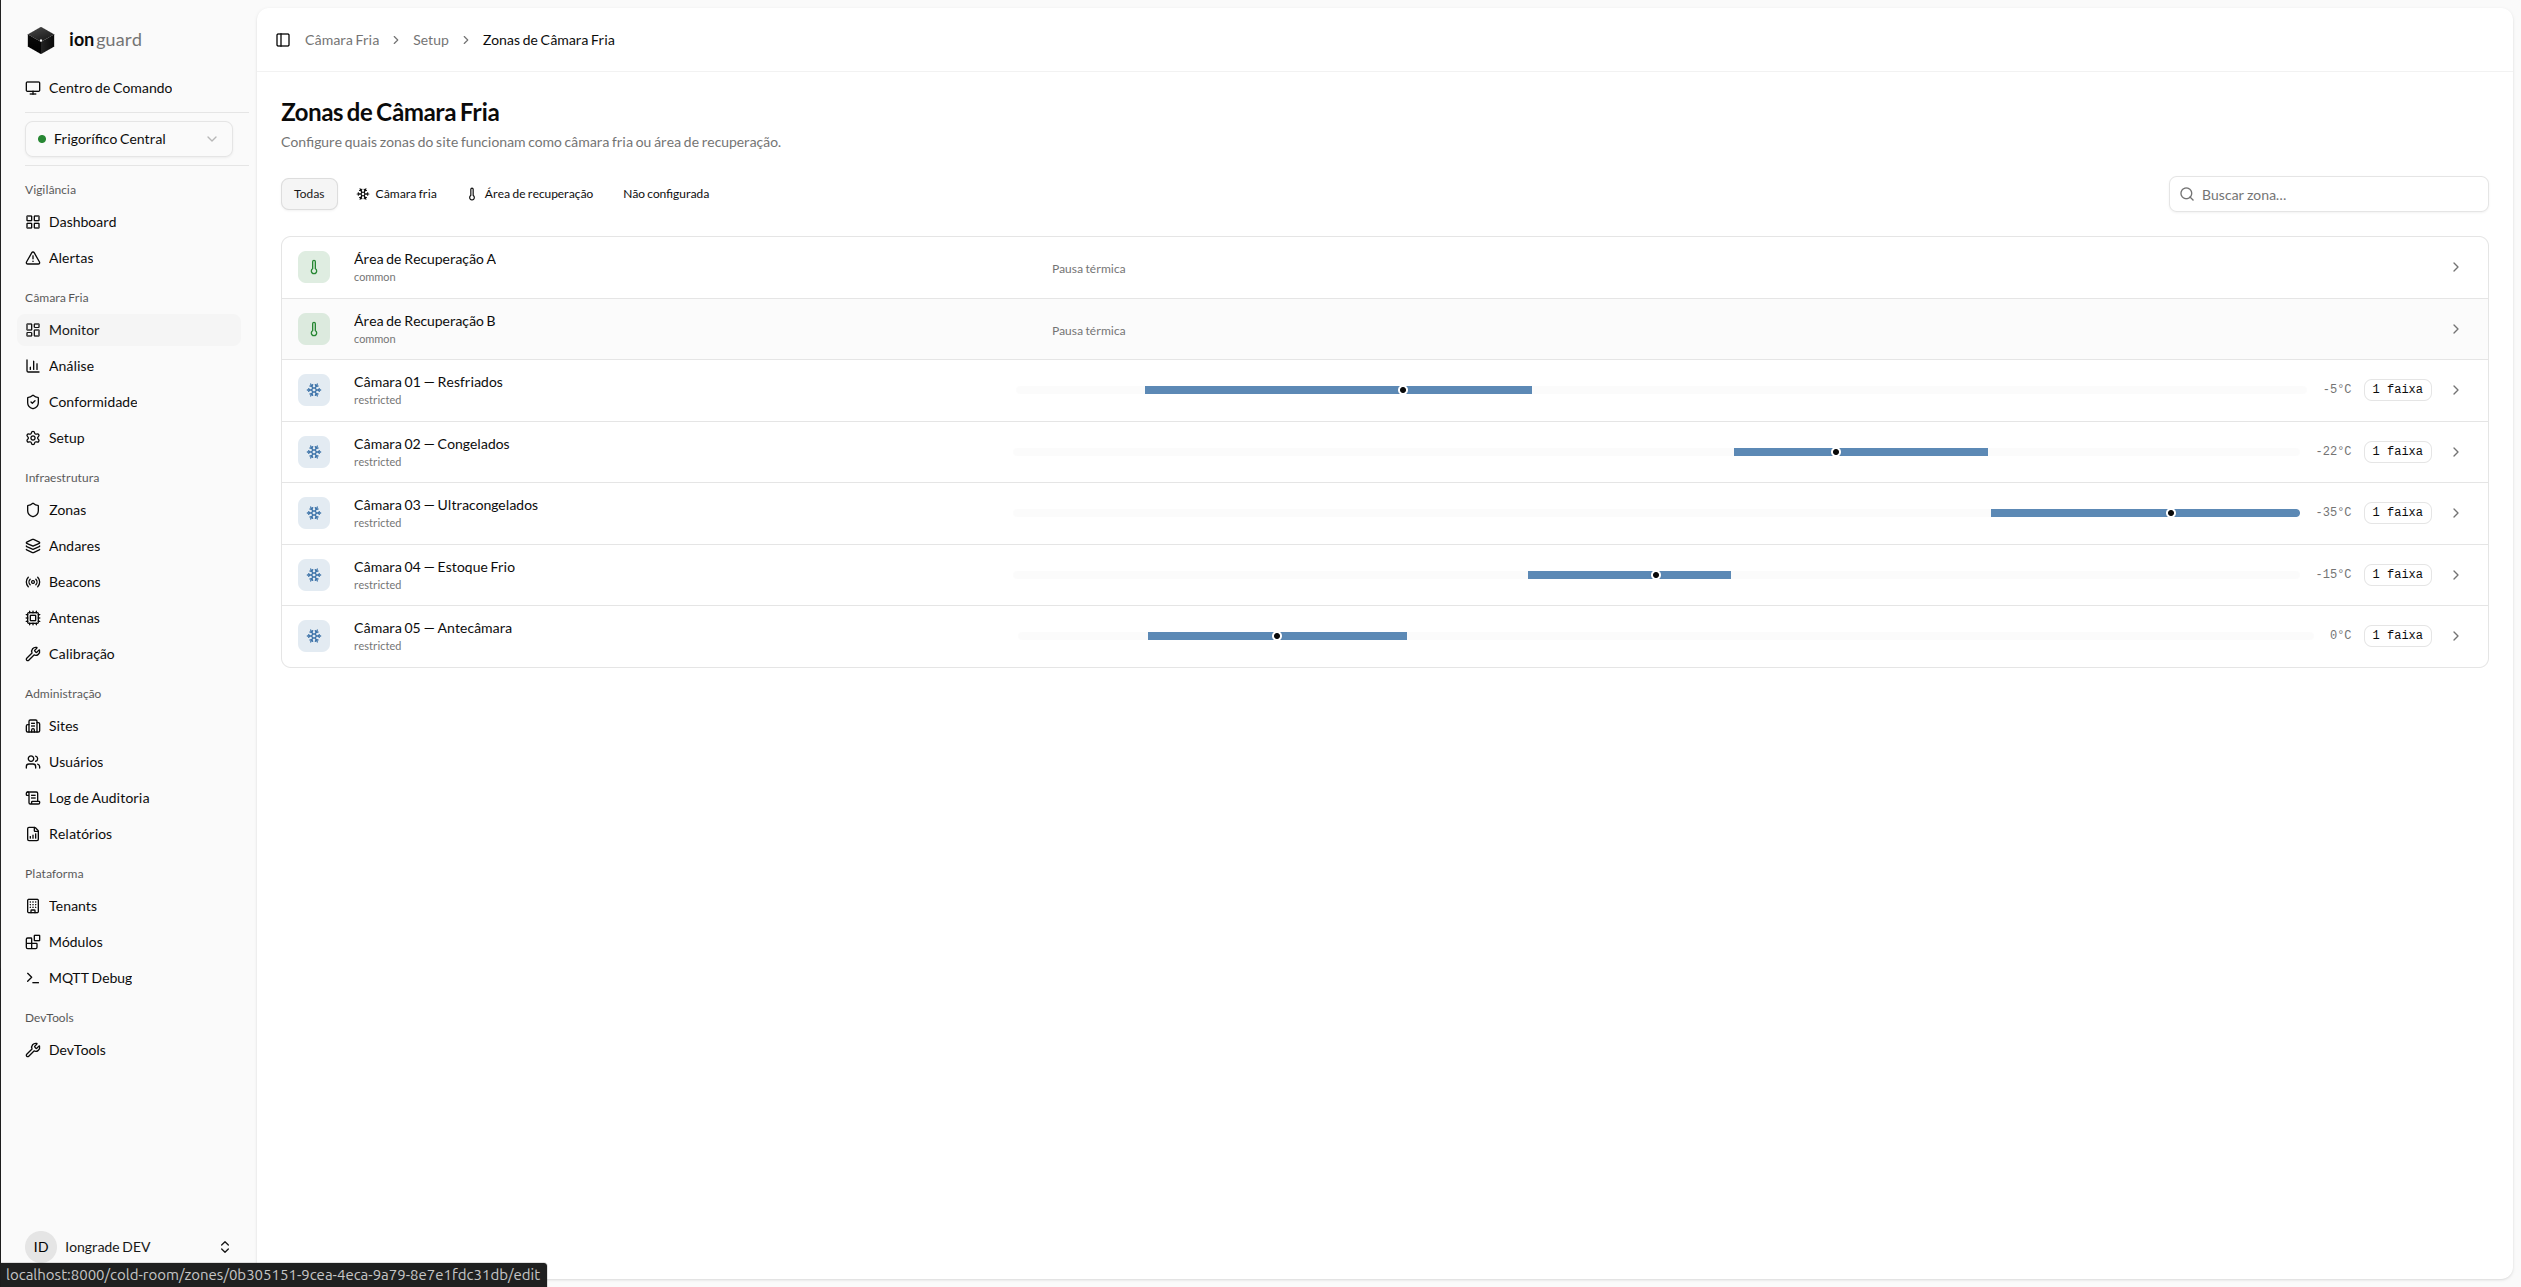
Each zone can be configured into one of three states:
| Type | Description | Behavior |
|---|---|---|
| Cold Room | Monitored refrigerated environment | Active exposure timer, progressive alerts, session recording |
| Recovery Area | Thermal break zone | Active break timer, sufficiency validation |
| Not configured | Ordinary site zone | No cold room monitoring |
A zone is either a cold room or a recovery area — never both at the same time. The system prevents conflicting configuration.
Listing and filters
The zone list lets you filter by type (all, cold rooms, recovery, not configured):
Configuring a cold room
When you edit a zone and mark it as a cold room, the following options become available:
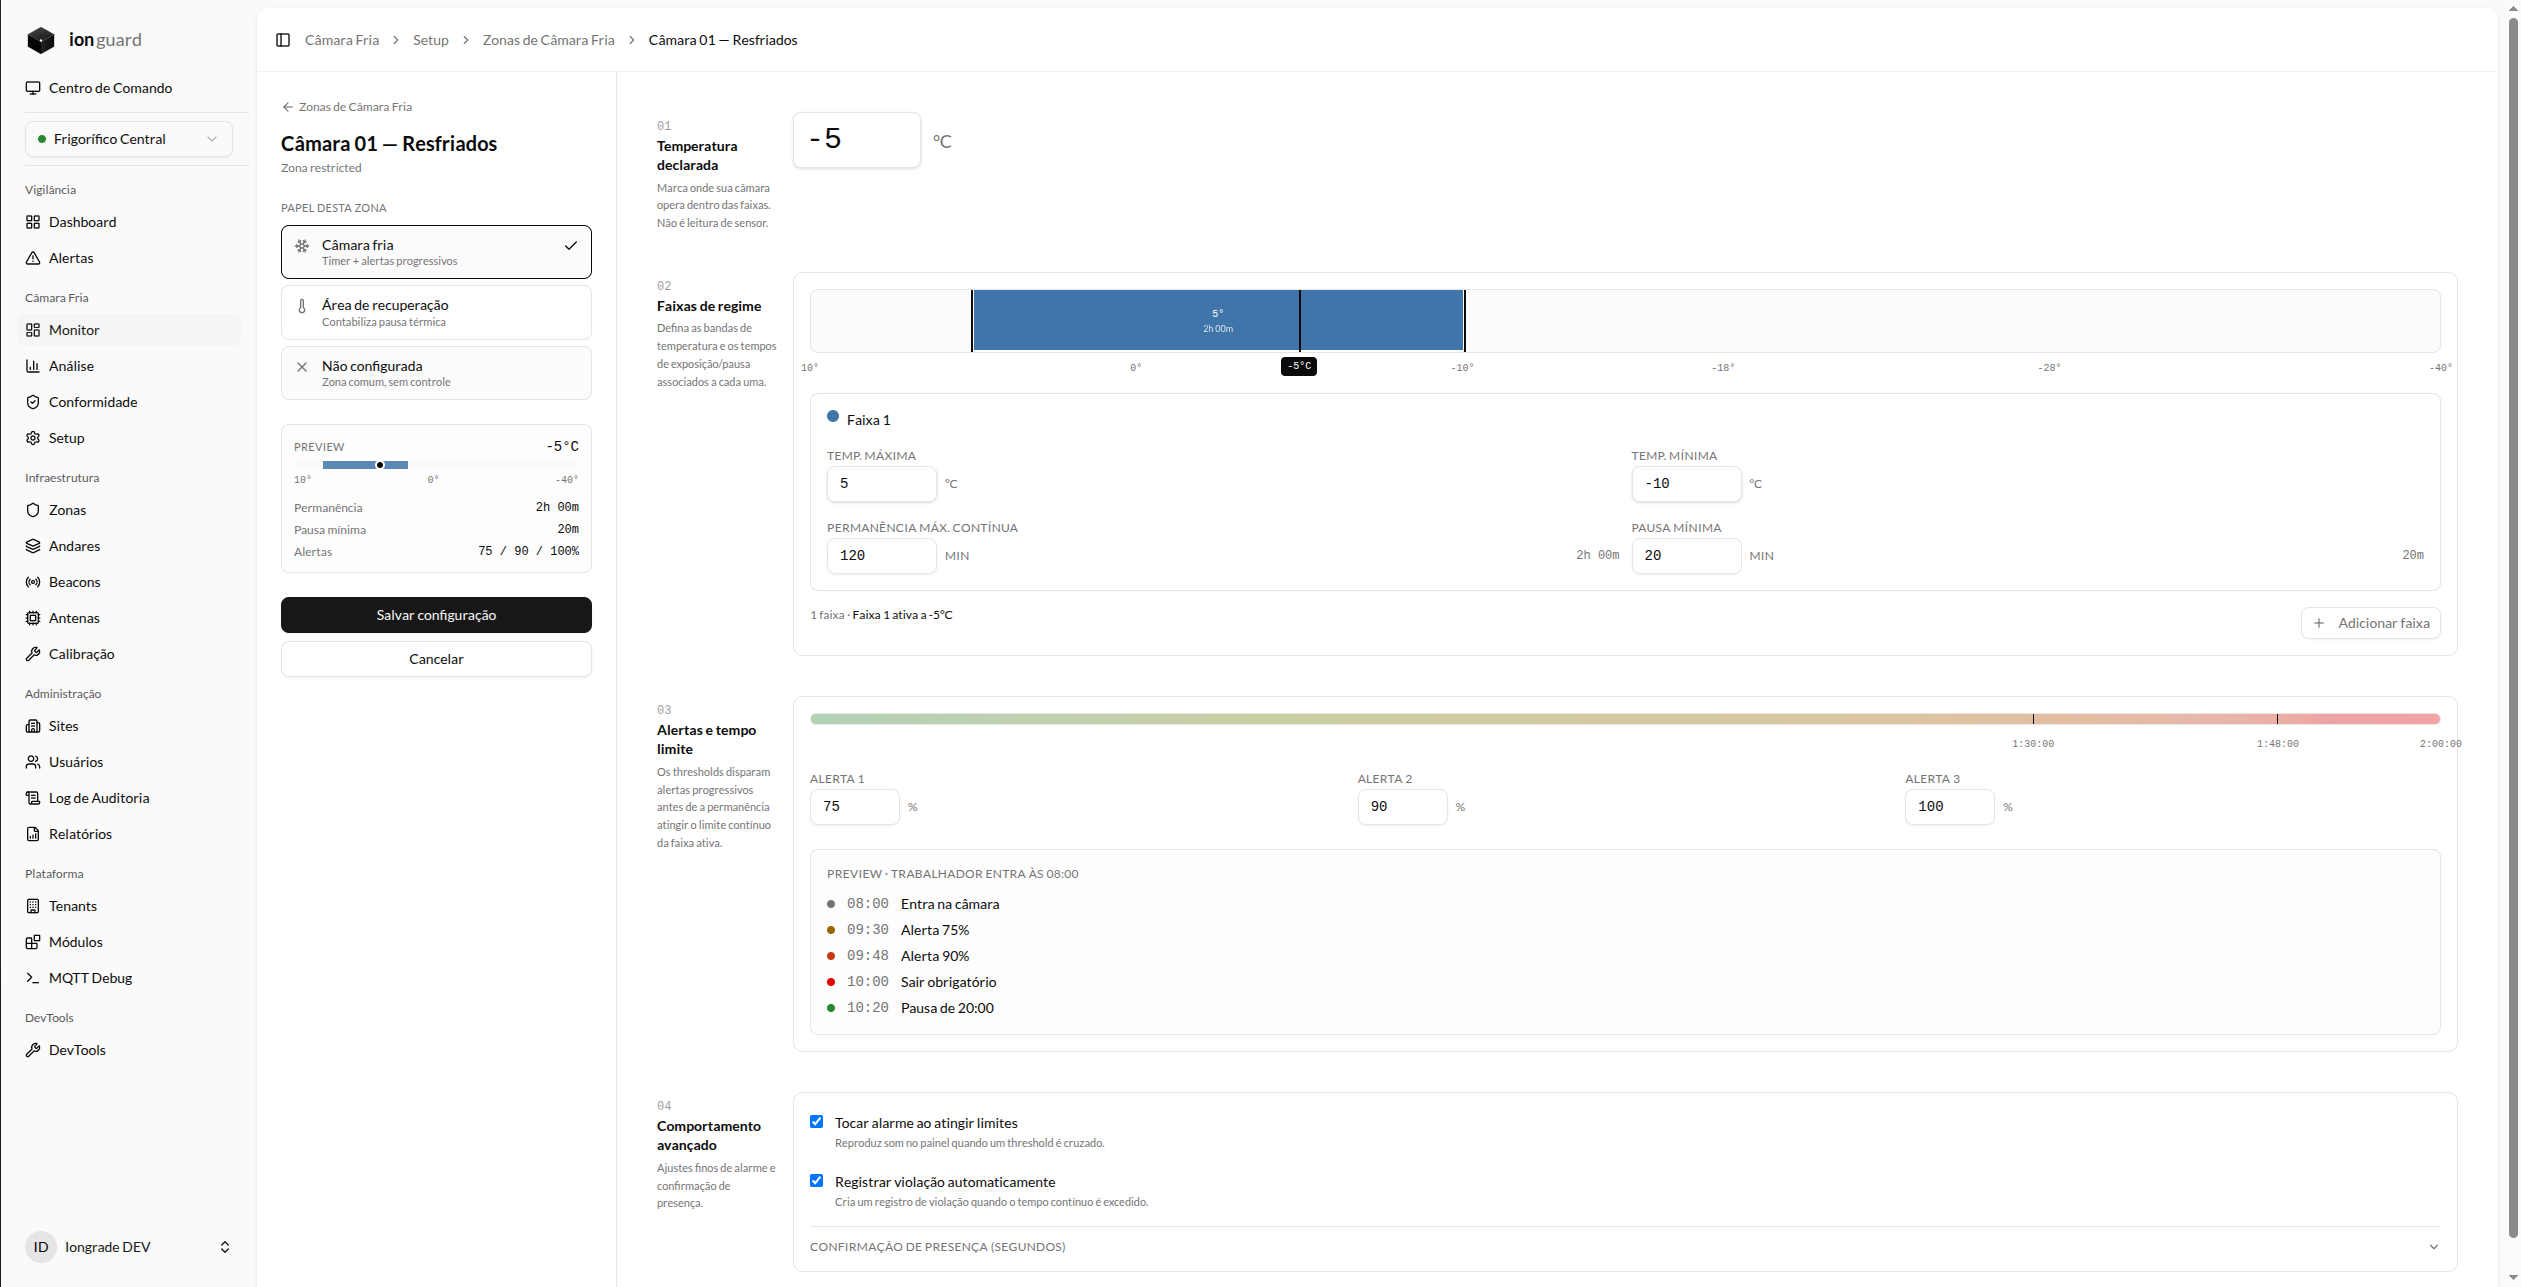
Declared temperature
The operating temperature of the cold room (in °C). The system uses this value to automatically select the applicable exposure regime:
- 0.0°C to -17.9°C → Light regime (100 min / 20 min break)
- -18.0°C to -27.9°C → Moderate regime (80 min / 20 min break)
- -28.0°C to -80.0°C → Severe regime (60 min / 30 min break)
Regime ranges
The colored bar visualization shows the temperature ranges and their limits. Each range indicates the maximum continuous exposure time and the minimum break time for that temperature.
Exposure and break limits
| Field | Description | Default |
|---|---|---|
| Maximum continuous exposure | Maximum time the worker may stay in the cold room without a break | Defined by the temperature regime |
| Minimum break | Minimum time in the recovery area for the break to be considered valid | Defined by the temperature regime |
Alert thresholds
The system triggers progressive alerts at configurable percentages of the exposure limit:
| Threshold | Default | Behavior |
|---|---|---|
| 75% | Active | Visual alert (yellow badge on the zone card) |
| 90% | Active | Visual + audible alert |
| 100% | Active | Critical alert + automatic violation record |
Advanced behavior
| Option | Description | Default |
|---|---|---|
| Audible alarm | Play an audible alarm on the dashboard and wallboard when a threshold is reached | Active |
| Automatic violation record | Automatically create a violation when the limit is reached | Active |
Configuring a recovery area
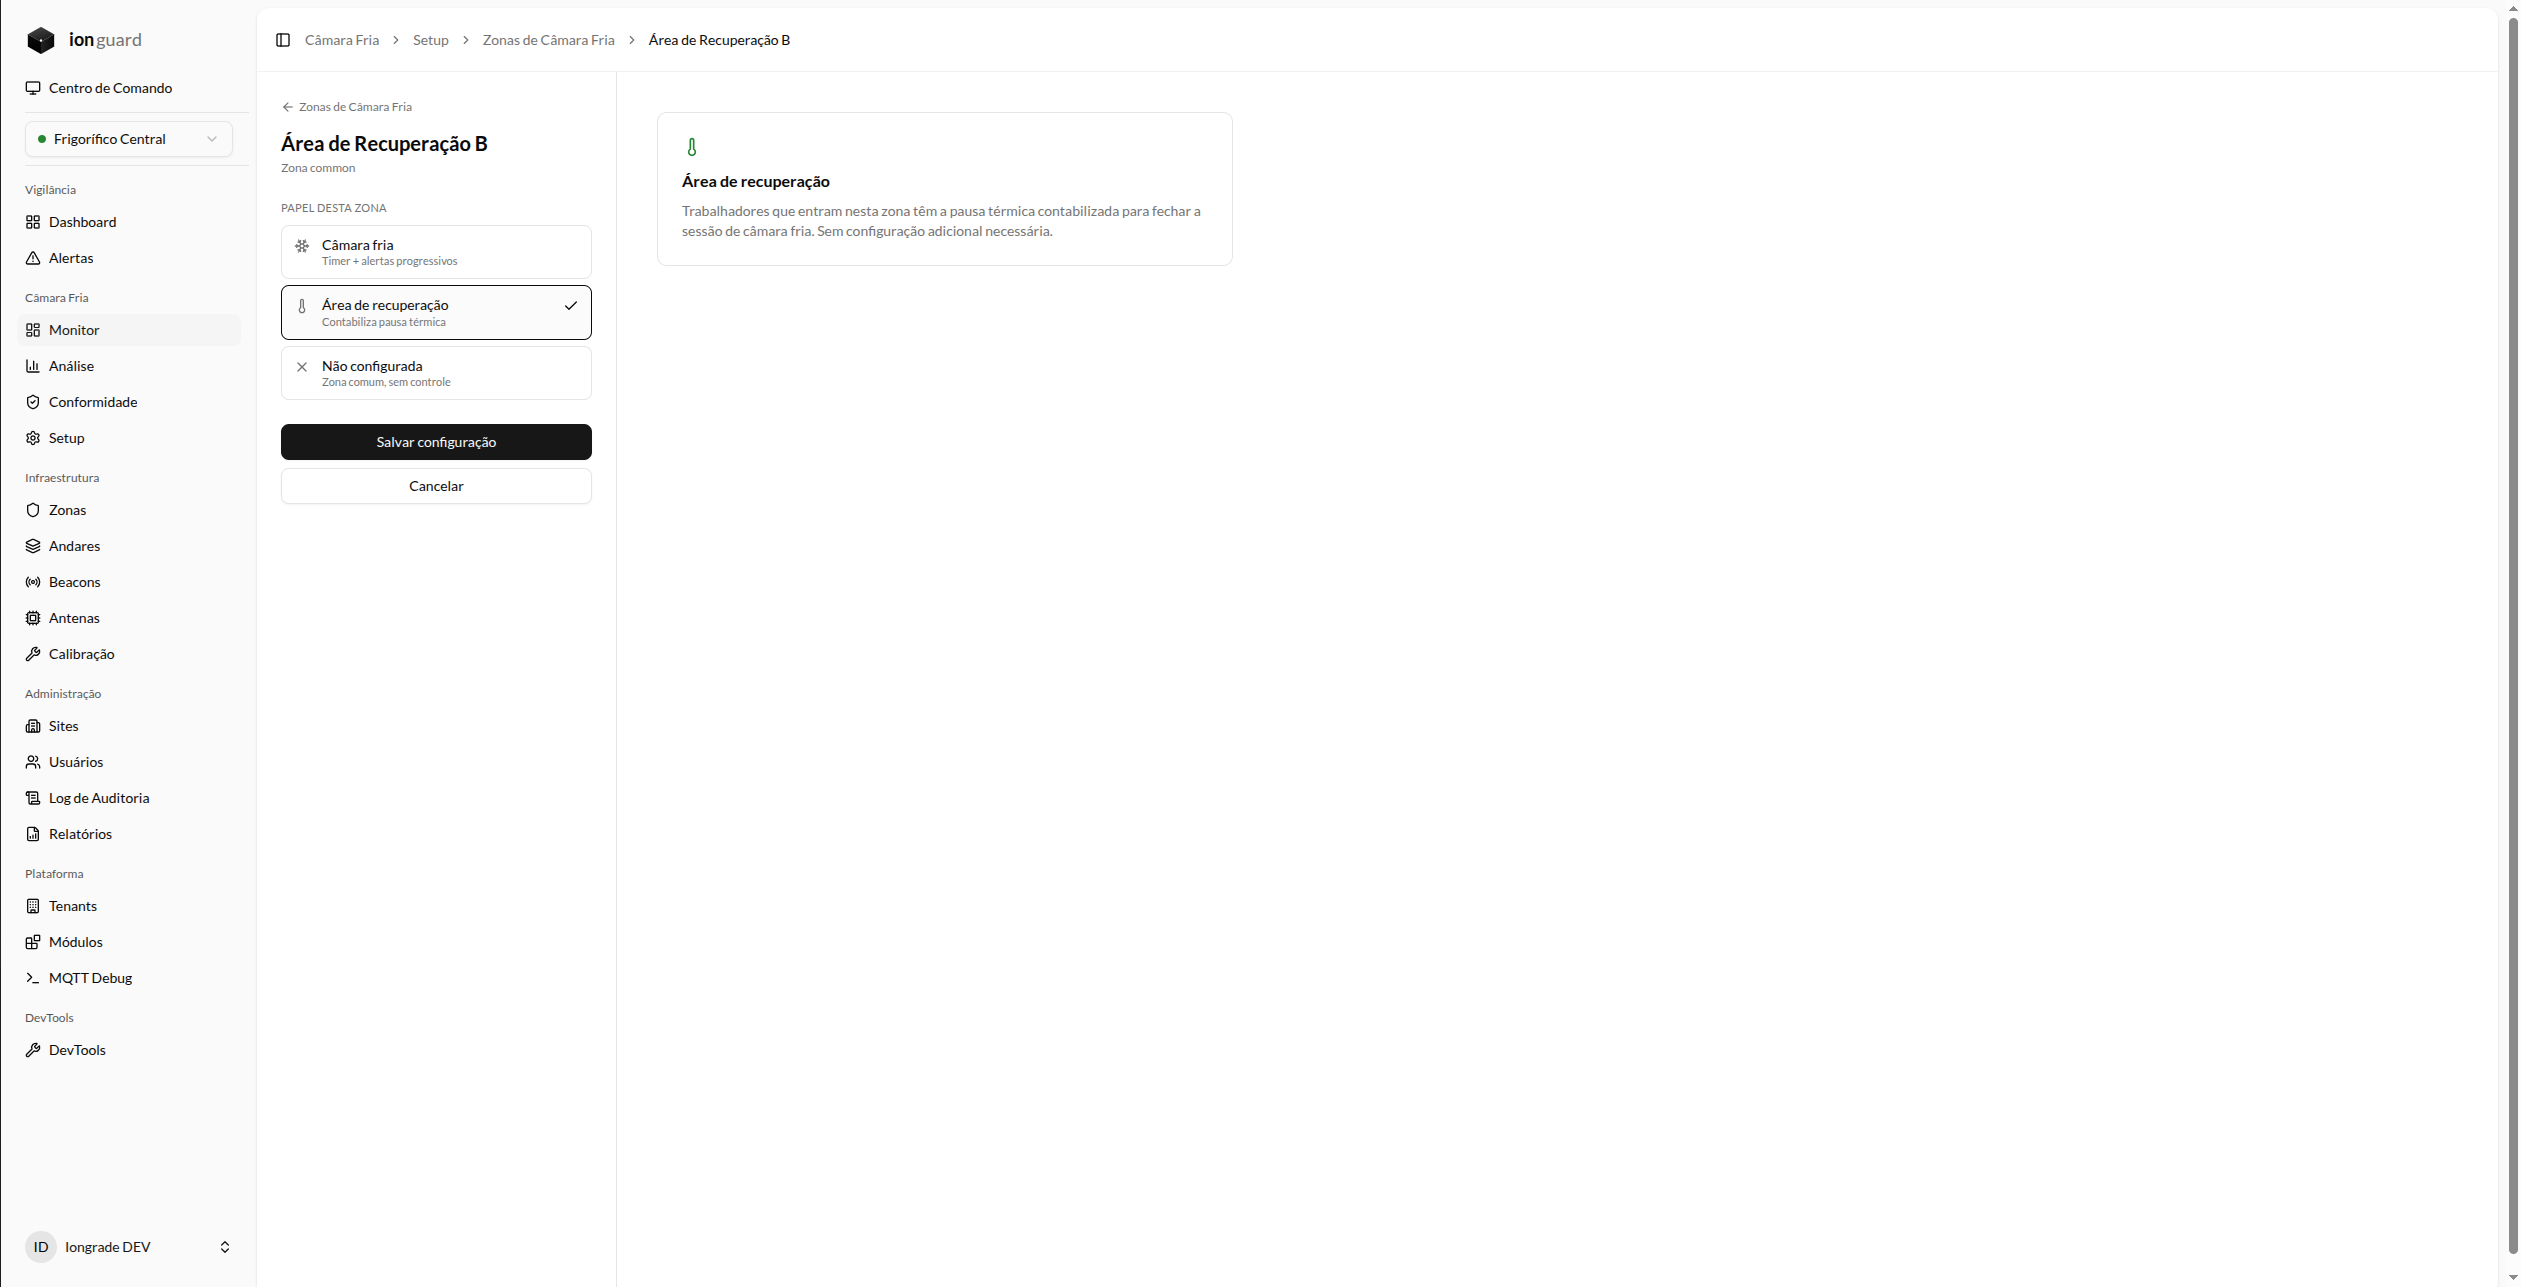
Recovery zones do not have temperature or regime configuration. When you mark a zone as a recovery area, it starts working as a thermal break destination — the system automatically starts the break timer when a worker with active exposure enters that zone.
Site Defaults
Site defaults work as a template: when a new zone is configured as a cold room, the default values are applied automatically (and can be overridden individually).
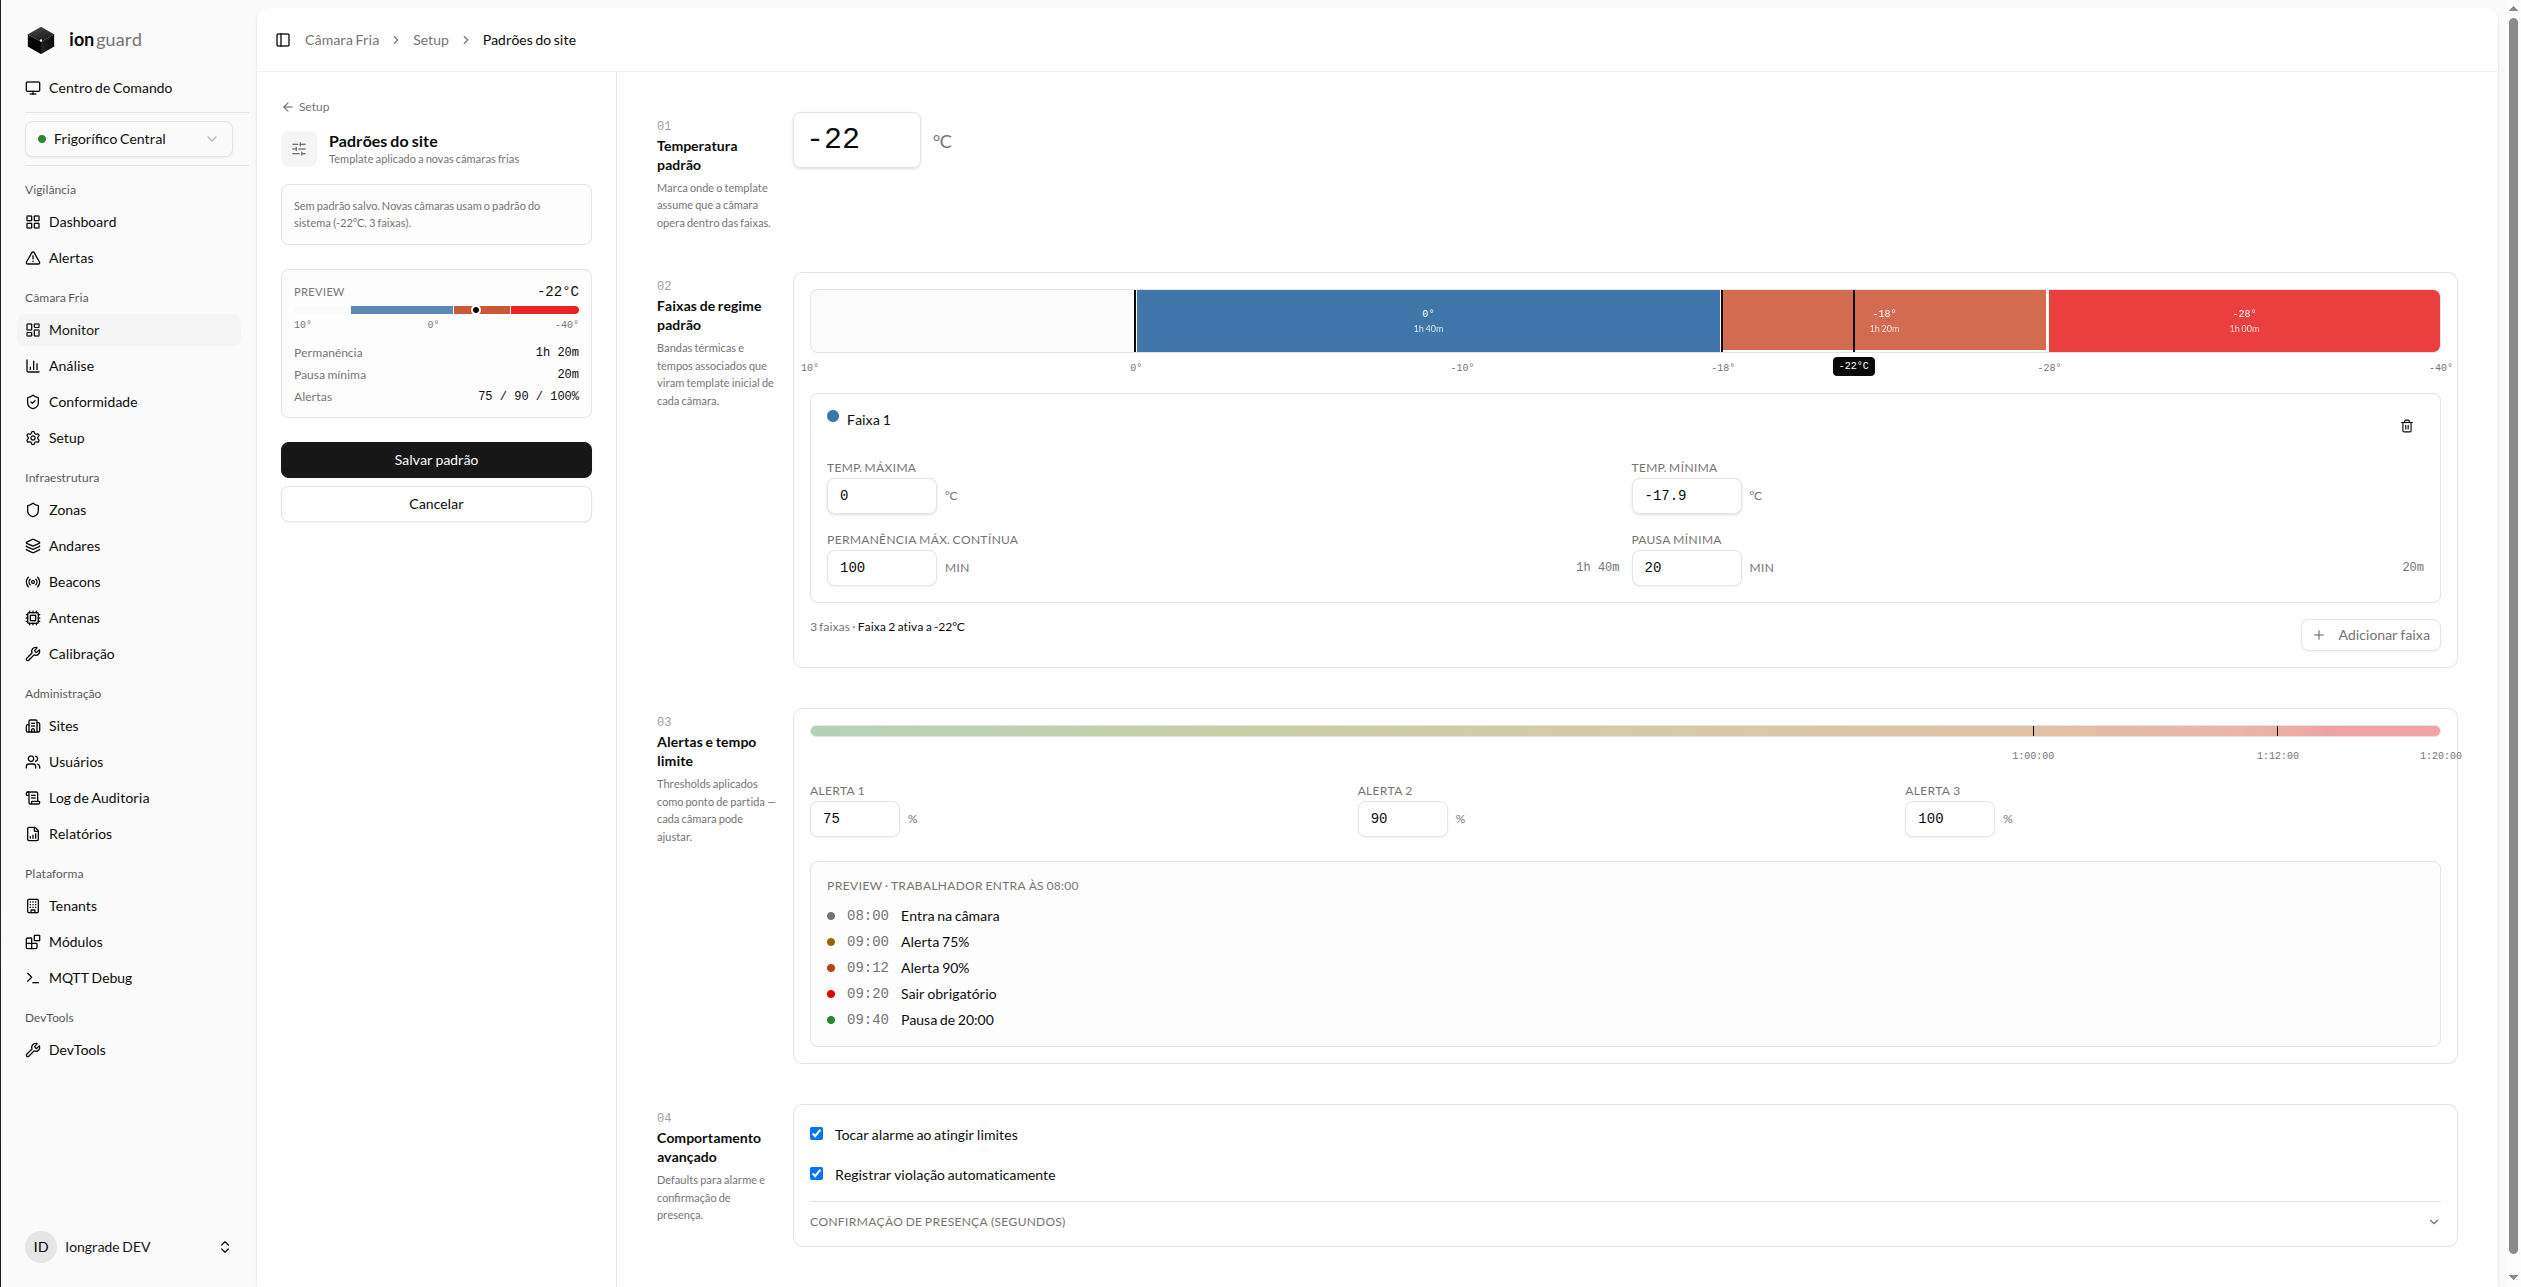
| Field | Description |
|---|---|
| Default temperature | Temperature applied to new cold room zones |
| Default regime | Regime ranges with exposure and break limits |
| Alert thresholds | Percentages for progressive alerts |
| Behavior | Audible alarm and automatic violation record |
Worker Management
Worker registration
Worker registration is done in the dedicated Setup section:
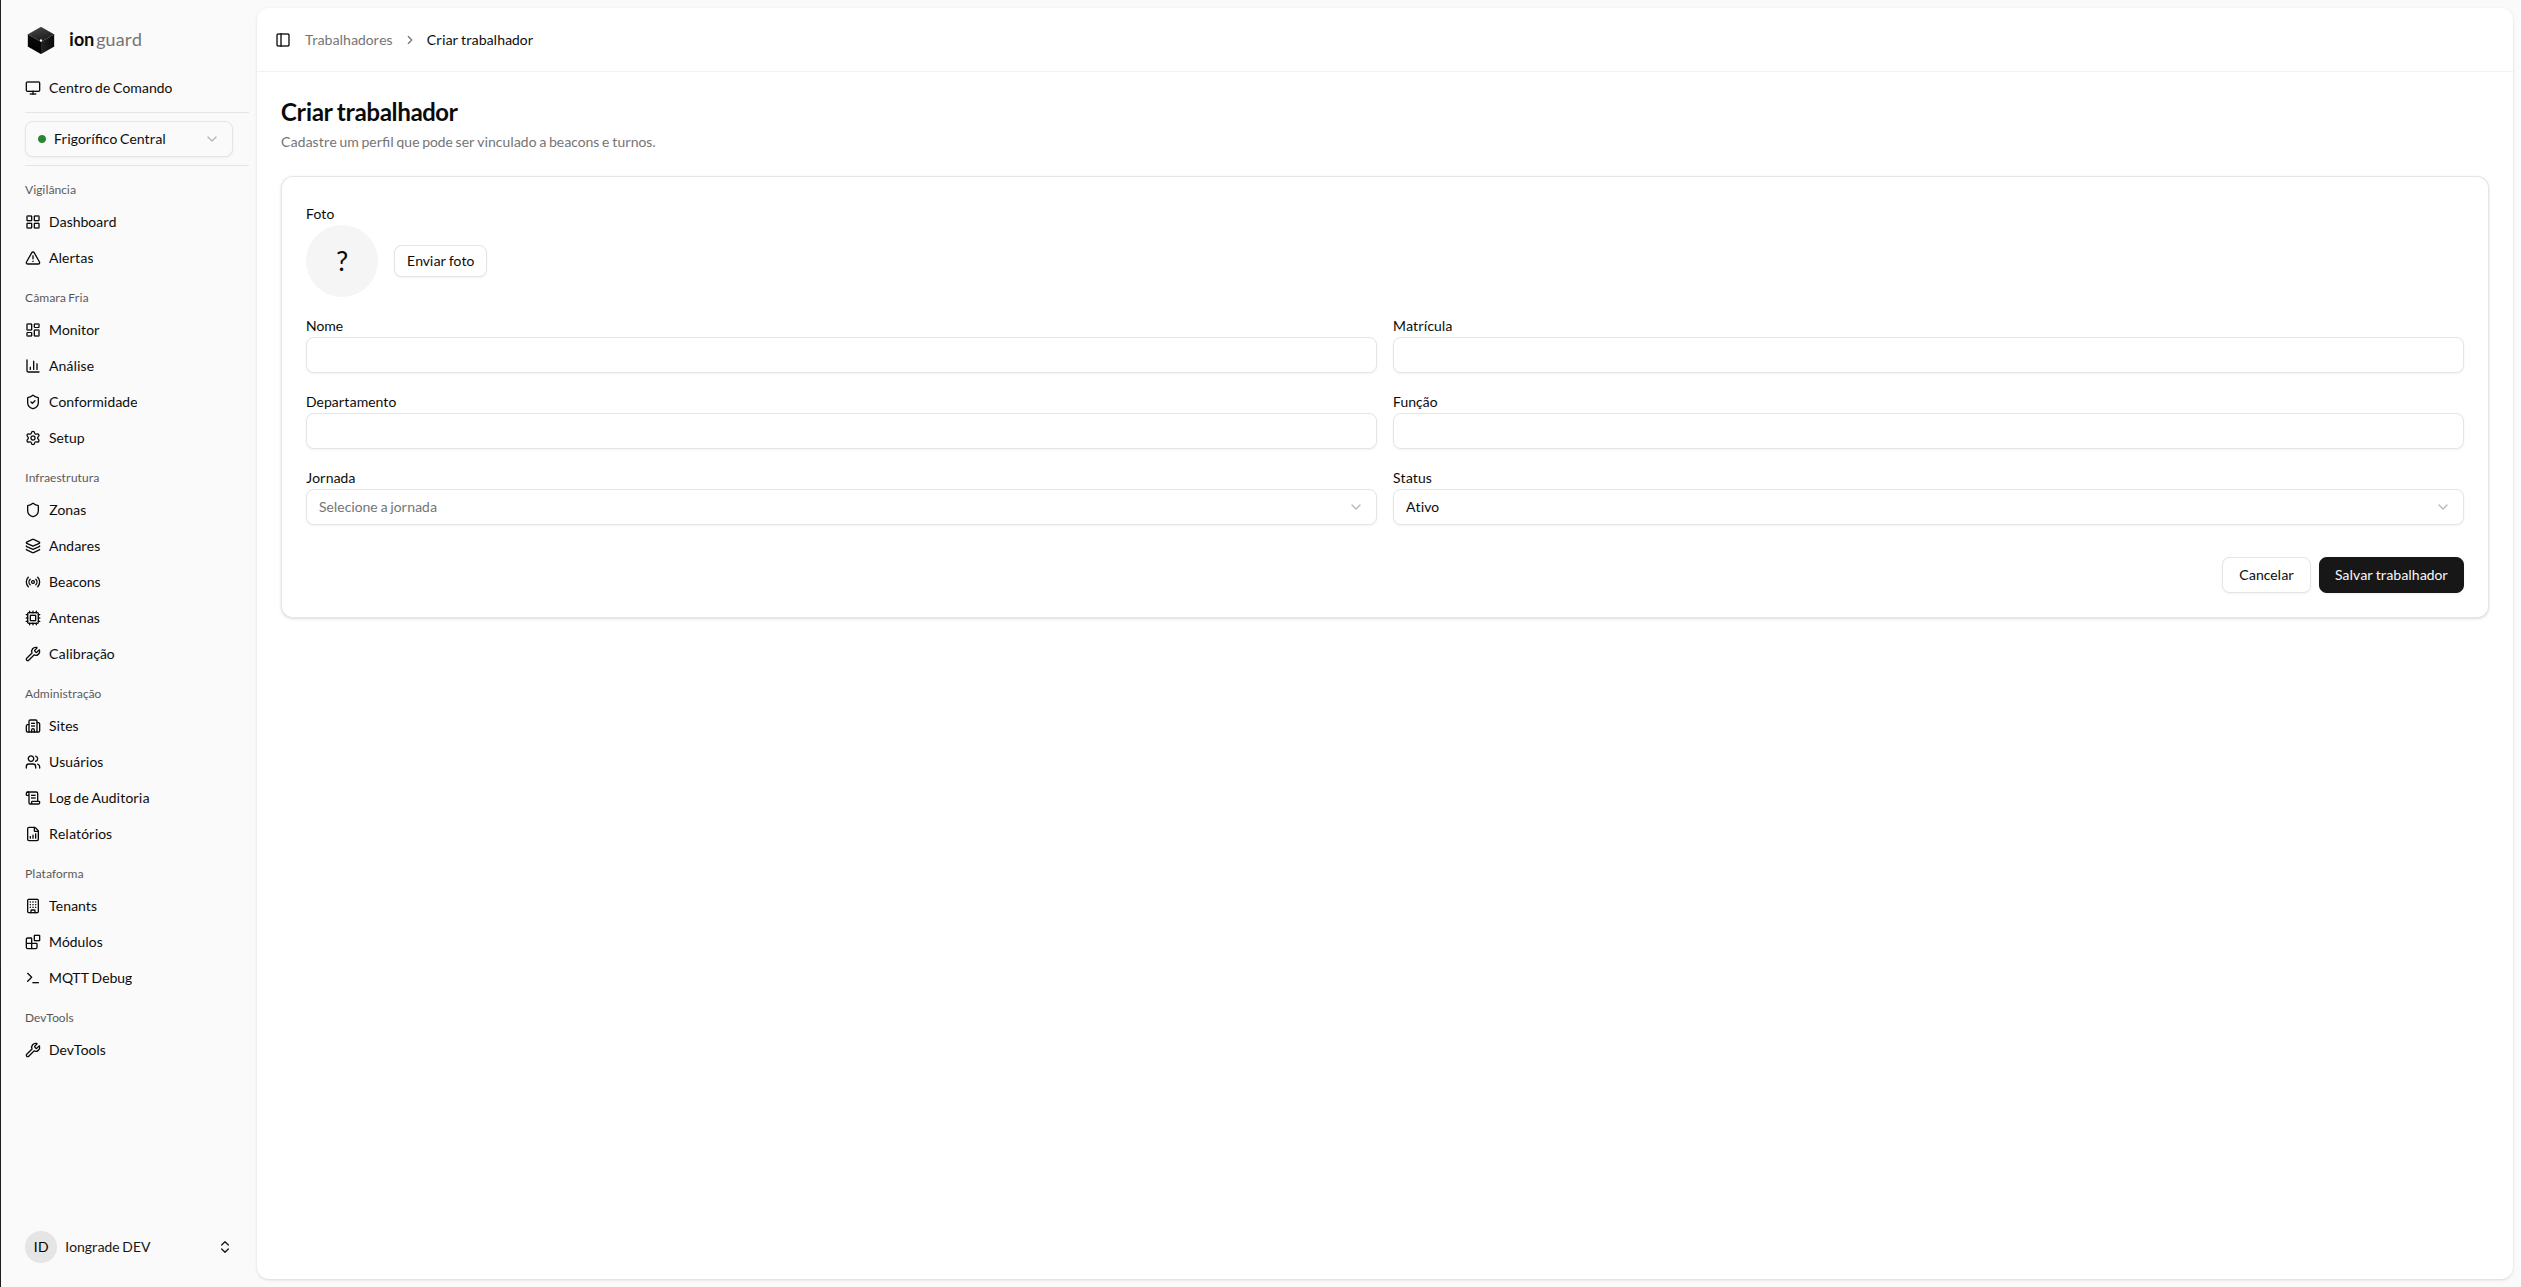
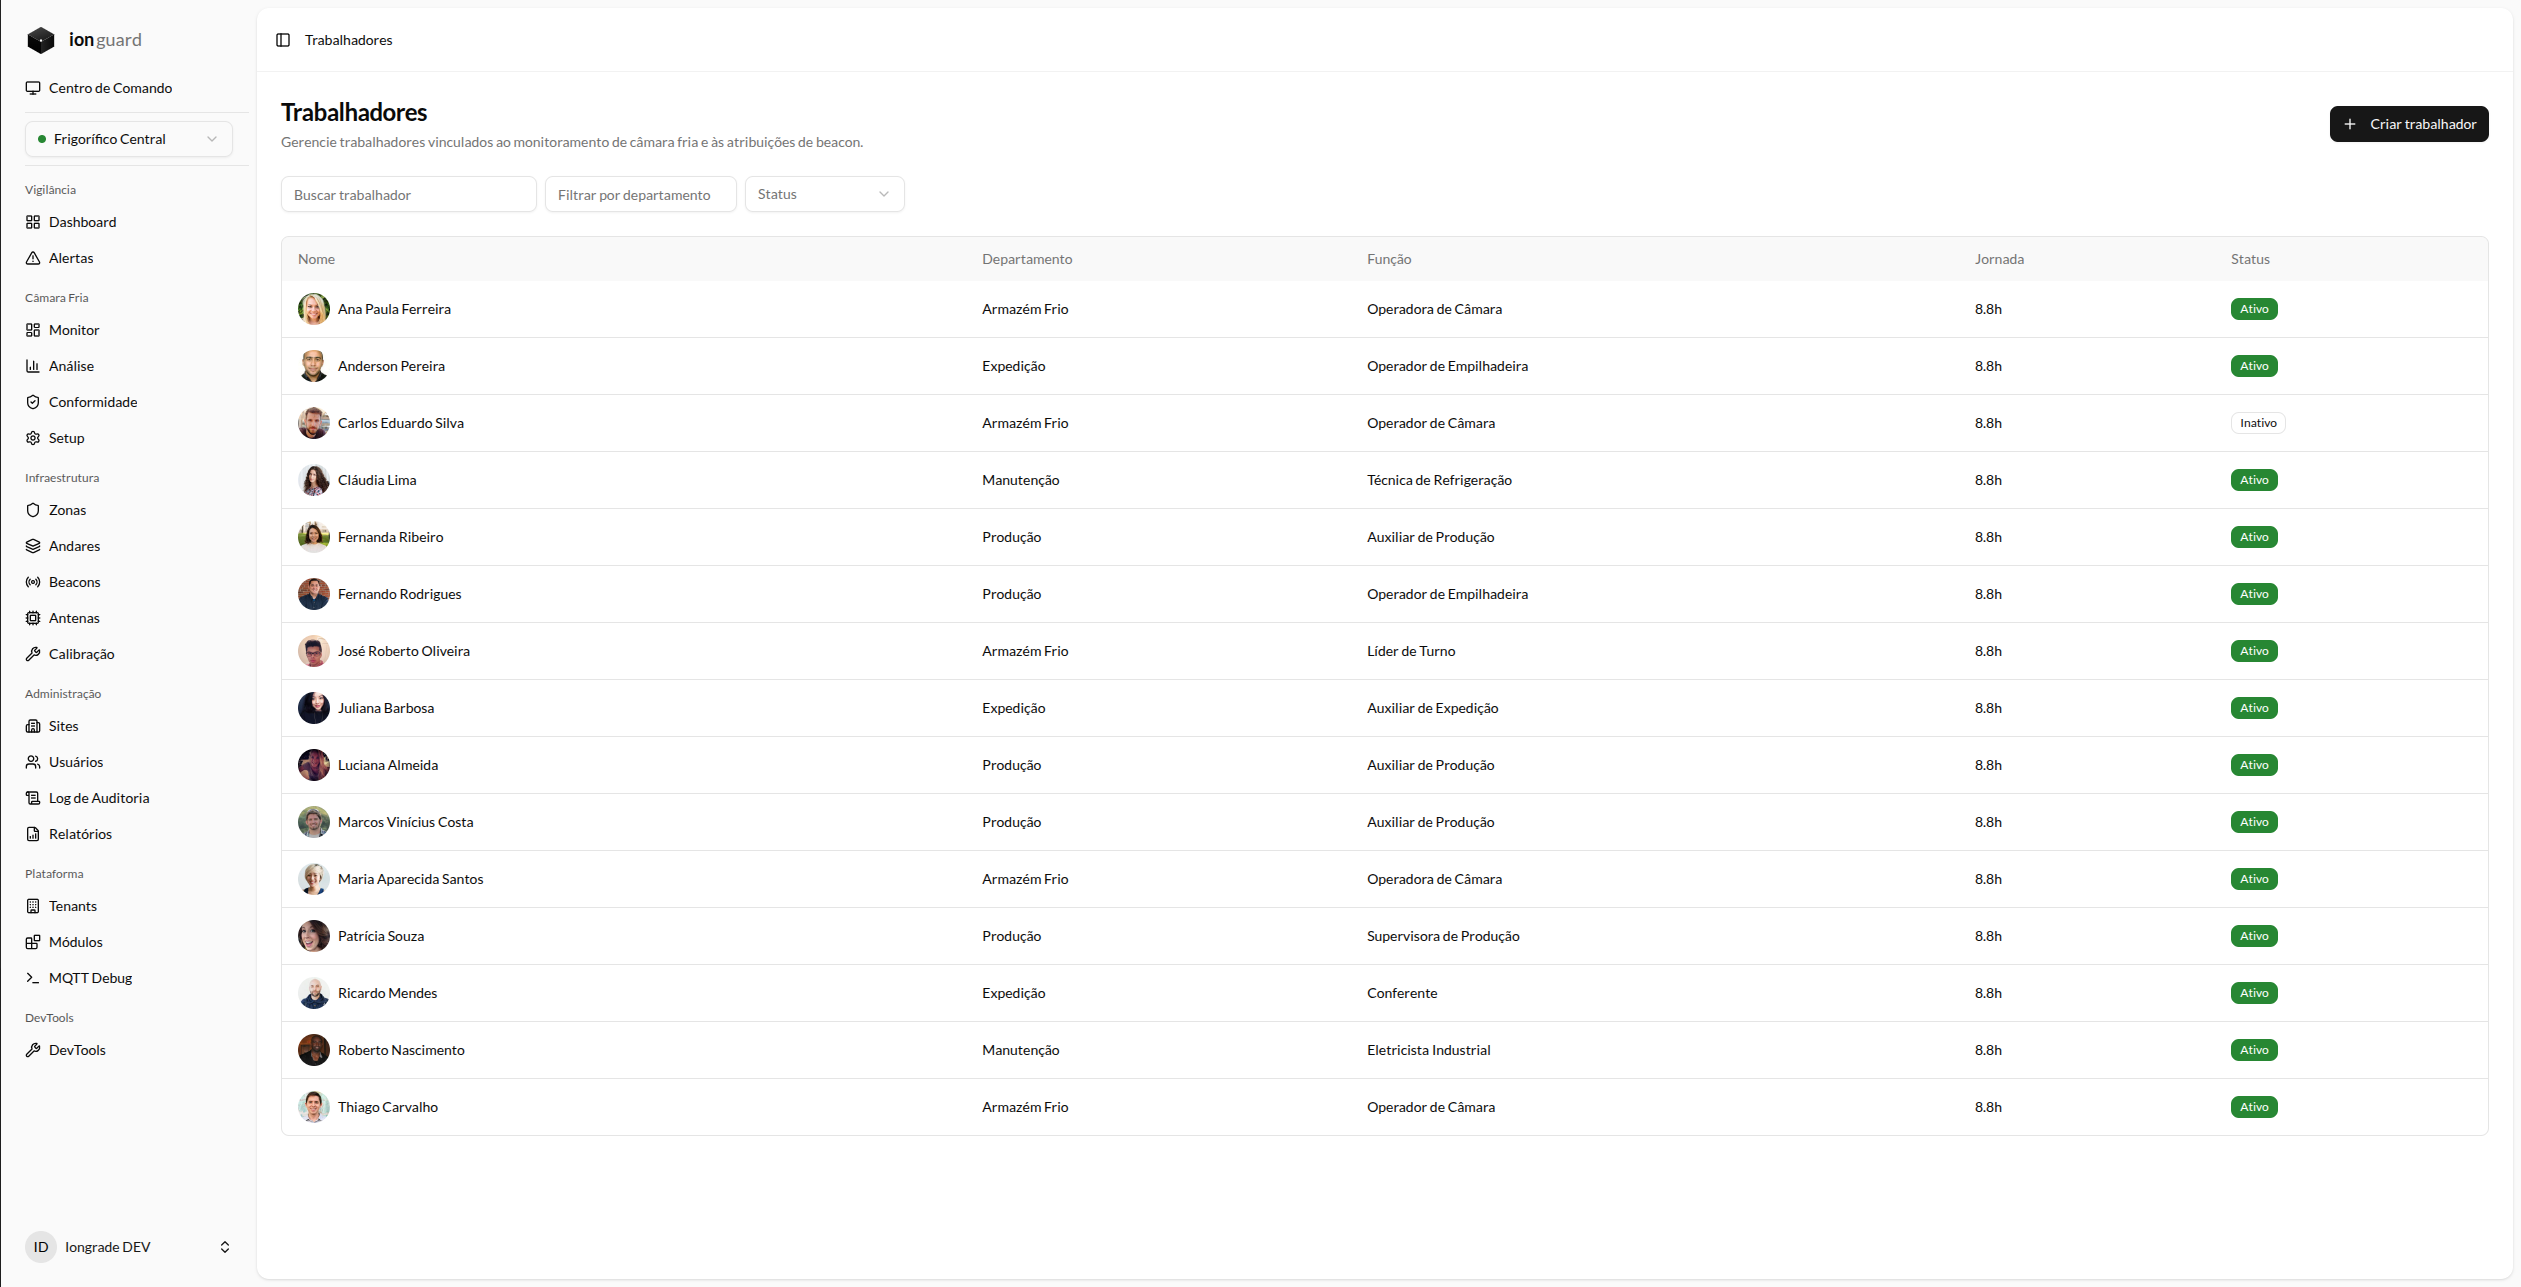
| Field | Description | Required |
|---|---|---|
| Name | Worker's full name | Yes |
| Employee ID | Functional identification at the company | Yes |
| Department | Assigned sector | No |
| Role | Position/role performed | No |
| Work schedule | Shift duration in hours (e.g.: 8.8) | Yes |
| Status | Active or Inactive | Yes |
The Work schedule field is essential for the NR-36 calculation: the system uses this value to determine the total thermal breaks required per shift. An 8h48 (8.8h) schedule requires 60 minutes of accumulated breaks.
Worker profile
The individual profile shows the registration data and the beacon assignment section:
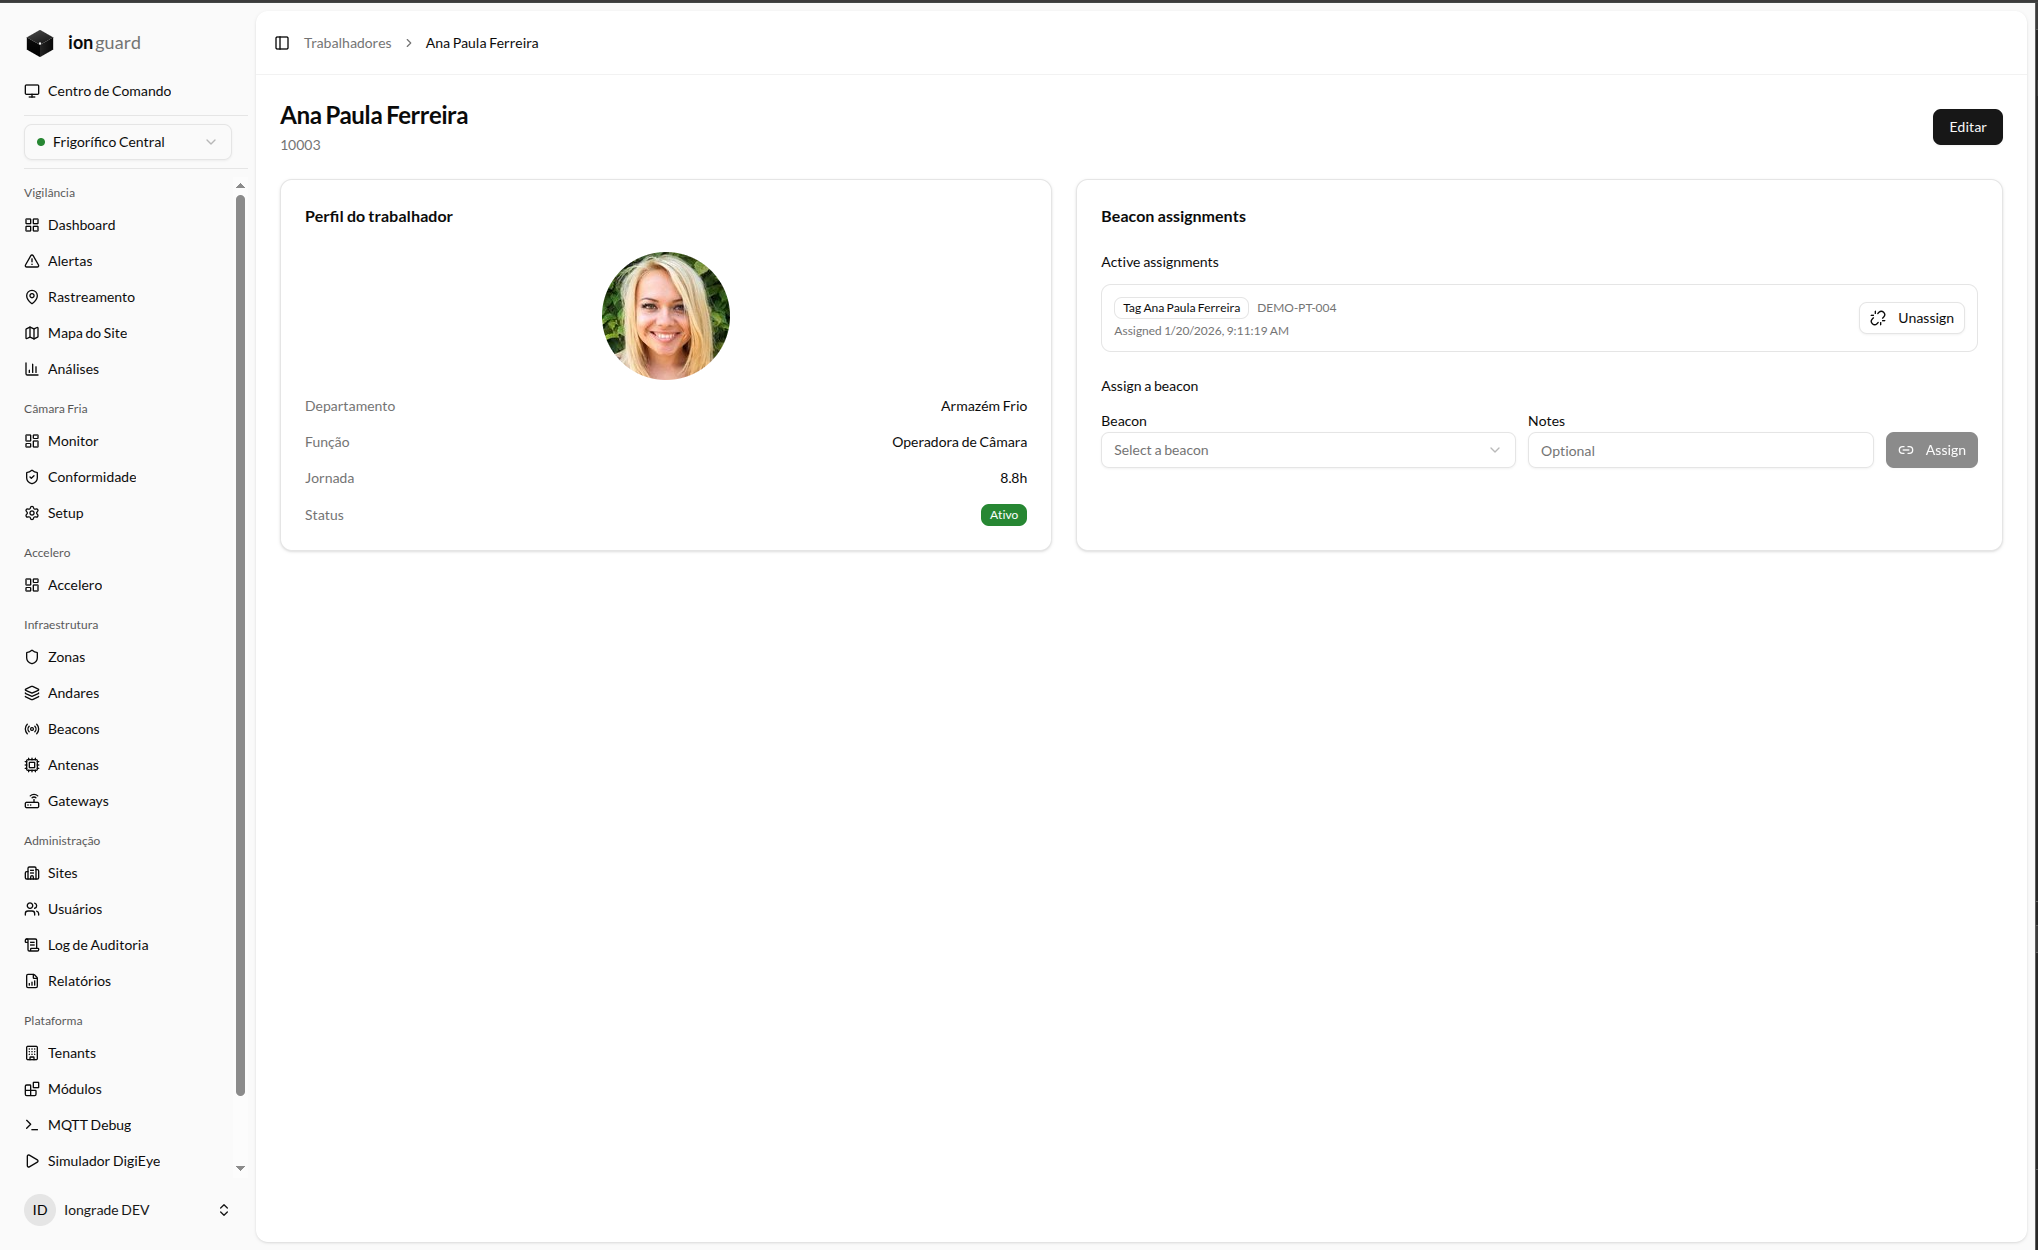
Beacon assignment
Each worker needs an assigned personal beacon in order to be tracked by the system:
- Open the worker's profile
- In the Assign Beacon section, select an available beacon from the list
- Confirm the assignment
The assignment is time-based — when you unassign a beacon, the system records the unassignment date and keeps the full history. A beacon can only be assigned to one worker at a time.
Work schedule and NR-36 validation
The work schedule field directly determines the NR-36 compliance calculation:
| Registered work schedule | Required accumulated break |
|---|---|
| Up to 6h | 20 minutes |
| 6h01 to 7h20 | 45 minutes |
| 7h21 to 8h48 | 60 minutes |
| Over 8h48 | 60 minutes + proportional |
If a worker's schedule is changed, the validation of the next shifts will use the new value.
Deactivating a worker
Workers can be deactivated (Inactive status) without deletion. Inactive workers do not appear in monitoring, but their historical records are preserved for auditing.