Getting Started
This guide covers the minimum path to get cold room monitoring up and running. For advanced options, see the Detailed Configuration.
Prerequisites
Before starting, confirm that:
- The ION Guard platform is operational (containers running, web access working)
- The BLE antennas are physically installed in the cold rooms and in the recovery areas
- The personal beacons are available for assignment to workers
- The site's zones have already been created on the platform (cold rooms, antechambers, recovery areas)
Step 1: Access the Cold Room module
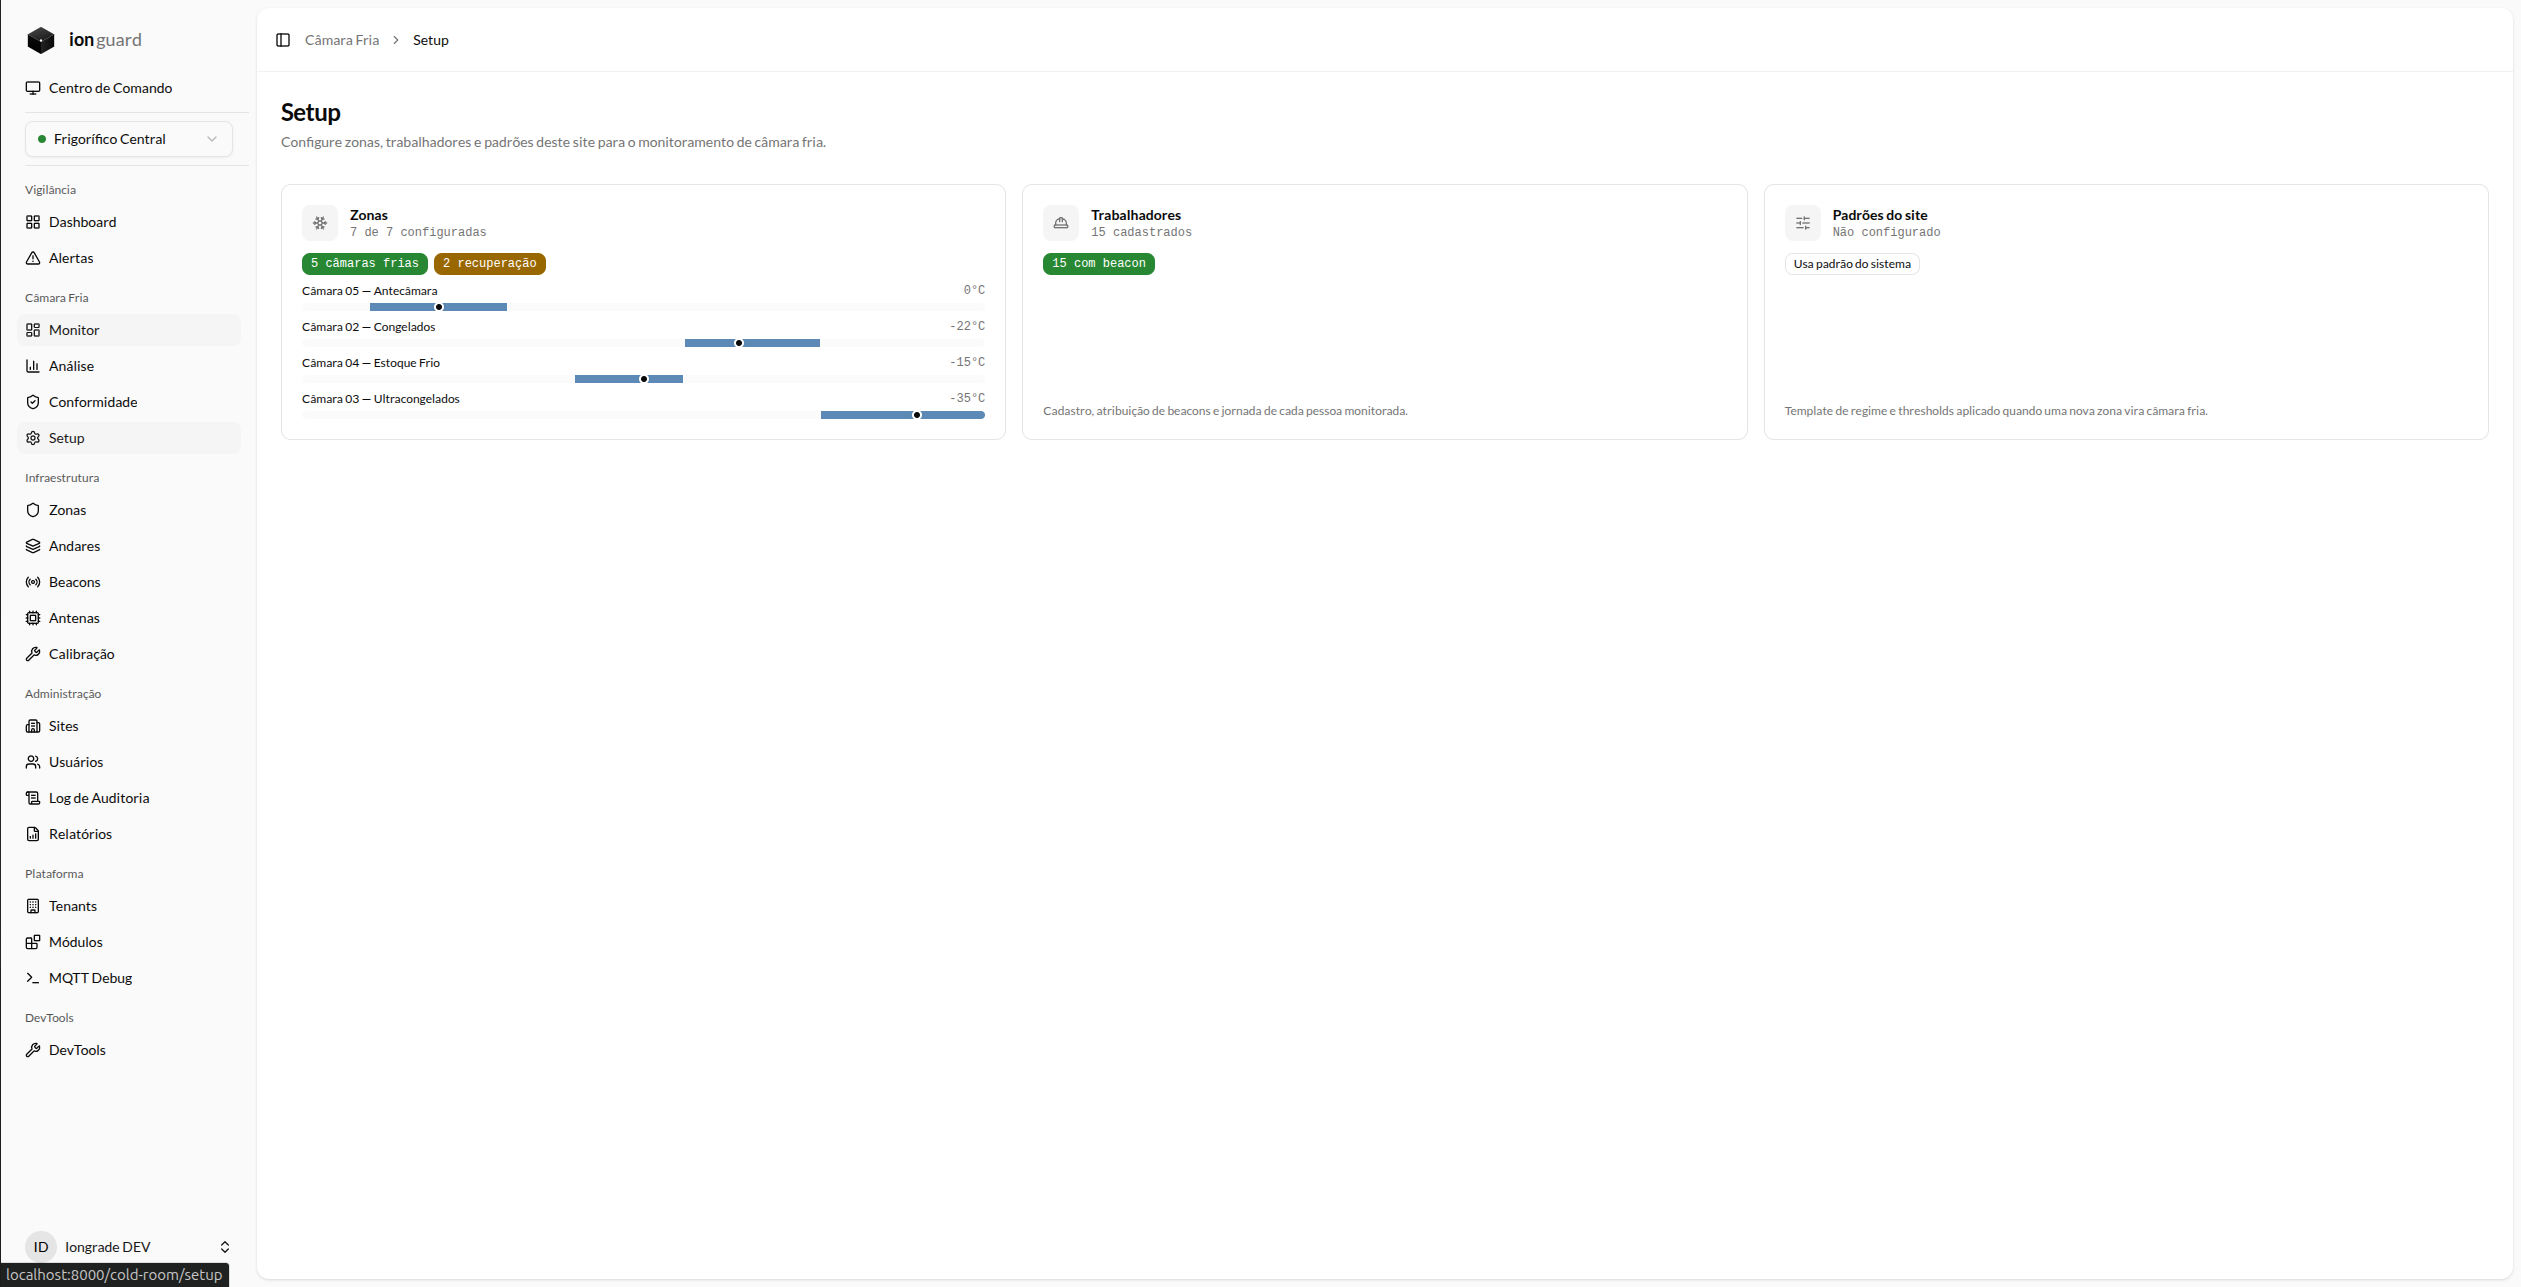
Navigation path: Cold Room > Setup
The setup page displays three configuration areas:
- Zones — the site's cold rooms and recovery areas
- Workers — worker registration with work schedule and beacon
- Site defaults — regime template applied to new zones
Step 2: Configure the zones
Go to the zone list and configure each one according to its type:
- Click on a zone that will be a cold room
- Mark it as Cold Room
- Enter the declared temperature (e.g.: -22°C)
- The system will automatically select the compatible exposure regime
- Repeat for all cold rooms
For the areas where workers will take their thermal breaks:
- Click on the zone
- Mark it as Recovery Area
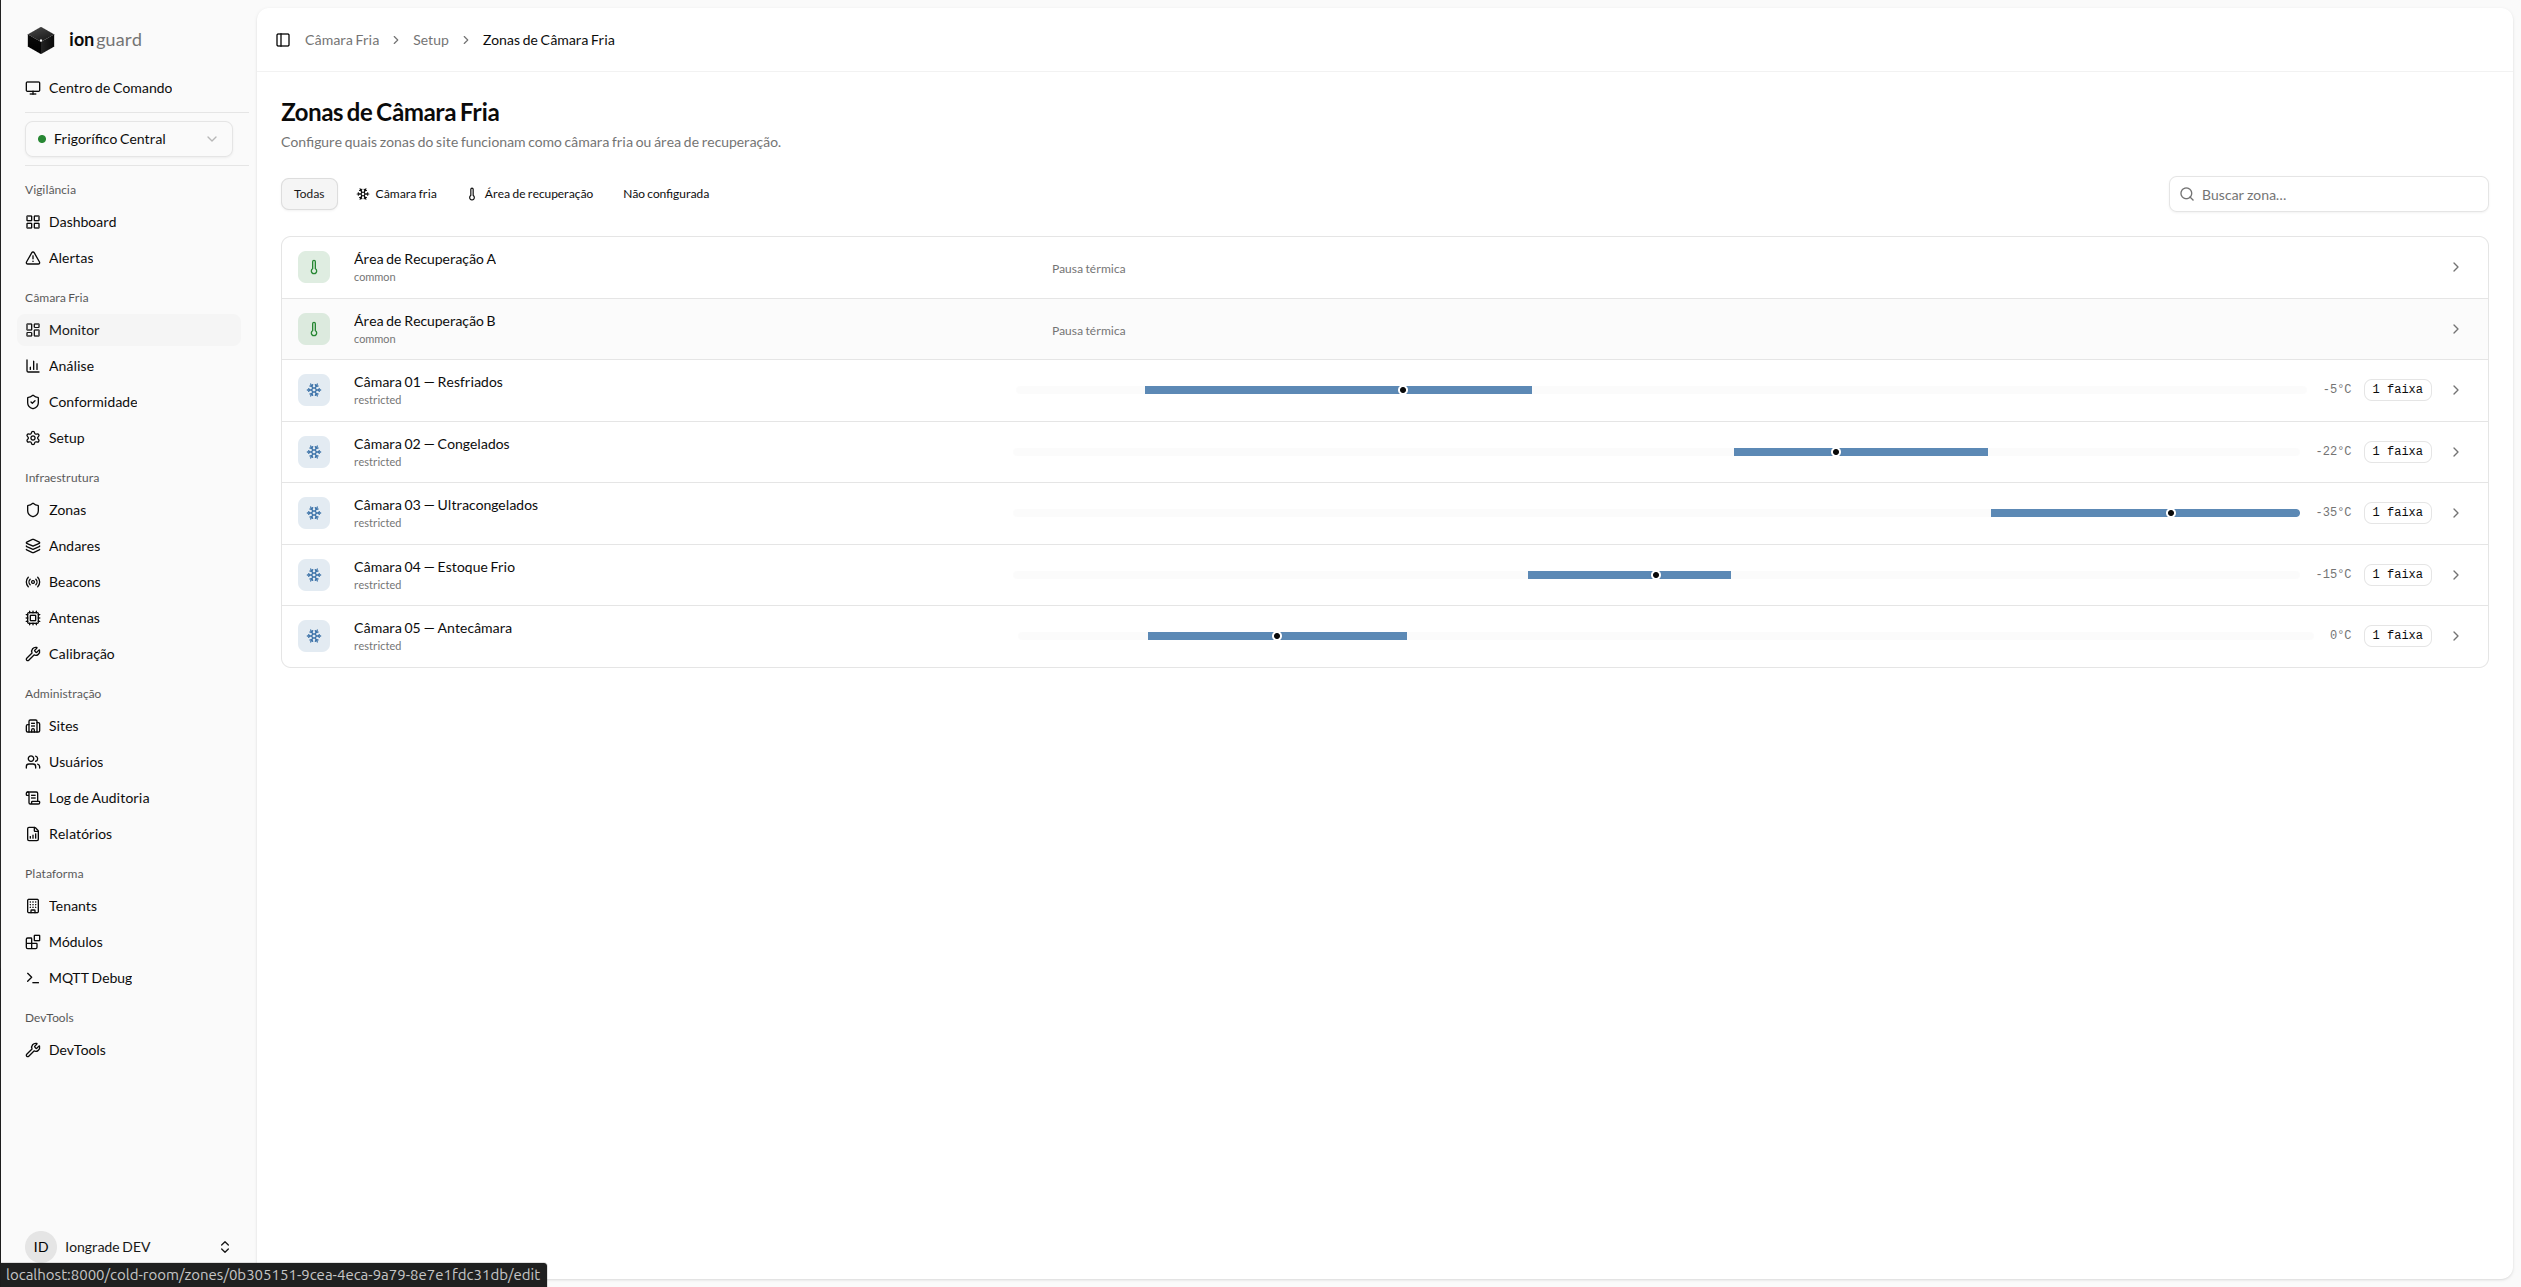
A zone is either a cold room or a recovery area — never both. The system prevents conflicting configuration.
Step 3: Register workers
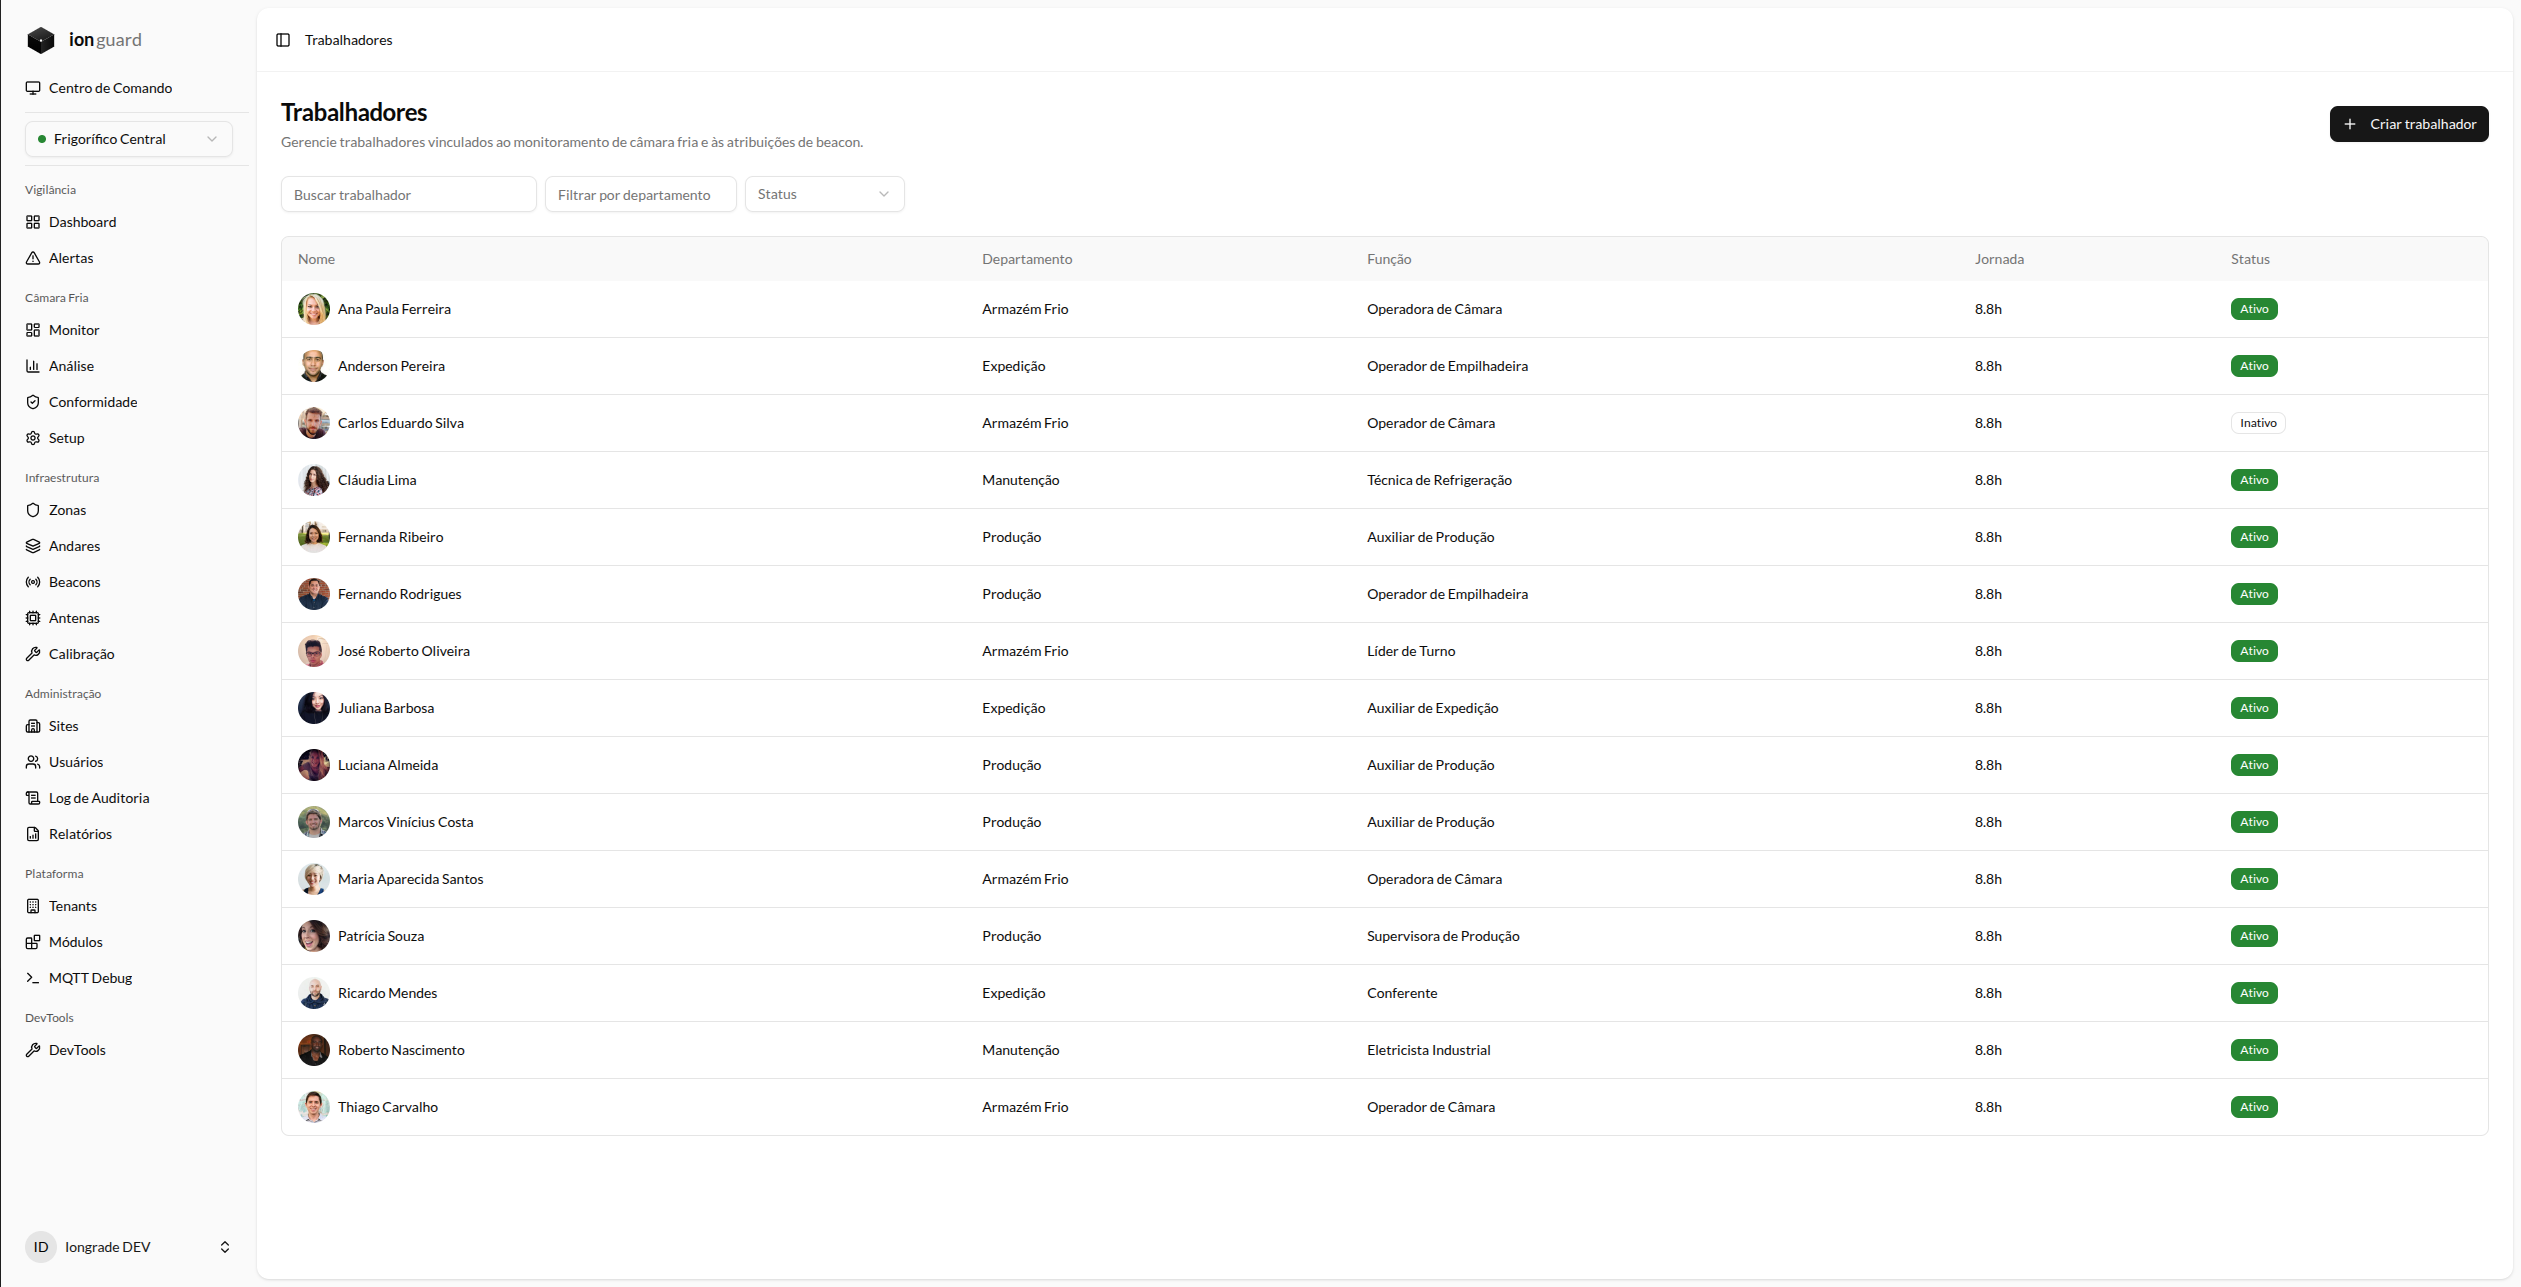
Go to the workers section and register each employee who operates in the cold rooms:
- Click on New Worker
- Fill in: name, employee ID, department, role
- Enter the work schedule (e.g.: 8.8h) — this value is used to calculate the breaks required by NR-36
- Save the record
Step 4: Assign beacons
Each worker needs an assigned personal beacon in order to be monitored:
- Open the worker's profile
- In the Assign Beacon section, select an available beacon
- Confirm the assignment
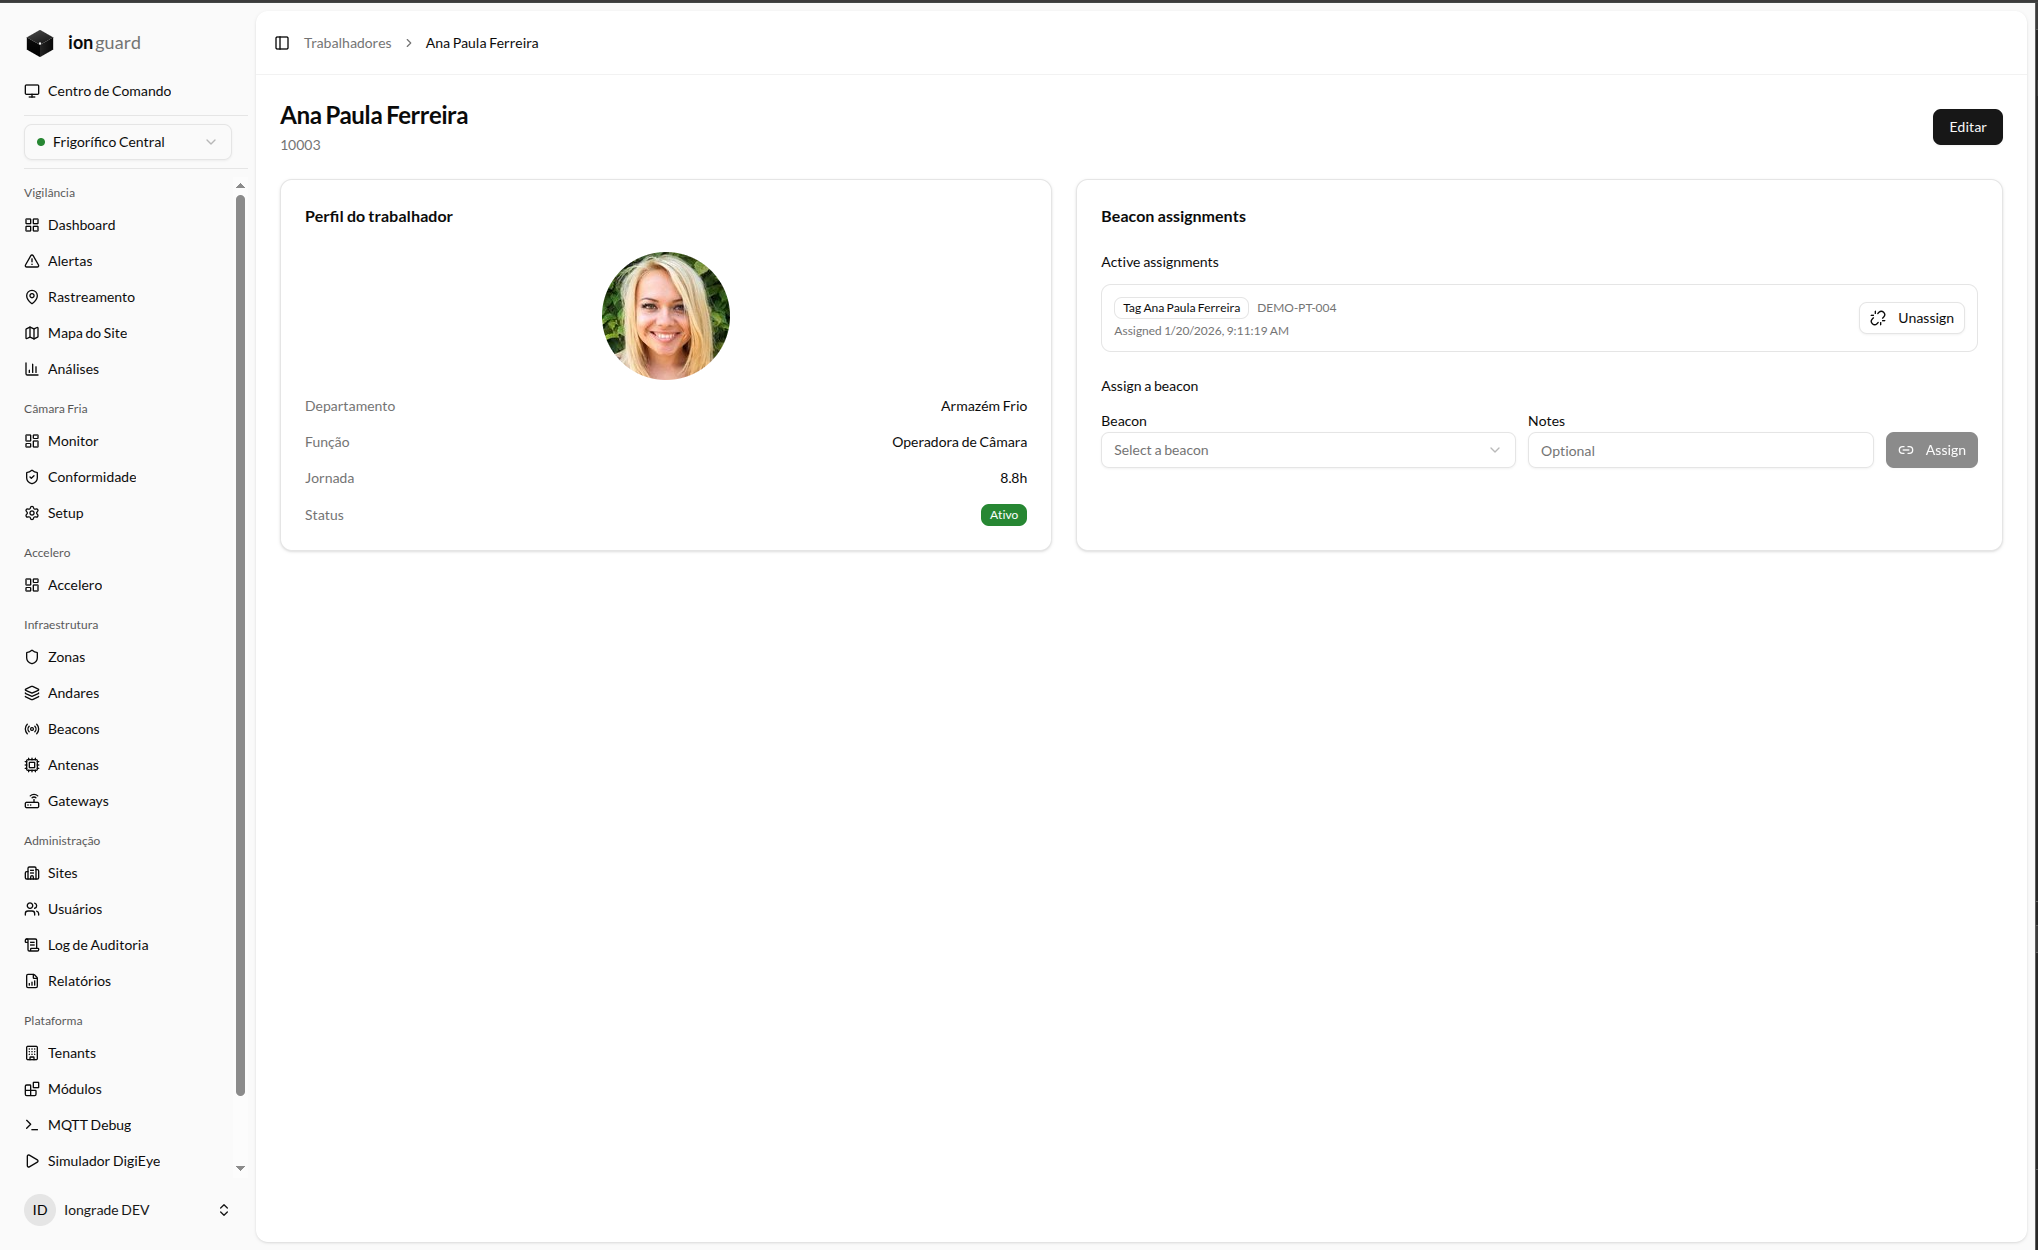
Beacon assignment is time-based — you can unassign and reassign beacons at any time. The system keeps the assignment history.
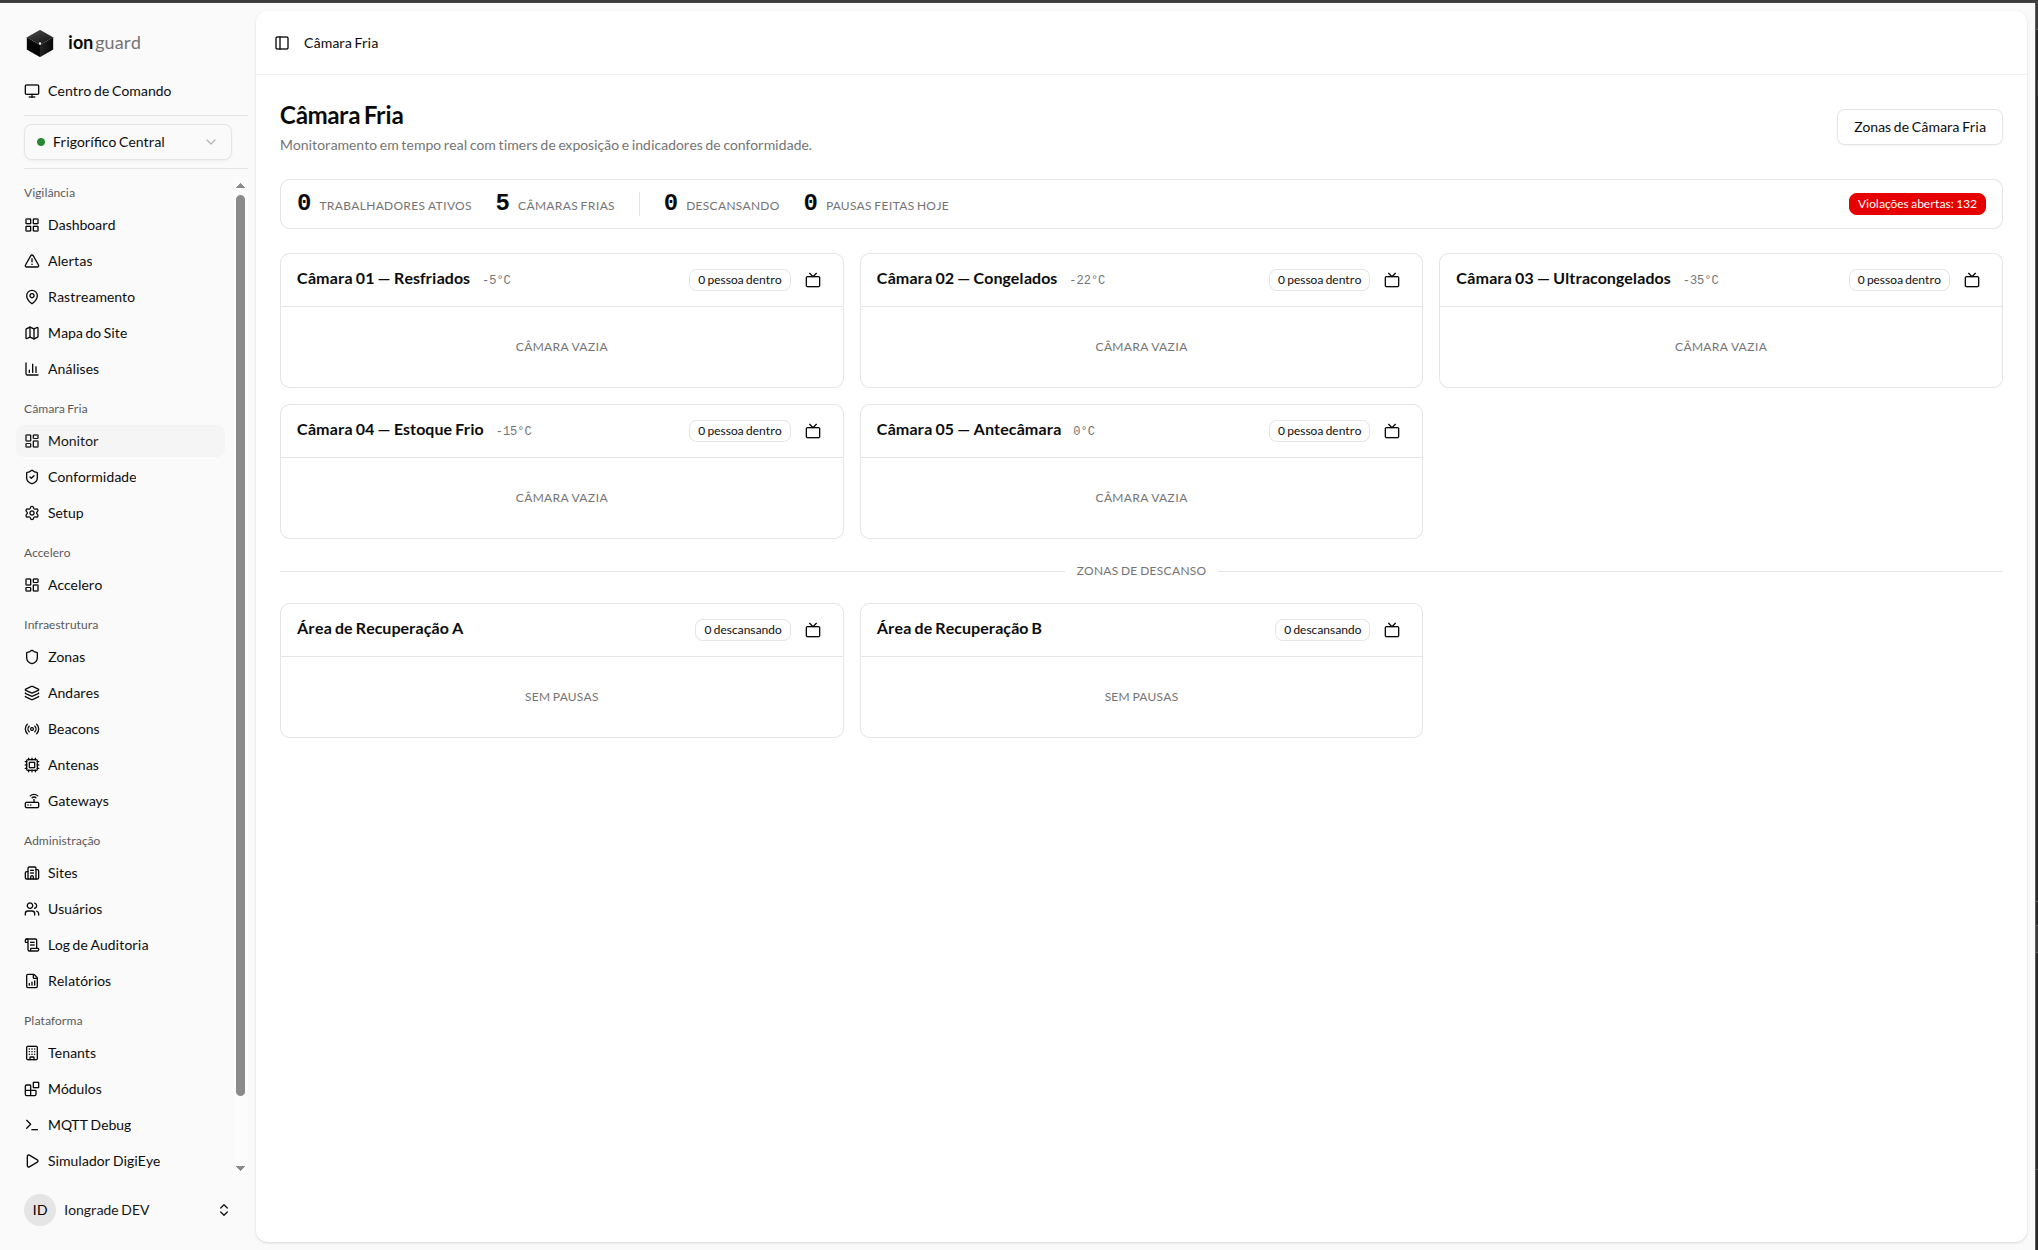
Step 5: Verify monitoring
Navigation path: Cold Room > Monitor
- Verify that the cold rooms appear as cards with temperature
- The recovery areas should appear at the bottom
- When a worker with a beacon enters a cold room, the timer will start automatically
Next steps
- Detailed Configuration — customize regimes, alert thresholds, and advanced behaviors
- Real-Time Monitoring — learn to operate the monitoring panel during the shift
- Wallboard — set up full-screen displays at the entrance of the cold rooms
- Regulatory Compliance — understand how the system aligns with NR-15 and NR-36