Create invitation
Overview
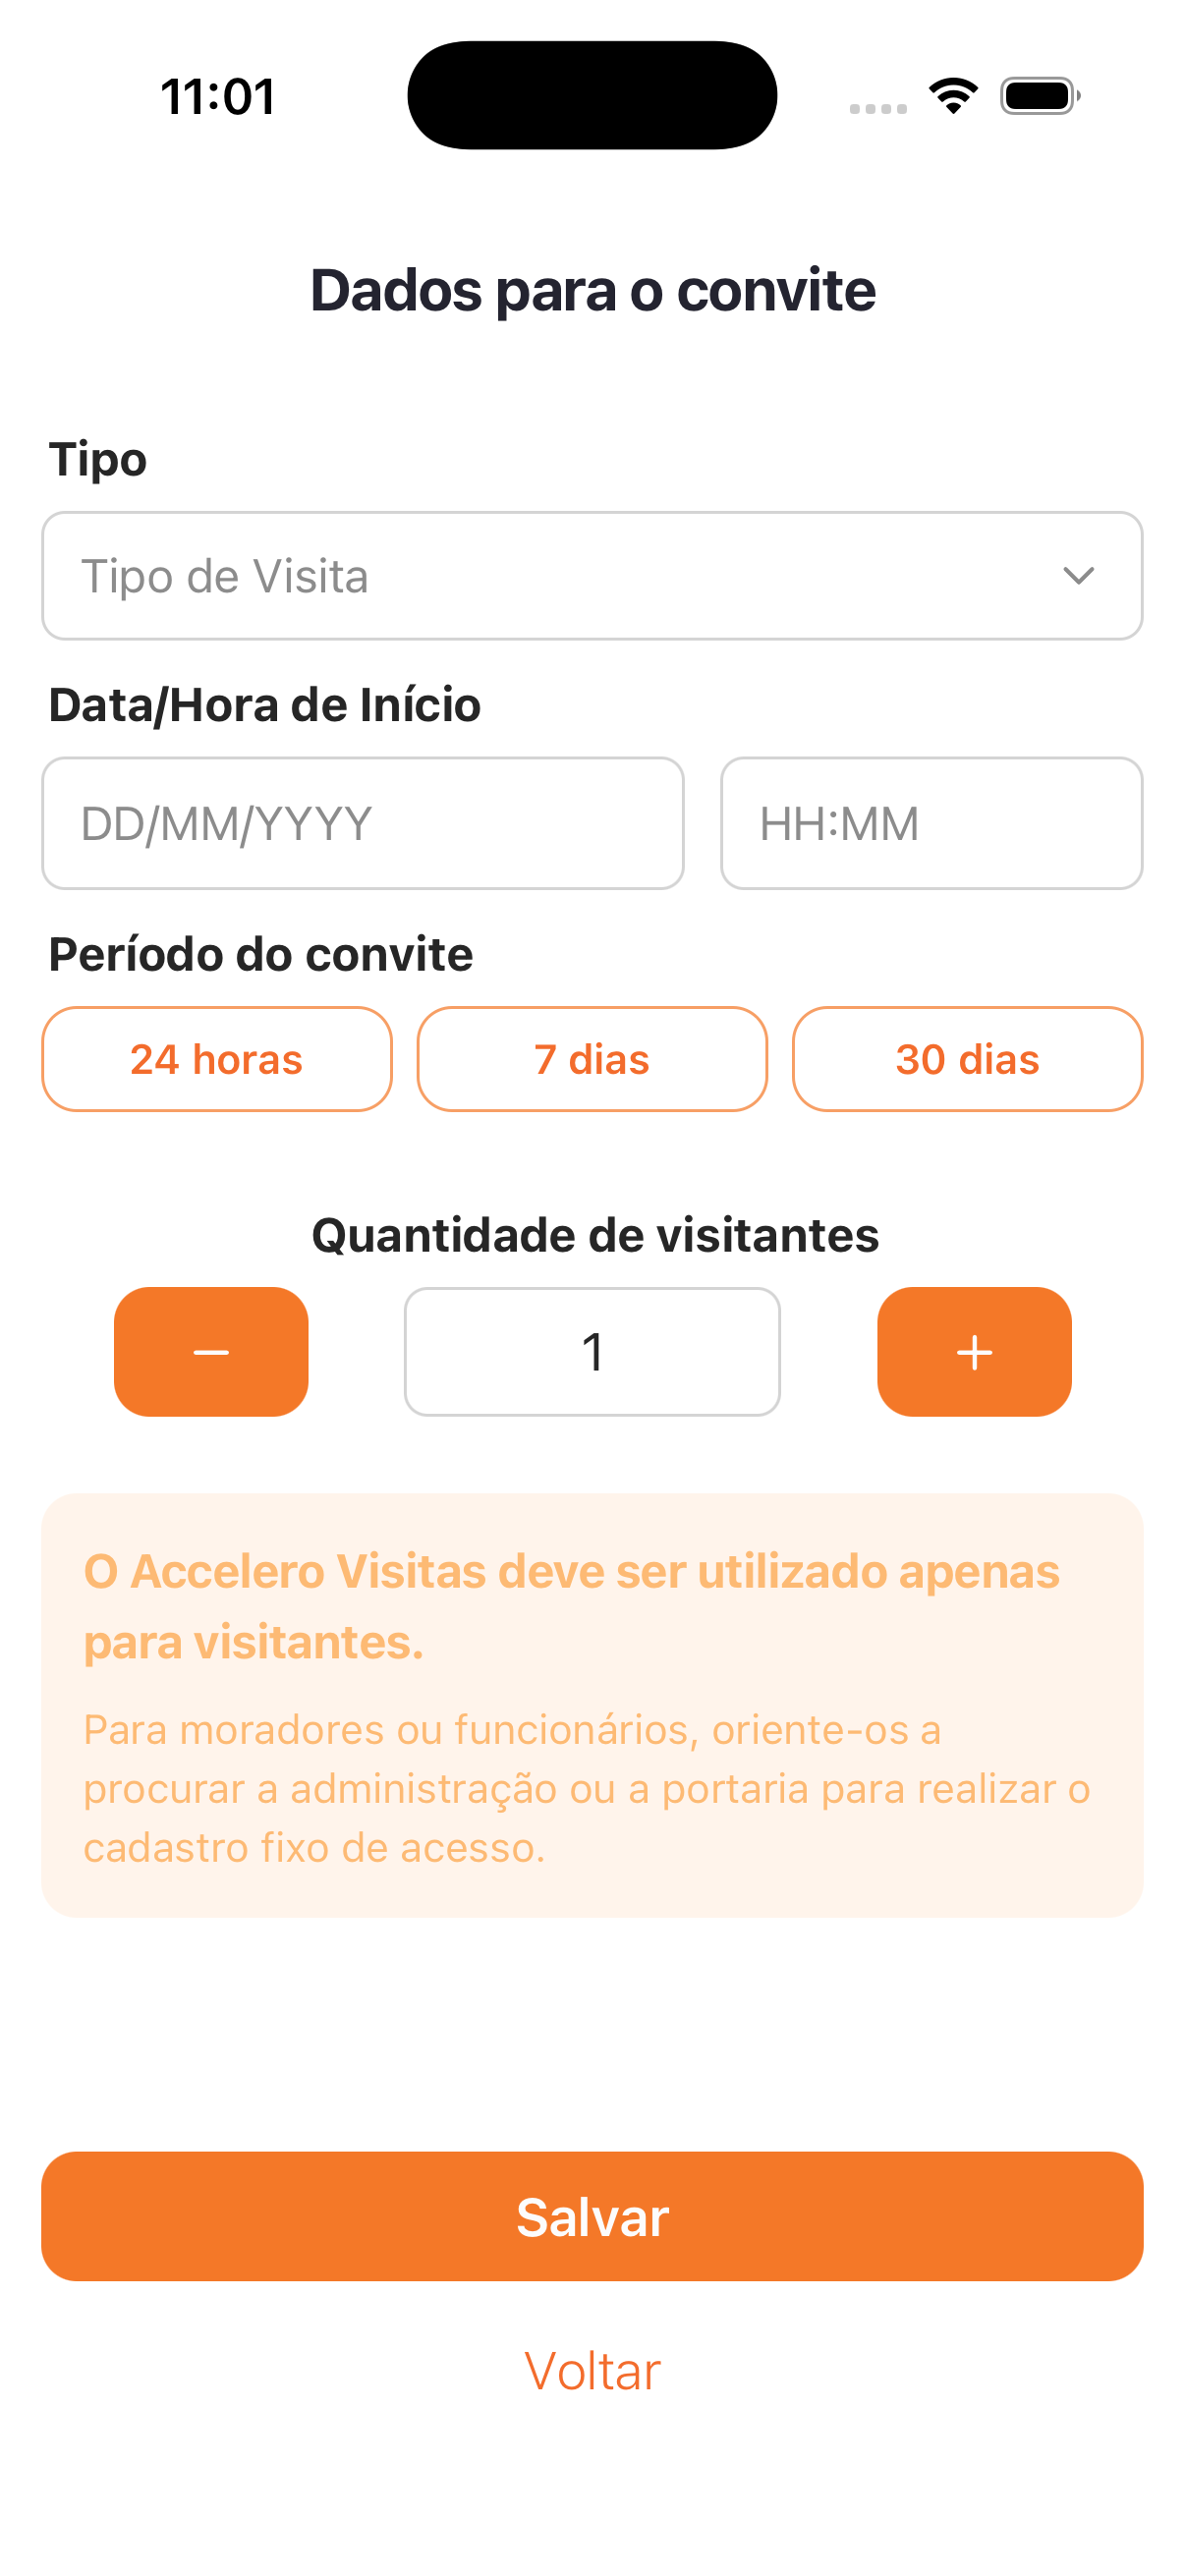
The Invitation data form, used by the approver to generate a new visit invitation. The available screenshot is from the app; in the web panel the action starts from the Create Invitation button in My Invitations (see Invitations and navigation). The created invitation then appears in the My Invitations list.
Fields
- Type — the Visit Type selector.
- Start Date/Time — date field (DD/MM/YYYY) and time field (HH:MM).
- Invitation period — options 24 hours, 7 days, or 30 days (defines how long the invitation is valid).
- Number of visitors — counter with − and + (initial value 1).
The screen also shows the notice: Accelero Visitas must be used only for visitors. / For residents or employees, guide them to contact the administration or the front desk to set up permanent access.
Actions
- Save — creates the invitation.
- Back — returns without creating.
Step by step
- Choose the visit Type.
- Enter the Start Date/Time.
- Select the Invitation period (24 hours, 7 days, or 30 days).
- Adjust the Number of visitors with − / +.
- Tap Save (or Back to cancel).
Use this invitation only for visitors. Set the type, the start date/time, how long the invitation is valid, and how many people it covers, then save. For residents or employees, direct them to the administration/front desk for permanent registration — do not use the visit invitation. After saving, share the link in Invitations and navigation.